Image Alt Text
Image Alt Text
Image Alt Text
Image Alt Text
Image Alt Text


Current Exhibit (Coming Soon)


Exploring the Unkown–Dr. Trelease on the Harriman Expedition, 1899
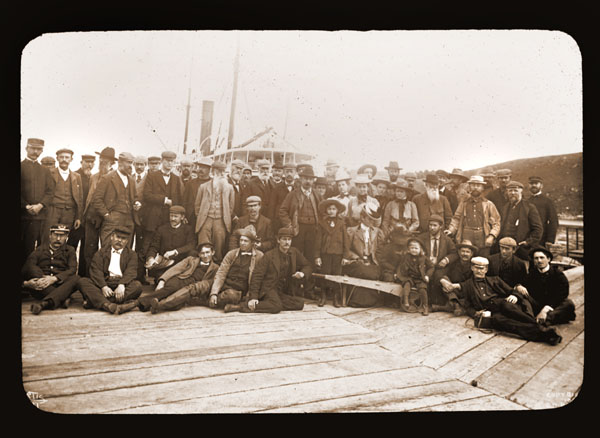
 

Dr. Trelease Harriman


 The changing exhibit, featured on the second floor on the east side of the home, shares the story of the first director of the Garden after Shaw’s passing, Dr. William Trelease, his wife Julia and their 5 children and their tenure at Tower Grove House (1889-1912). The Trelease family bore witness to a revolutionary time in American history; navigating the changing family roles, achievements in technological advances and exploration in scientific discoveries that dominated the 1900s. A balance of scientific achievements and personal loss would befall William and Julia, as they both worked to establish their life within Tower Grove House.

This narrative is also deeply impacted by the physical change to the structure of Tower Grove House underwent during the 1st Director’s tenure. Dr. William Trelease, his wife Julia, and children, would move in to Henry’s country estate late in 1889, finding an unrestored bachelor pad. With the entire east wing being dormitory style servant’s quarters and lacking an indoor kitchen and bathroom, Tower Grove House was behind the times. The physical footprint of Tower Grove House transitioned with the world the Trelease family lived in while within the home’s walls (1889-1912). This exhibit also explores how the home was remodeled to suit a 20th century family.

The 2020 exhibit focuses specifically on Dr. Trelease would work to explore different continents, playing a major role in the Harriman Expedition in Kodiak Alaska, documenting unique flora in diverse ecosystems. The Harriman Expeditoin was the foundational inventory of untouched Alaska, beginning in 1899. Scientists from around the world journeyed on the S. S. George W. Elder, surveying never before seen areas of the Alaskan Coast. This is where Dr. Trelease would begin a lifelong friendship with John Muir, the naturalist who would establish the National Park Service.

Learn more


Past Exhibits at Tower Grove House

Woodlands and Rain Gardens

Digging a rain garden in a woodland may be counter-productive as it may disturb and damage tree roots. Also, some trees are not tolerant of highly moist soils; a rain garden placed directly beneath a tree may weaken it.

Conduct a Percolation Test

A percolation test, sometimes referred to as a perc test, determines how quickly water can move through the soil when saturated. The results of a perc test will help determine the suitability of your site for a rain garden.

Dig a hole(s) in the soil 6 inches deep and about 6 inches in diameter. The location of the perc test should be in the center of where you plan on creating a rain garden. Perform the test when the surrounding soil is saturated, such as the day after a rain. If there has been no rainfall prior to the test, fill the hole with water, and thoroughly saturate the surrounding soil with a hose. Wait for the hole to drain, and fill the hole(s) to the top a second time. Check the hole again in 24 hours and if the water is all gone you are good to go because the minimum percolation rate that is suitable for a rain garden is .25 inches per hour (6 inches divided by 24 hours = .25 inches per hour).

However, if both of the following conditions are true

  • it takes more than 24 hours for the water to drain entirely from the hole
  • the site is flat

consider siting your rain garden at a different place in the yard and run a percolation test there. Percolation rates in different locations may vary.

If both conditions are still true after retesting in a different spot, then you may want to consider landscaping options for compacted soils or for a low wet area at this site instead.

If either condition is false (preferred), then continue to Examine Slopes.

Examine Slopes

Gentle Slope
A rain garden is ideally located on a gentle slope uphill from the low point in your yard, perpendicular to the flow of water. Shapes that are oval or kidney-shaped are most commonly used. Shape is also determined by the surrounding landscape, such as other planting beds, sidewalks and driveways. This helps to maximize the amount of water intercepted and the ability of the rain garden to dissipate the energy (velocity) of the runoff. Also consider shaping your rain garden in a way that complements existing lines (bed borders, sidewalks or paths, etc.) and the surrounding design style.

Little or No Slope
If there is little or no slope, the soil needs to be well-drained, or your rain garden will become a pond. Round or rectangular shapes are most commonly used.

Moderate Slope
If the site has a moderate slope, consider building a linear rain garden or bioswale along the contour of the hillside. The use of erosion control fabric may be needed on a moderate slope to prevent erosion while plants are becoming established. There are many forms of biodegradable erosion fabric: mats, netting or blankets (see our Erosion & Sediment Control Resources section).

Narrow Long Slope
If the site has a narrow, long slope, consider a series of small rain gardens stepped along the slope. You can also connect the rain gardens with a meandering bioswale that resembles a dry stream bed with stones and plants to help slow down the water.

Steep Slope
If the site has a steep slope, a successful rain garden may be difficult to achieve. Digging into a steep hillside may destabilize the slope. In addition, infiltration of rainwater into the soil may be minimal as water may migrate laterally and break out on the slope, potentially causing further erosion. See other techniques for stabilizing steep slopes.