|
Introduction
Creating a holiday wreath from greens in your yard or greens purchased where holiday evergreen trees are sold is a fun way to get in the holiday spirit. It is also an opportunity to create some lovely decorations for your home. The object is to have fun decorating with natural materials.
Your completed wreath can be displayed either indoors or out but it will last longer if hung outdoors out of direct sunlight where it is cool.
Note: This technique can also be used with other plants, such as, rosemary, lavender, and thyme for making an herbal wreath!
|
 |
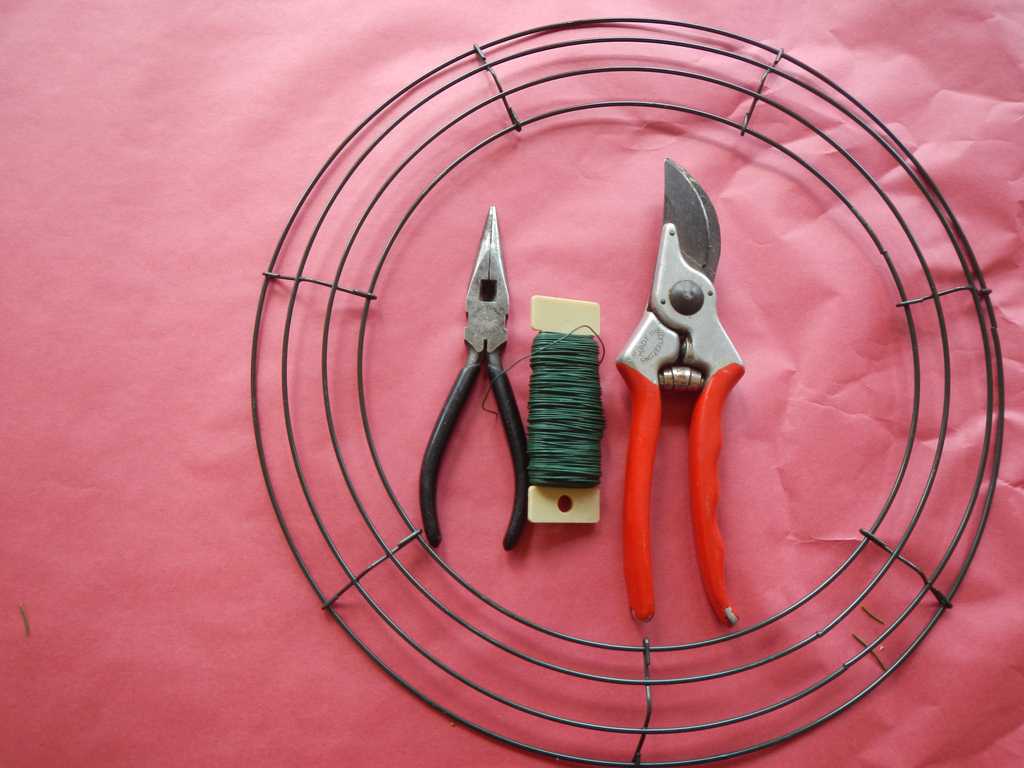
Materials needed
• Hand pruners
• paddle of 22 gauge wire
• Wire wreath frame (14" is used but any size will work)
• Evergreen branches and other natural materials
• Loppers for cutting large branches (not pictured)
• Work surface that can get dirty or covered with paper
• Gloves for working with natural materials
|
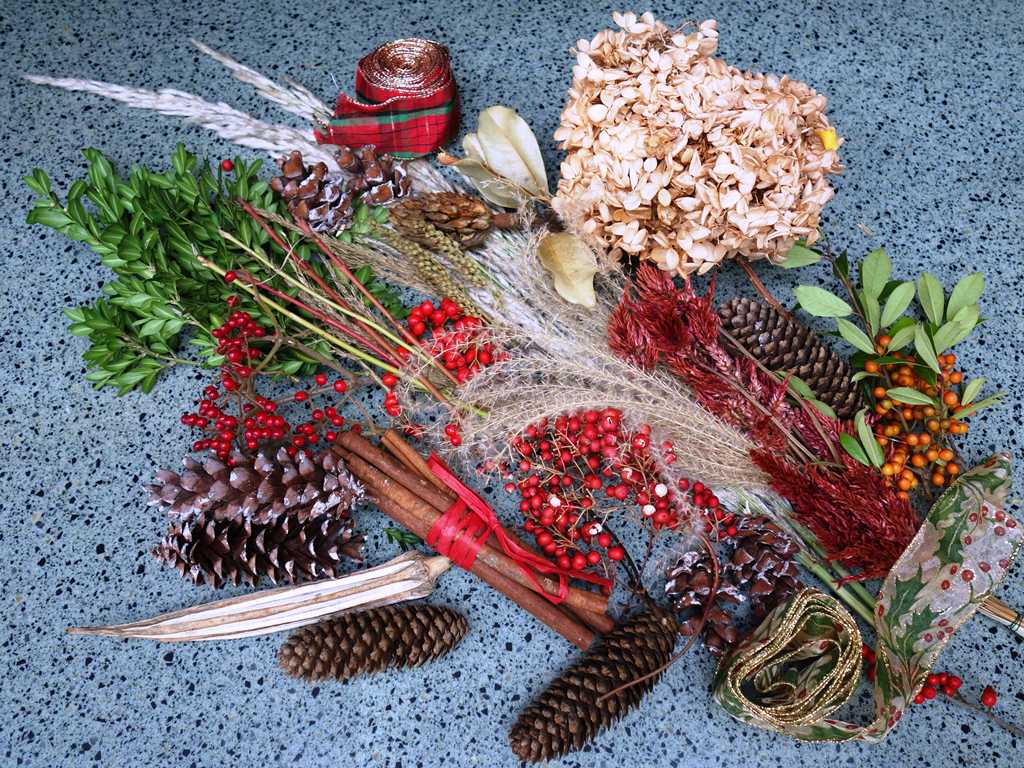 |
Other decorative materials
• pine cones
• spruce cones
• juniper berries
• red and yellow twig dogwood
• holly leaves and berries
• viburnum berries
• hydrangea flowers
• boxwood stems
• seed pods
• ribbon
• acorns
• grass seed heads
• Other materials suitable for where you want to hang your wreath
|


|
Selecting your base material
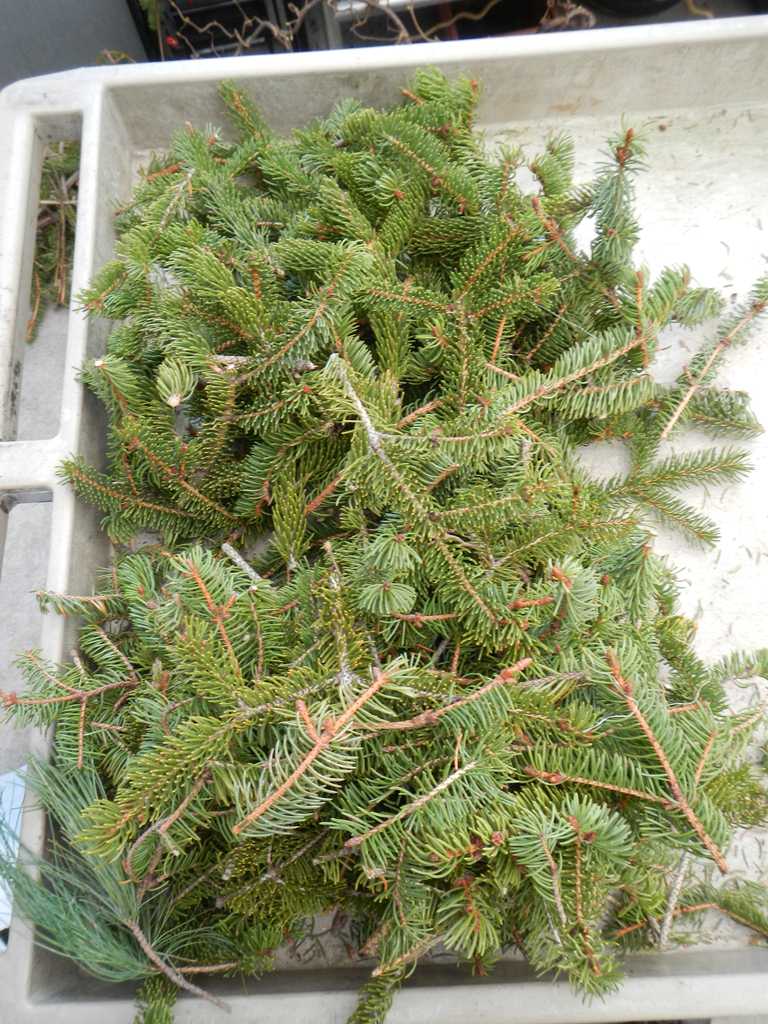
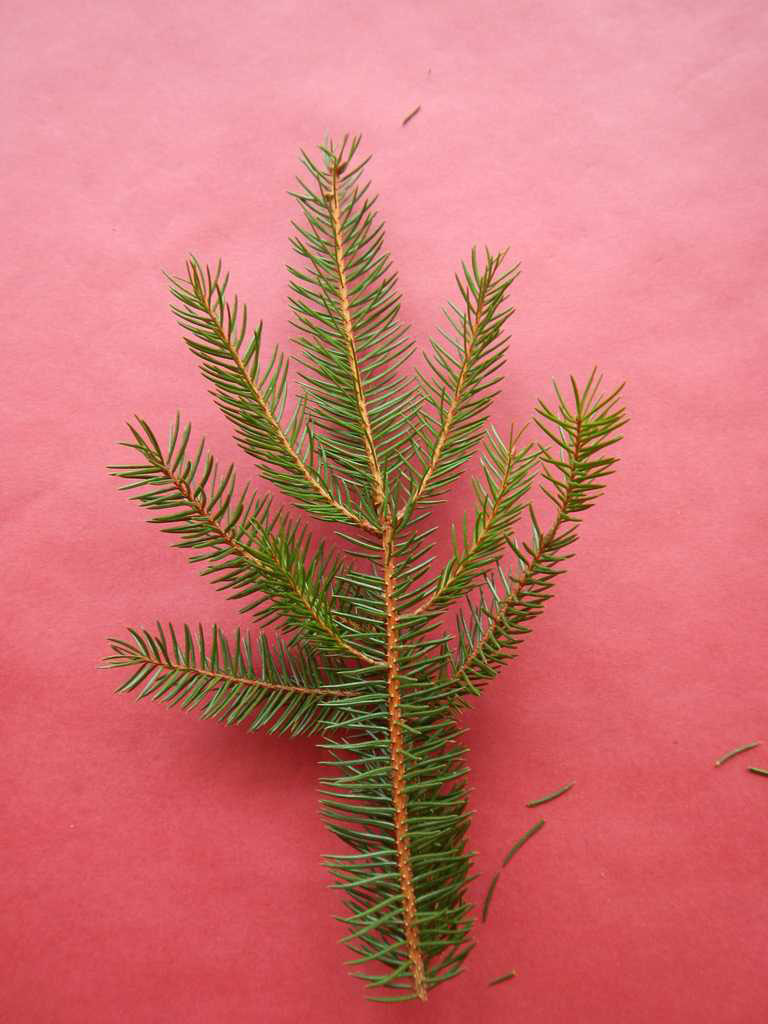
Juniper, white pine and Douglas fir are all good choices for an evergreen wreath. They will hold their needles for a long time without shattering. Some evergreens like spruce will shatter (or lose all its needles) when brought into a warm place so put a spruce wreath outside or in a cool, covered porch.
Douglas fir (top picture) is often available where Christmas trees are sold. Juniper (bottom picture) is prickly but long lasting. Use what you can find and experiment.
|
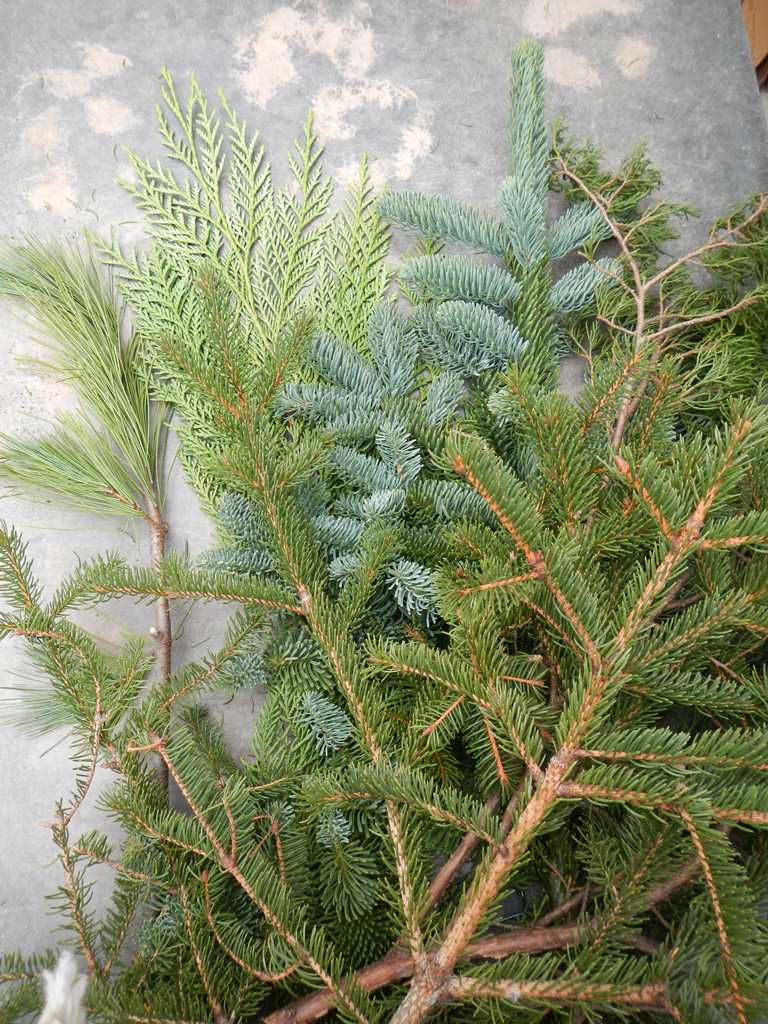 |
Needled evergreens
This image shows a variety of evergreens you can use to make your wreath. They are pine, arborvitae, blue spruce, juniper and spruce branches. |
 |
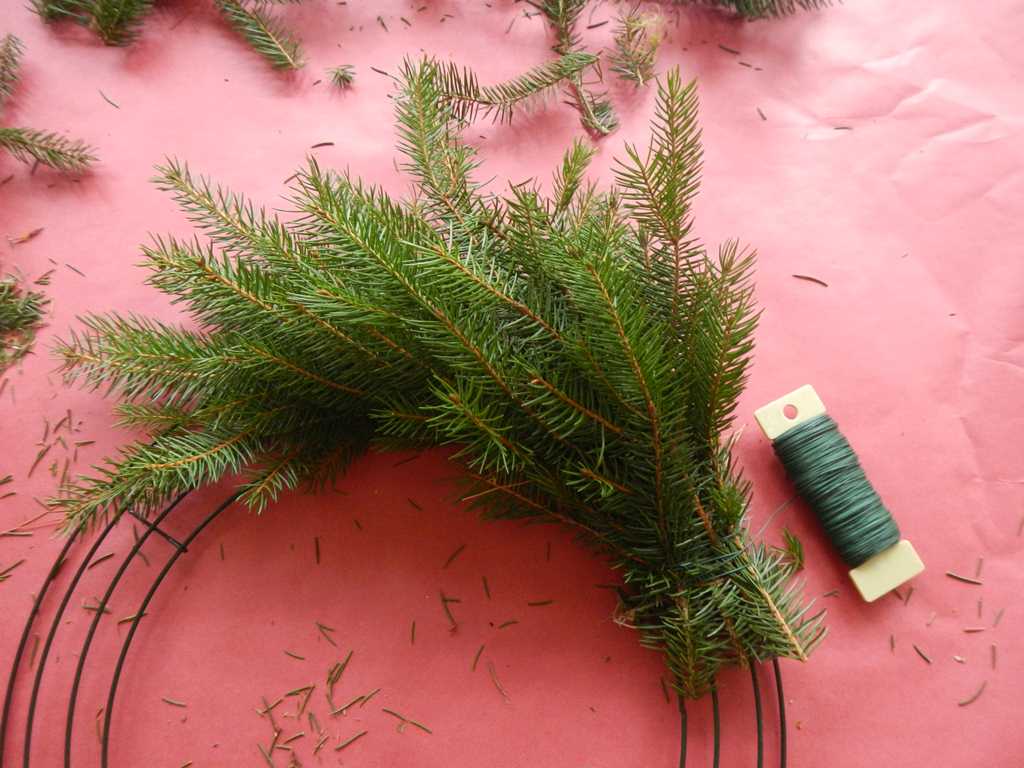
Gather your greens
Gather your evergreens and cut them into similar sized pieces from which you will make bundles. You will want about 7-8 branches to complete your 14" wreath. Since these are natural materials, the size of the pieces and their thickness and density of needles will vary from year to year. You will want to cut the twigs to be about 7-10" long. Be sure and keep the pieces the same size or your final wreath will be lopsided. For this demonstration we are using spruce. |
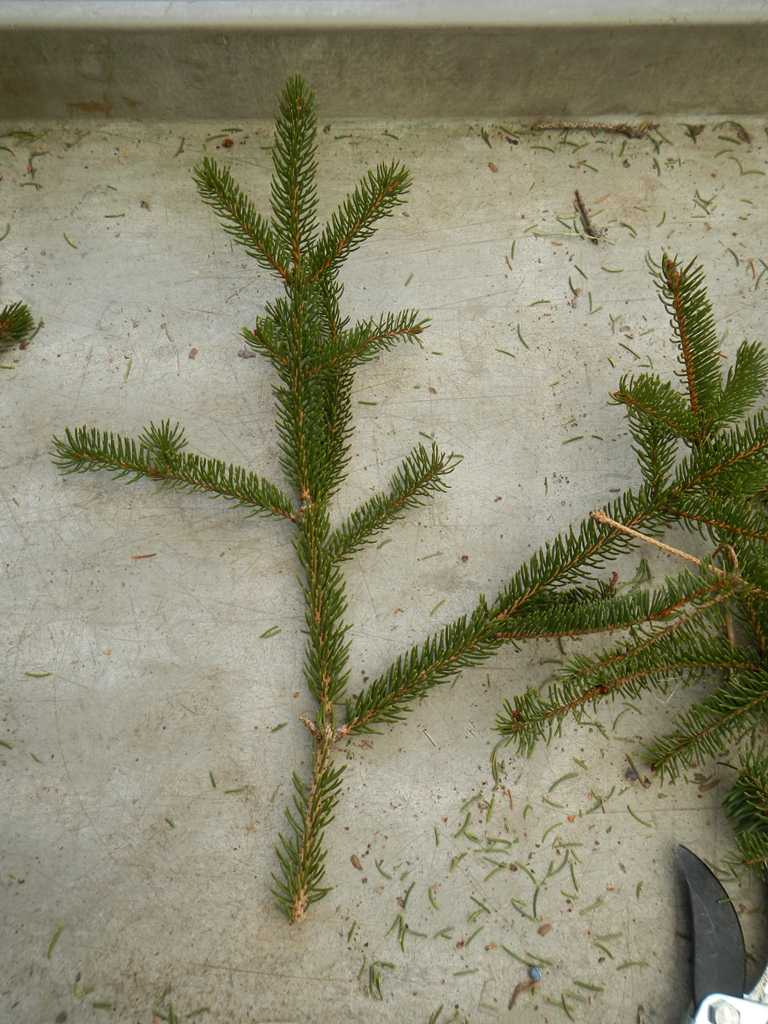 |
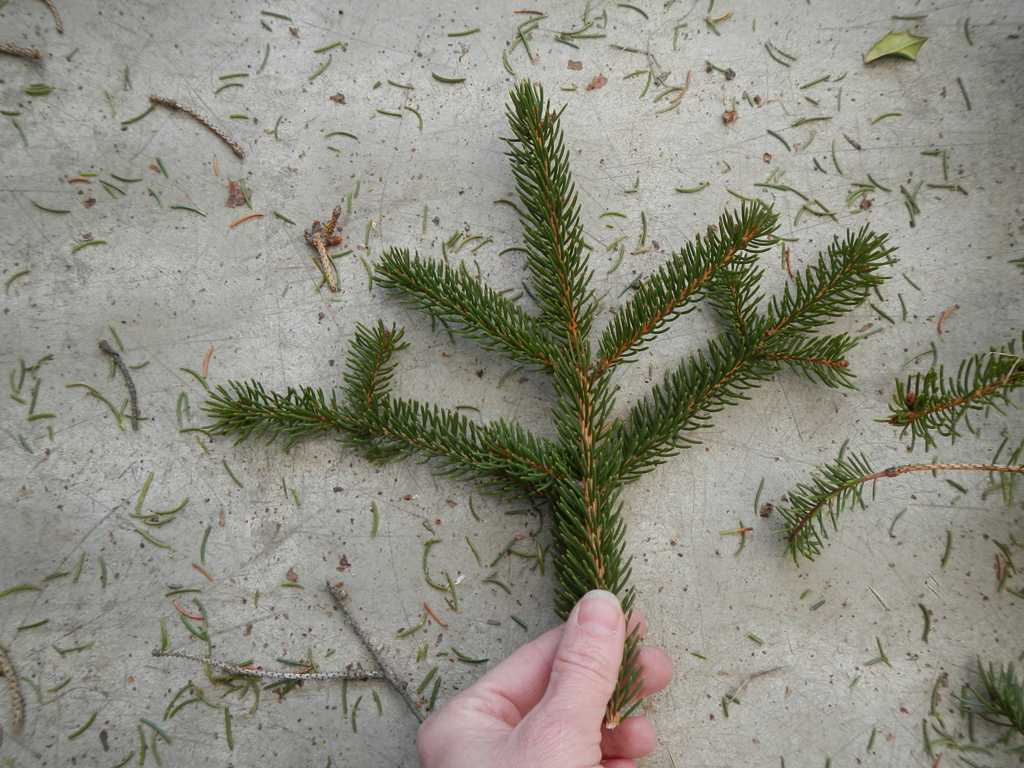
Maximizing your material
This twig is over 12" long so cut it in two and use both twigs to make a nice bundle of greens which will cover the base of the your wreath. |
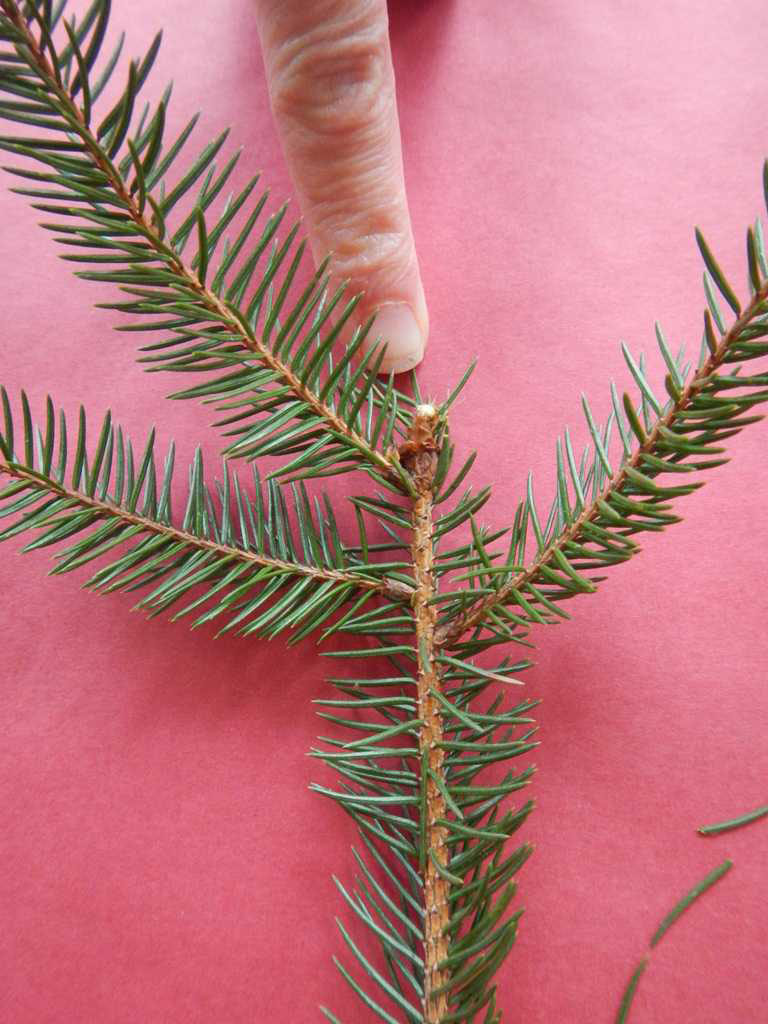
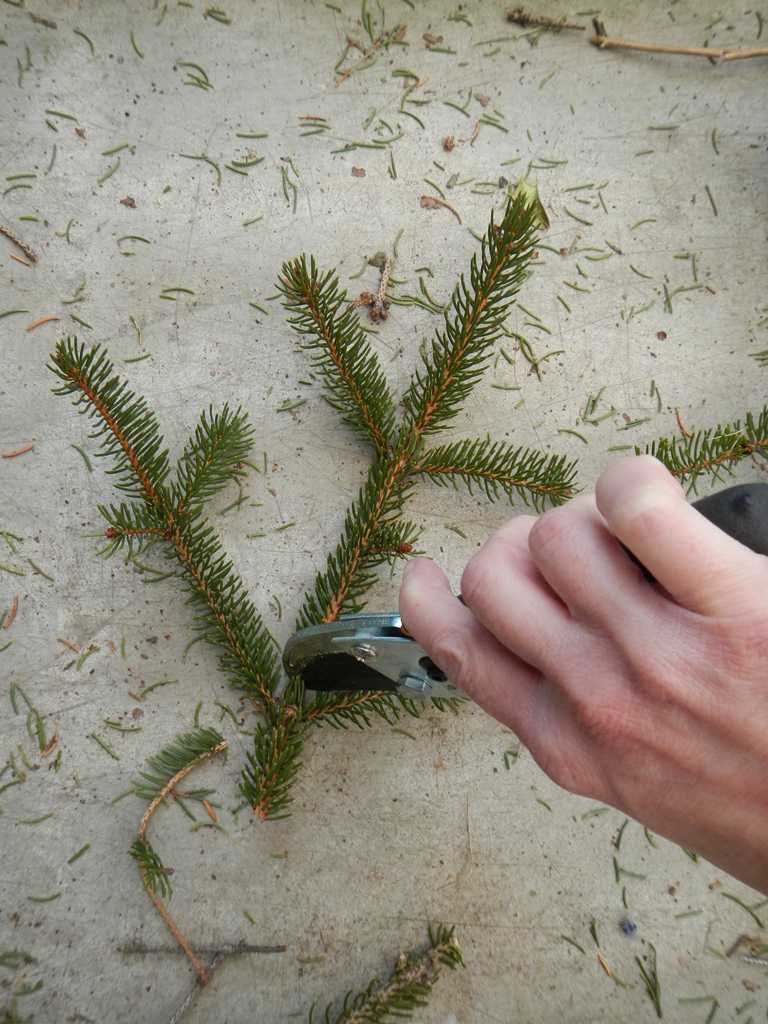 |
For a twig that is too long and has side twigs, you can cut it just above where the center twig meets the side twig. |

|
Both these pieces will be used in your wreath as you will cover the cut twig with the other shorter twig. |
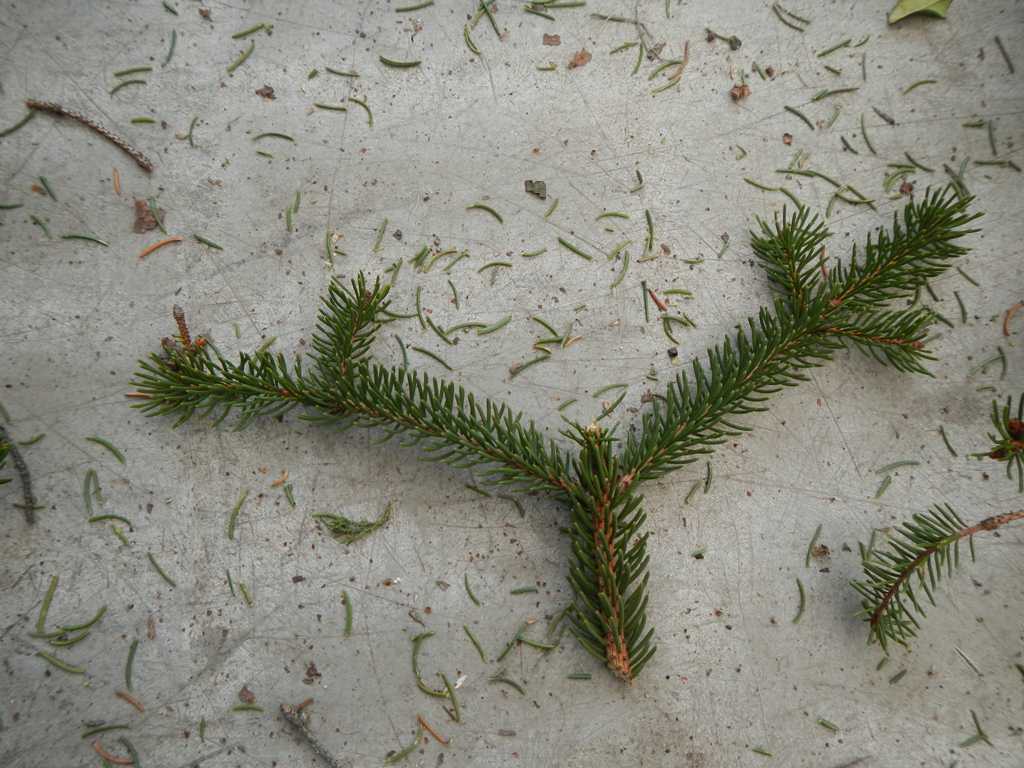
 |
This twig has several side shoots that you can cut off the main twig. Use these side twigs in your bundle as well. |
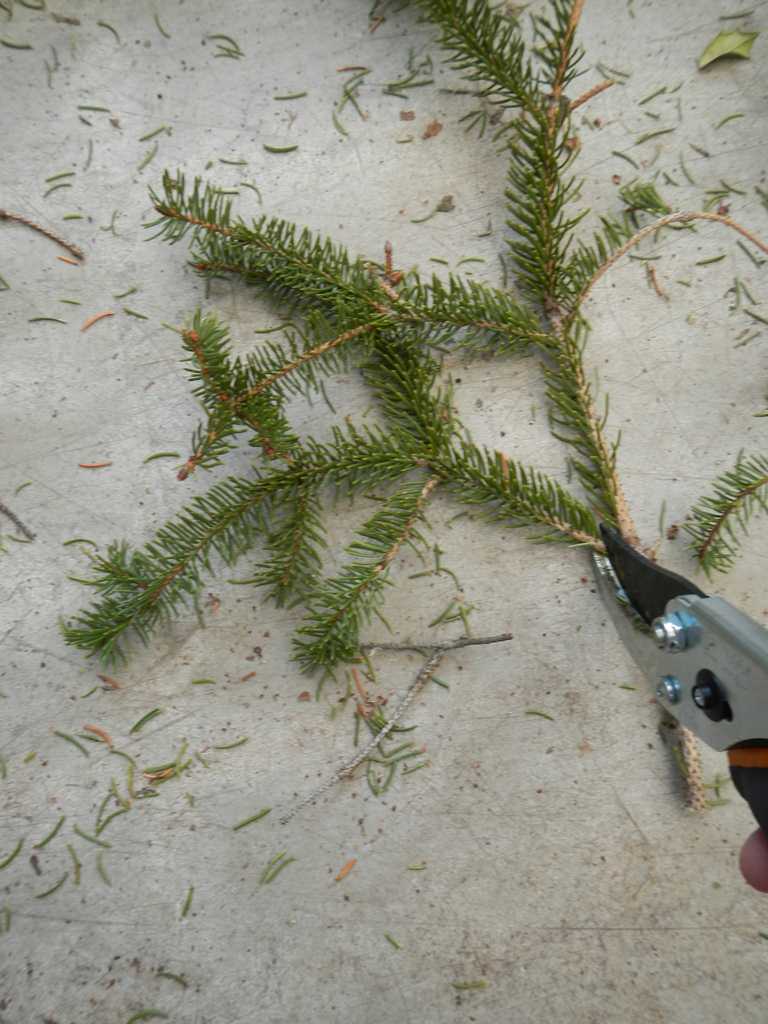
 |
Leave just the thick branch as scrap
Once you have trimmed off all the side shoots, you will only have the thick branch left. Most of the twigs that you cut can be used to create your wreath.
Be sure to use as much as you can. Don't just use the tips of the branches otherwise you will need twice or three times the amount of material.
|
 |
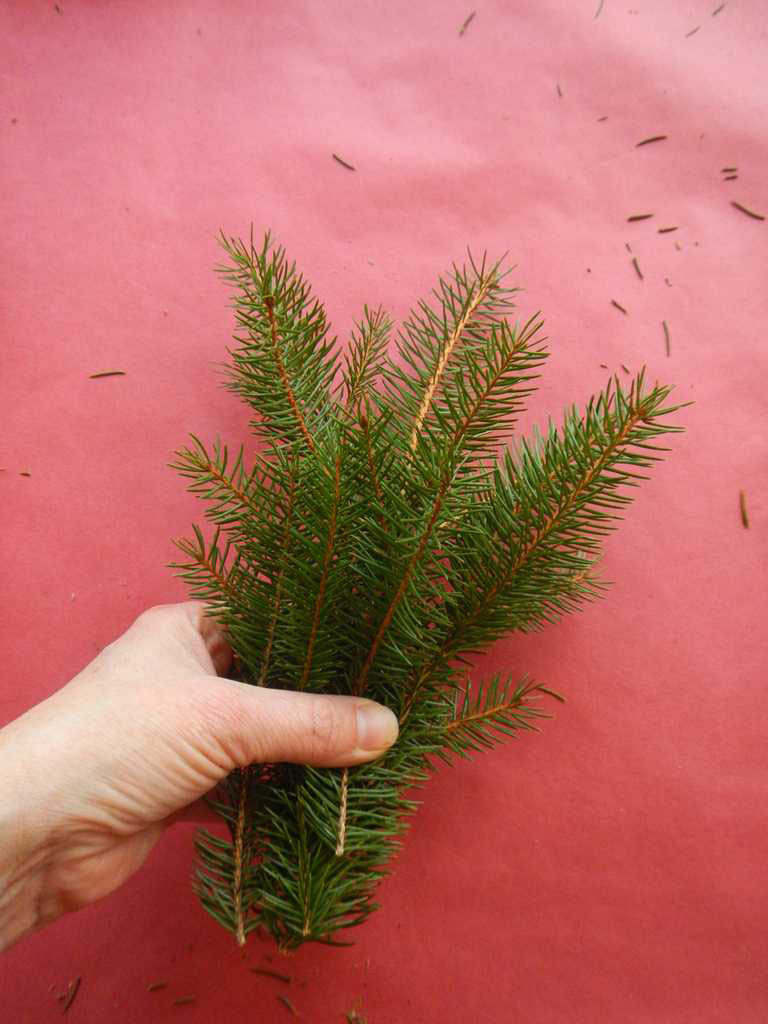
Your pile of greens
By the time you have trimmed all the branches, you will have a large pile of greens about the same size. You are now ready to begin assembling your wreath.
|
 |
Supplies check
Along with your cut greens, you will need:
14” wire frame
wire cutters
paddle of 22 gauge wire
hand pruners
|
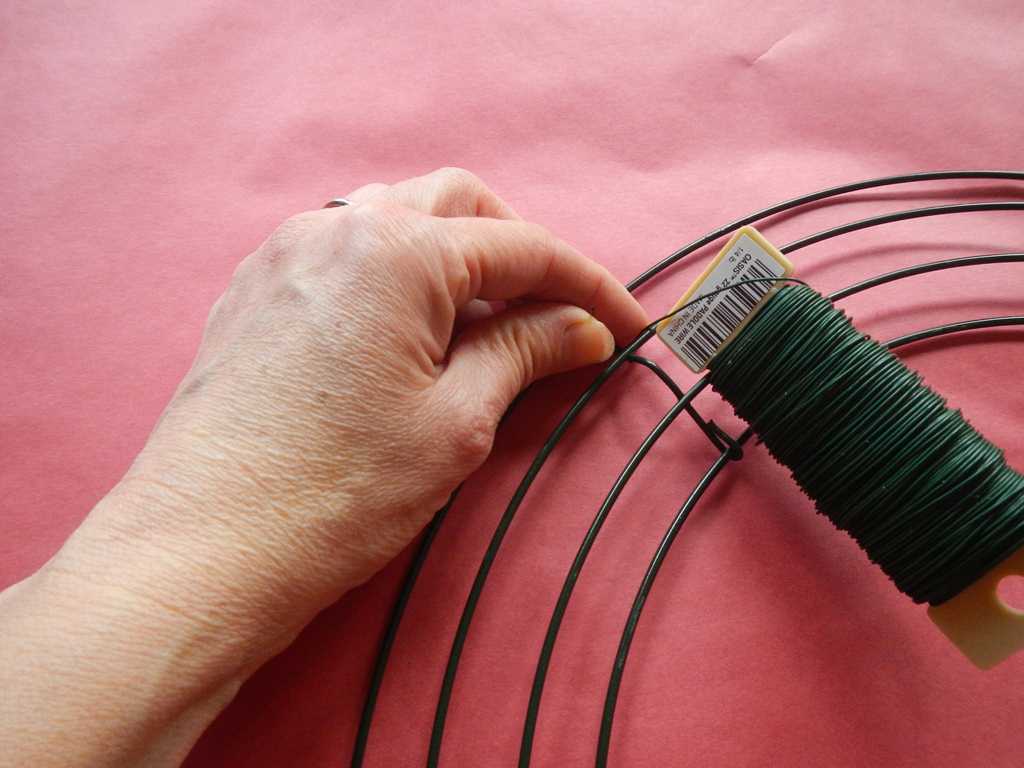 |
Getting started
Attach your wire to your frame by wrapping it around the cross wire and twist it securely to the frame. Remember, you will keep the wire attached until you have added your last evergreen bundle. Do not cut it.
|
 |
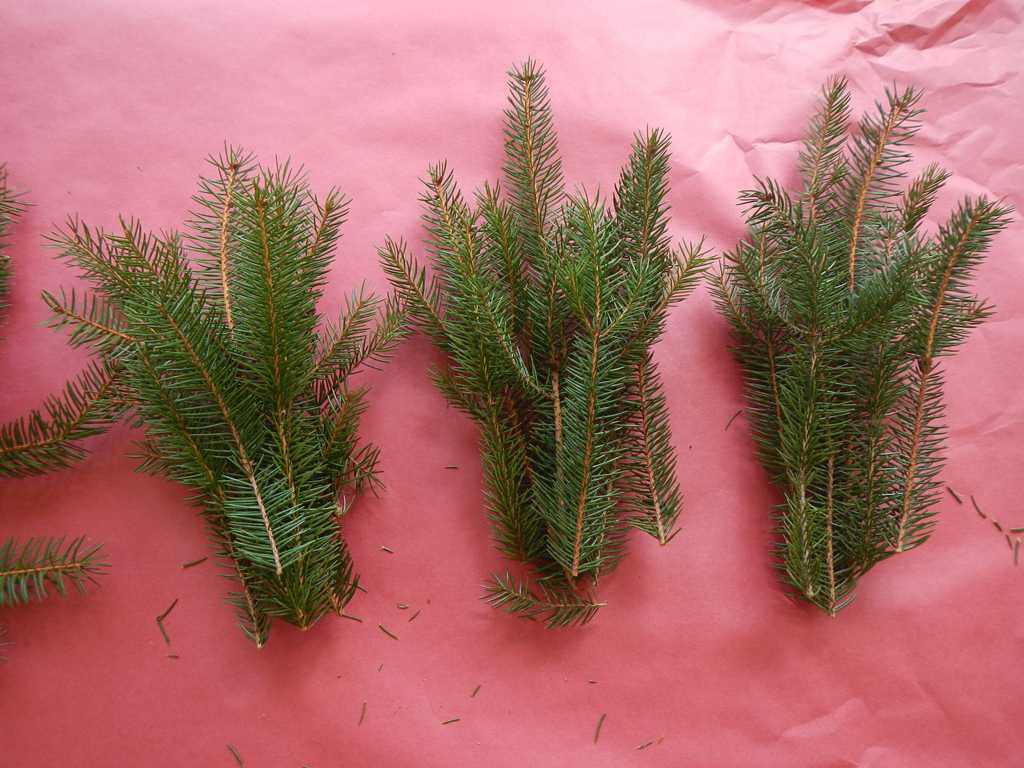
Create your first bundle
Gather together 5-7 evergreen twigs. Since these are natural materials, they won’t be perfectly uniform but that is fine. In the image, the twig on the right and in the middle are a bit smaller than the others. To create a full bundle of greens, layer the twigs from smaller in the front to taller in back. This will use up most of your cut twigs.
|
 |
Keep the twigs narrower than a pencil
A good rule of thumb is that you don’t want to use a branch or twig wider than the diameter of a pencil. Thicker twigs will add bulk and will not create a nice even wreath.
|
|
Cover your cut twigs
You can cover a cut twig by placing another twig over that cut point.
This will create fuller bundles without wasting material.
|
 |
Creating your first bundle
Here is what the finished bundle looks like. Notice the large twigs are in the back. If a twig is bent to the right, then place it on the right side to fill in that corner of the bundle.
|
 |
Continue to make bundles
Try to keep your bundles about the same height and density. Some people like a flatter wreath to fit on a small space on their door. You can also use less twigs in a bundle to make a flatter wreath. Likewise, if you use longer or denser bundles, the wreath will be larger and fuller.
|
 |
Add your bundles to the frame
Place your first bundle over where you attached your wire. Fan out your greens as you place the bundle on the frame.
|
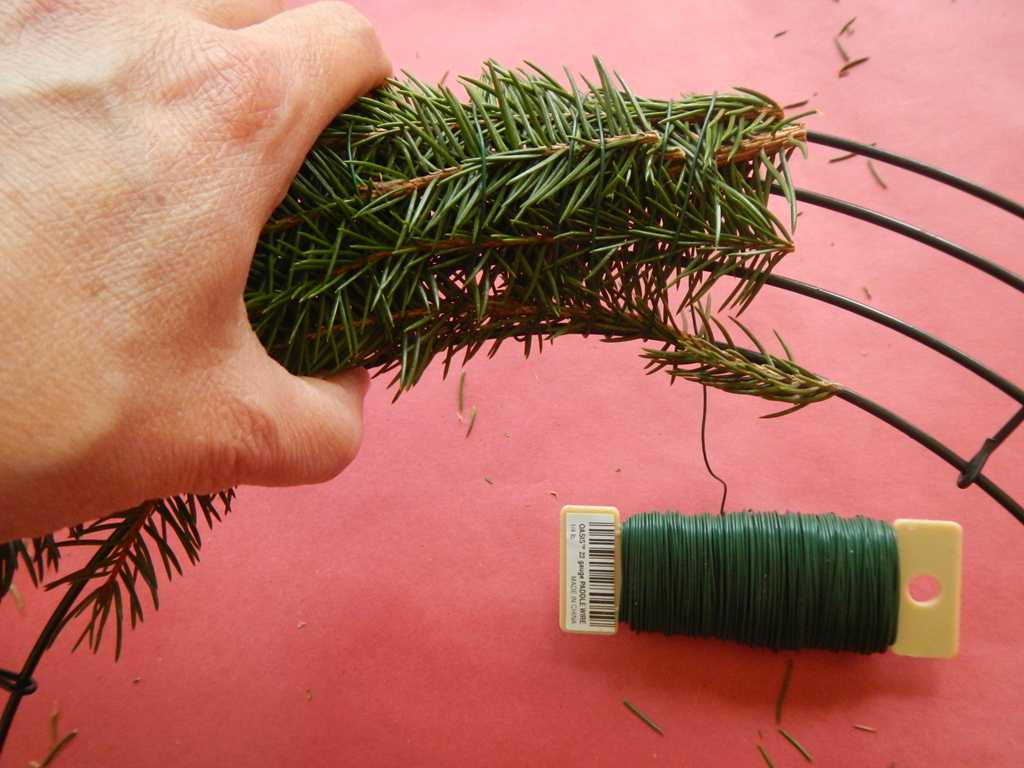 |
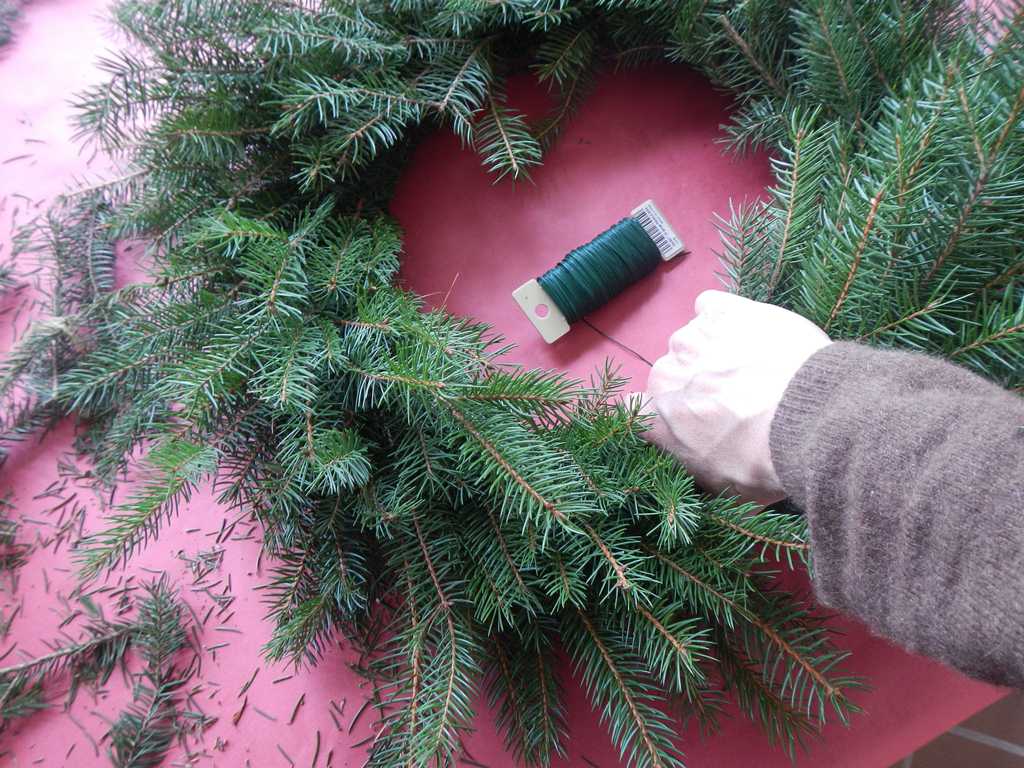
Are you right or left-handed?
If you are right-handed, hold the bundle on with your left hand and wrap the wire with your right hand going clockwise around the wreath.
If you are left-handed, turn the bundle around so the tips of the twigs are on the right side of the frame. Hold the bundle on with your right hand and wrap the wire with your left hand going counter-clockwise around the wreath.
|
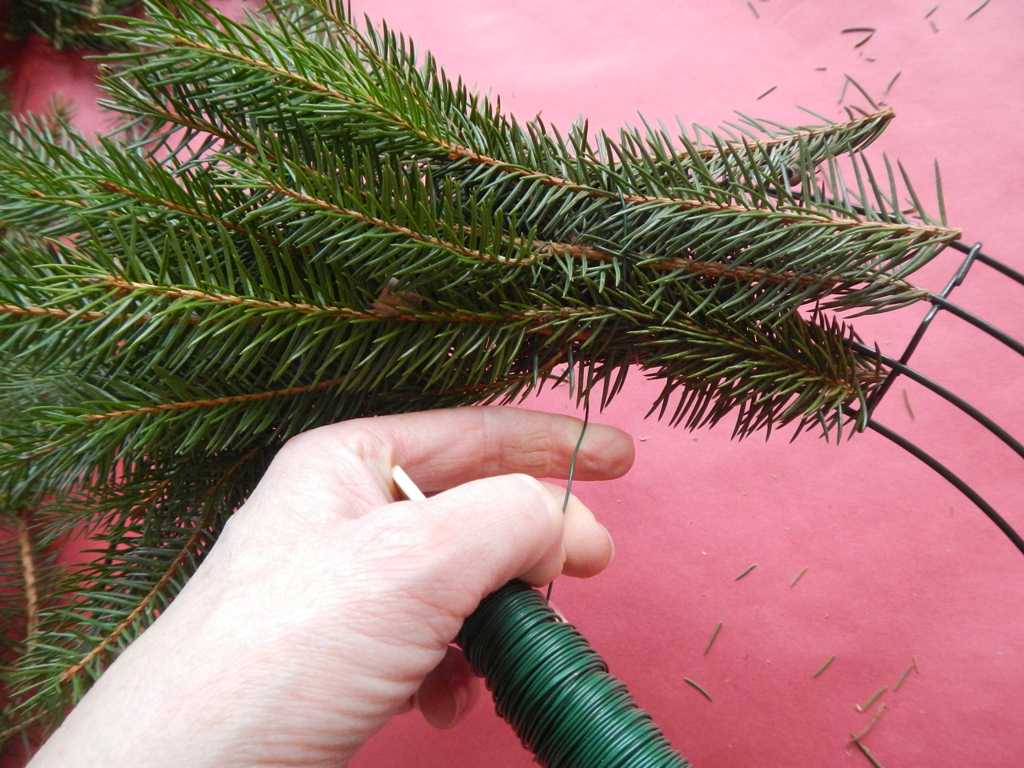 |
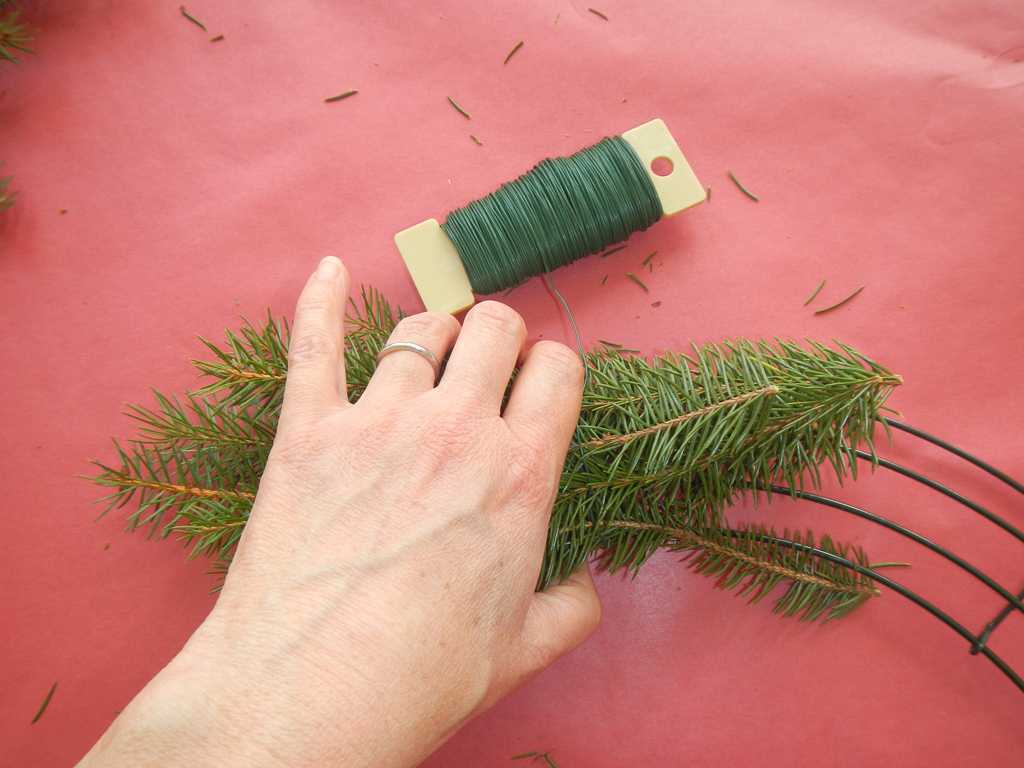
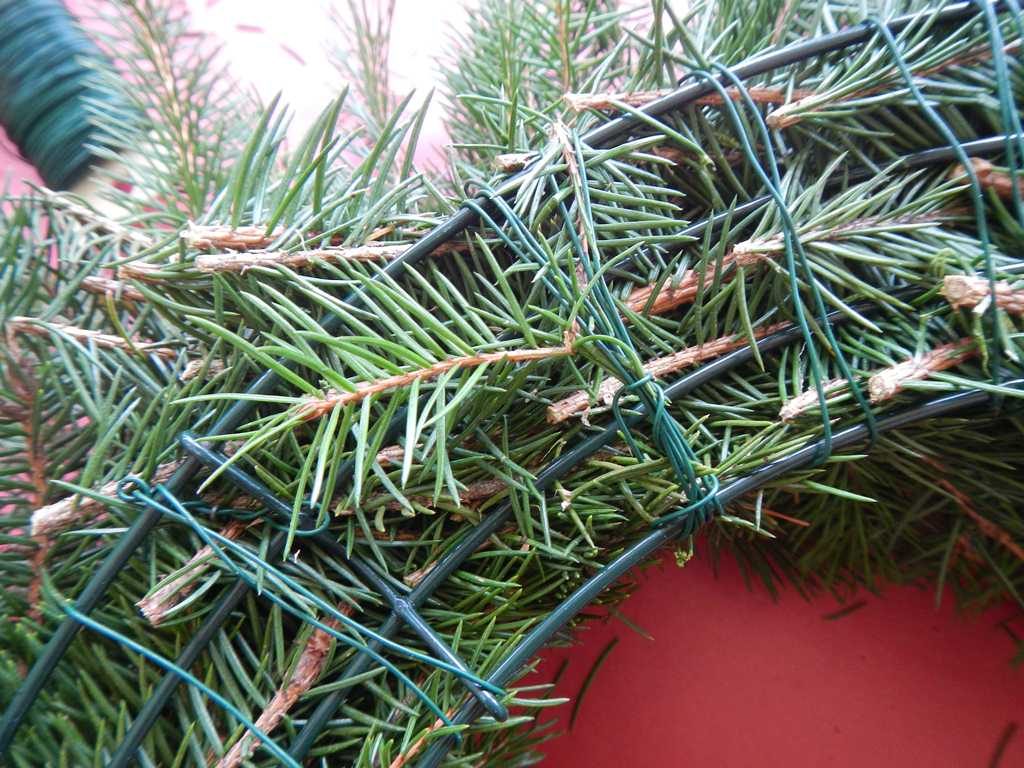
Spiral the wire around the lower 1/3 of the bundle
This demonstration shows a right-handed person. The bundle is held in place with the left hand while the wire is wrapped around the frame coming towards the person.
|
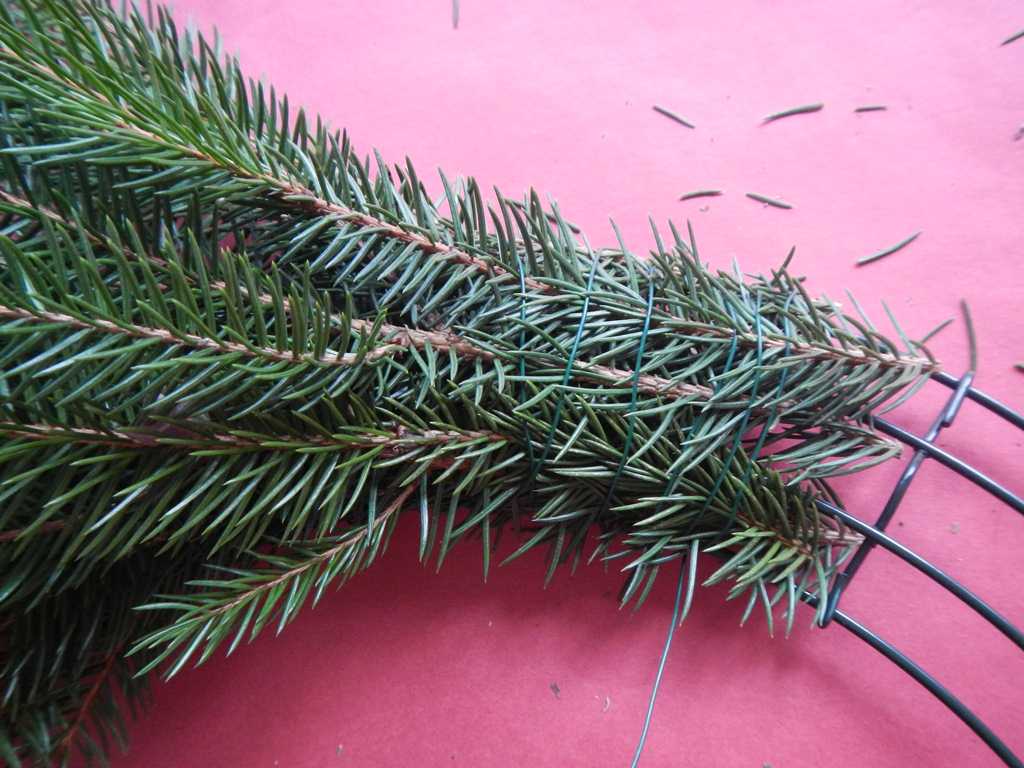 |
Spiral the wire around the lower 1/3 of the bundle
The wire is wrapped down the bundle pulling tight to hold the greens in place but not so tight that the frame is bent. At this point do NOT cut the wire. Keep the wire in one piece, continuing to wrap, until you reach the end of the wreath.
|
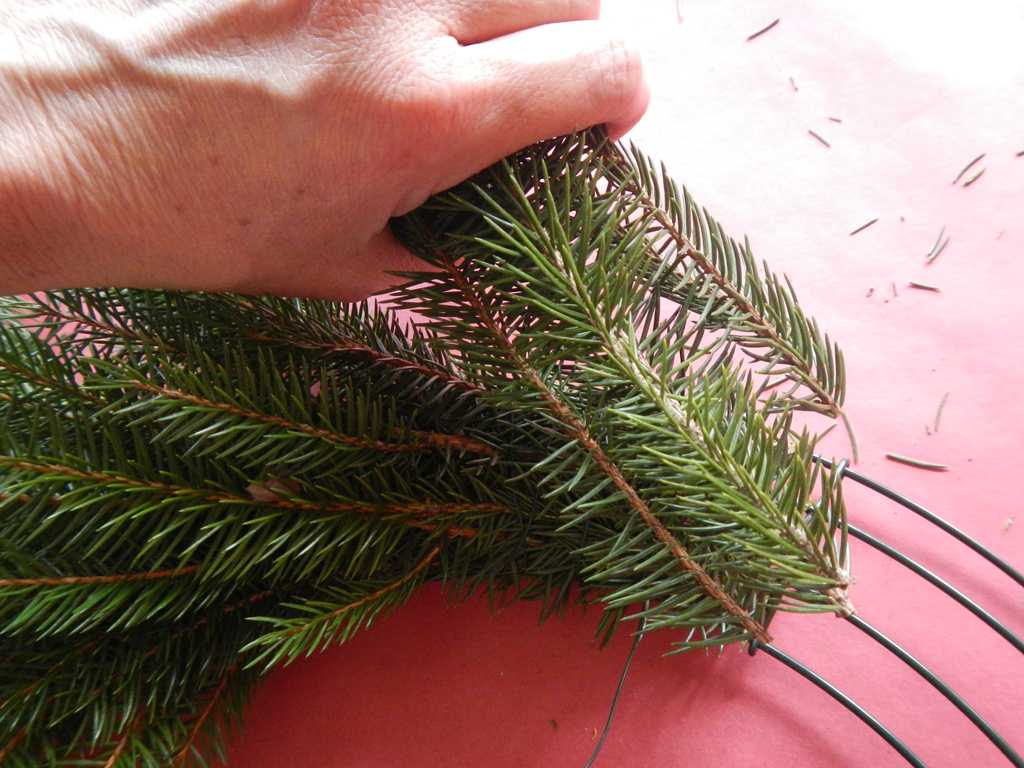 |
Place your second bundle
The next bundle is placed over the wired lower third of the bundle and moves clockwise around the wreath. Wrap the wire 3-4 times spiraling down the secure it. Remember if you were left-handed, you would turn the bundles around and go counterclockwise around the wreath.
|
 |
Next, place your third bundle
As you can see in this picture, you would add your third bundle just below the second bundle. Make sure to cover your wire from the previous bundle.
|
 |
Continue to add bundles
Using the same technique attach more bundles to the wreath frame until you have almost covered the frame.
|
 |
Prepare for the last bundle
To add the last bundle, gently bend back the first bundles tips.
|
 |
Adding the last bundle
Place the cut part of the twigs under the first bundle. You may need to ask a helper to hold back the first bundle while you wrap the wire around the final bundle. Pull the wire tight to hold it in place.
|
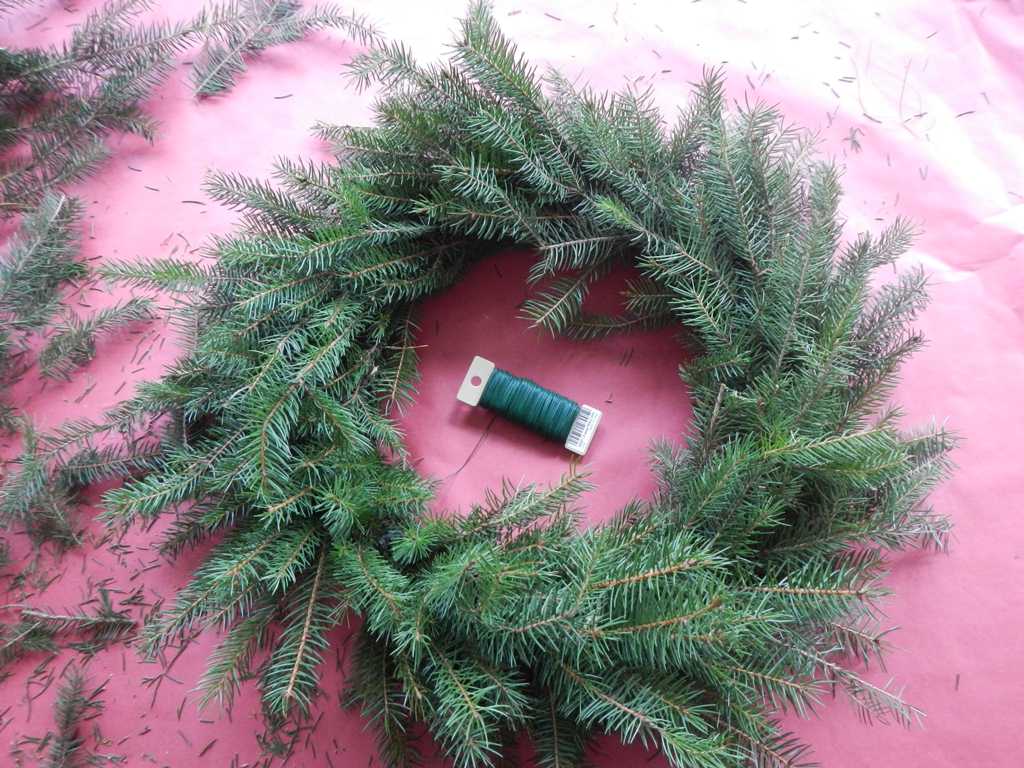 |
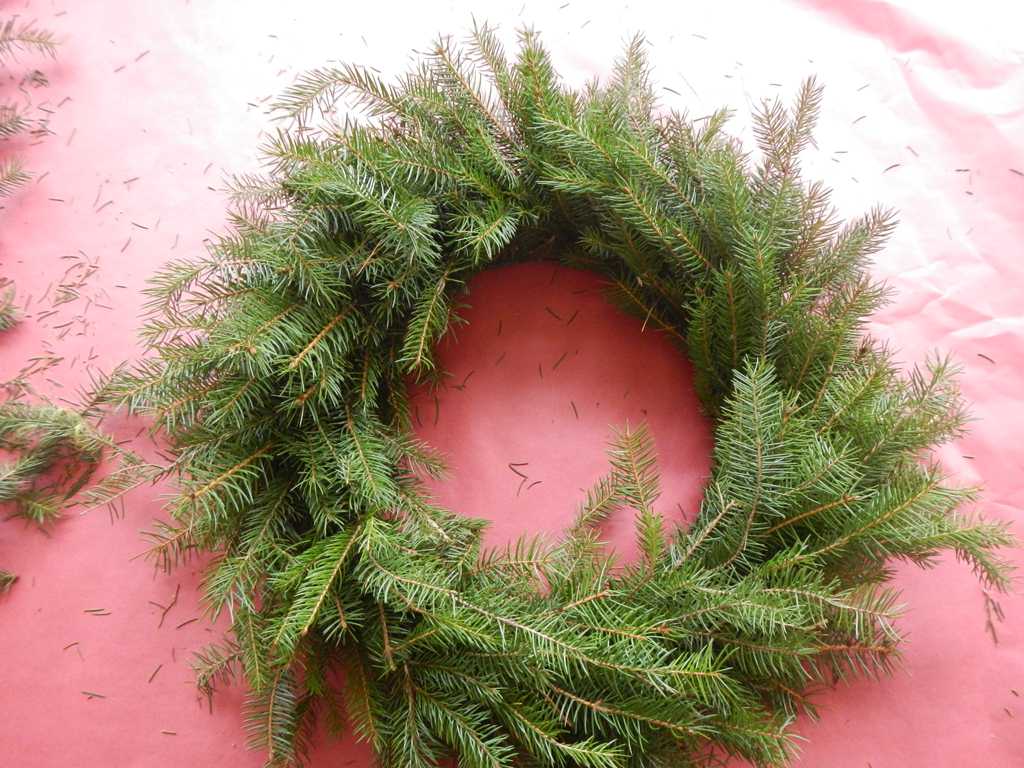
Completed evergreen base
Here is a finished base wreath.
|
 |
Detach the wire
Flip over the wreath so you can see the frame. Pull the wire taut and leave about 3” of wire. Cut the wire with wire cutter, not your pruners.
|
 |
Wrap the wire around the frame
Once cut, wrap the wire around the frame several times and give it a twist. Pull tight and tuck the end of the wire back towards the front of the wreath so it doesn’t scratch any surface it is on.
|
 |
Put a bow on it
You can now flip it over, put a bow on it and be done. Or you can add accents with the next couple of steps.
Before wiring accents, it’s a good idea to place your decorative material on your wreath and move them around to see what looks best to you. Then, you are ready to wire them on.
|
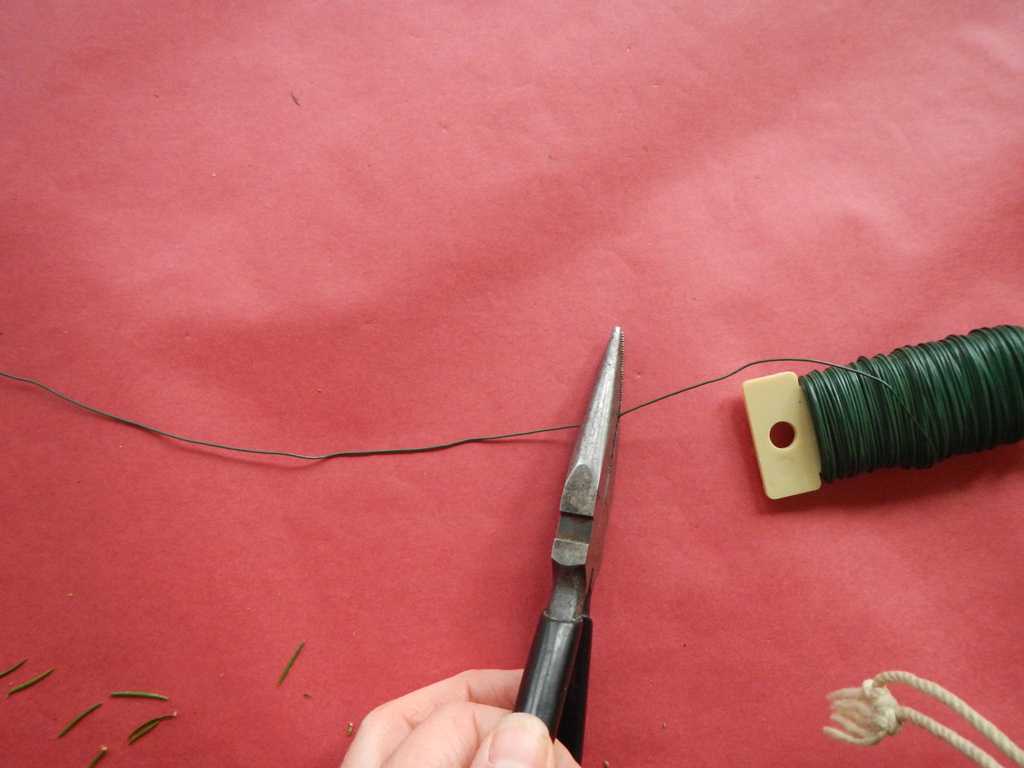 |
Add wire to your accents
To begin, cut a flat length of wire about 20”.
|
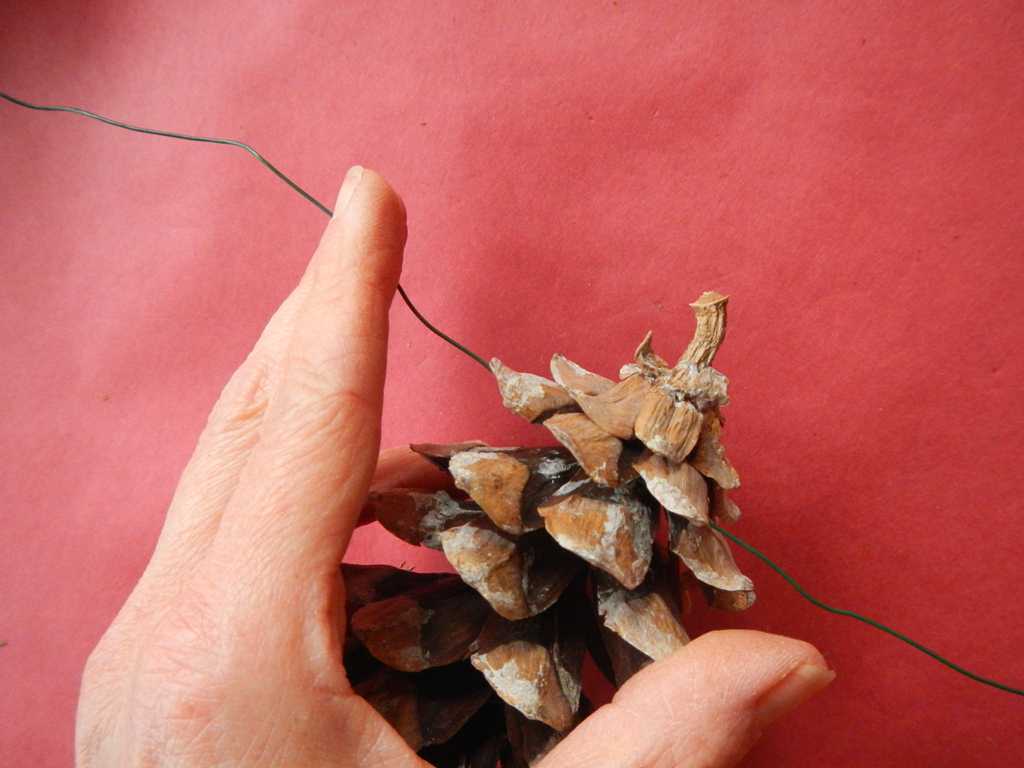 |
Wiring your accents
If using a cone, wrap the center of the wire around the base of the cone. Twist two times like a twist tie. Use the two ends to wrap around the wreath and tie in back. Tuck in the ends towards the front of the wreath.
|
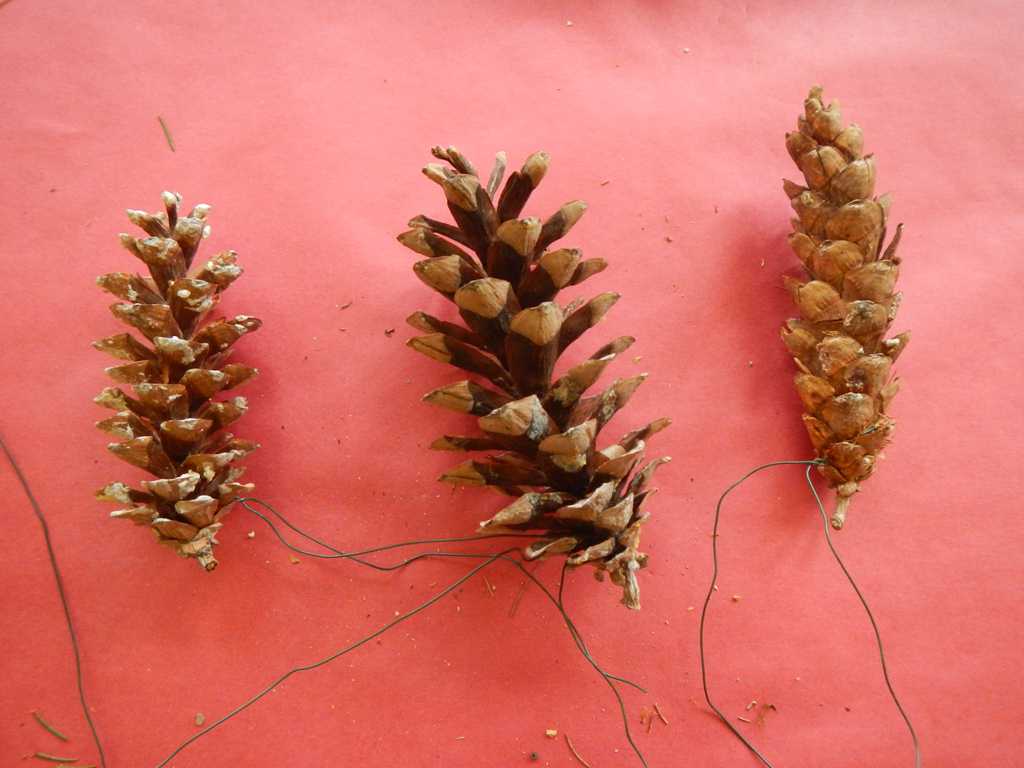 |
Add the cones with wire
Here are three wired cones.
|
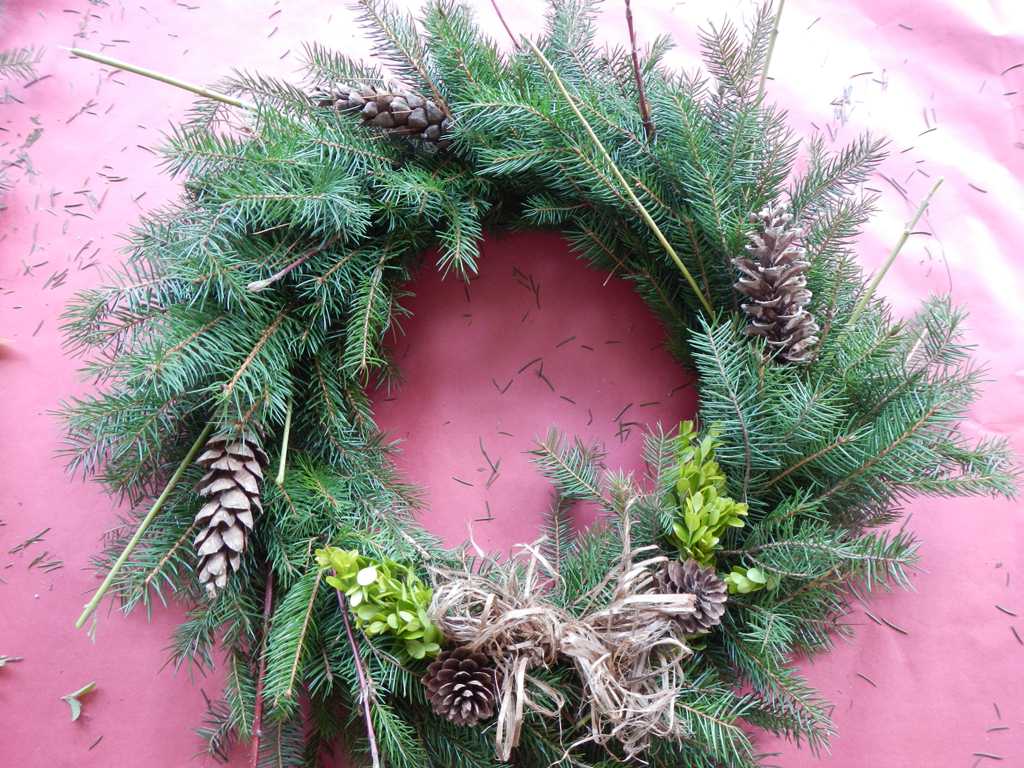 |
Completed wreath
Most people like to design with odd numbers like 1 bow, 3 pine cones, 5 twigs, etc. It’s your wreath so you get to choose how to decorate it.
This base of this wreath is fir with accents of pine cones, boxwood, yellow and red twig dogwood and a bow made from cedar bark.
|
|
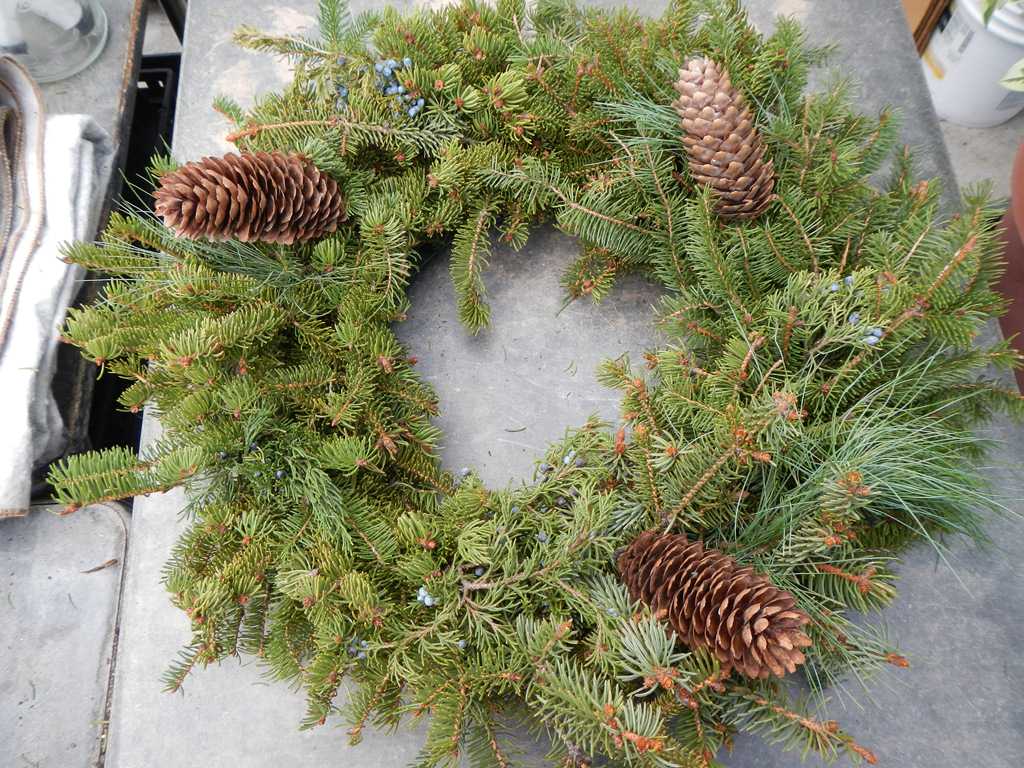
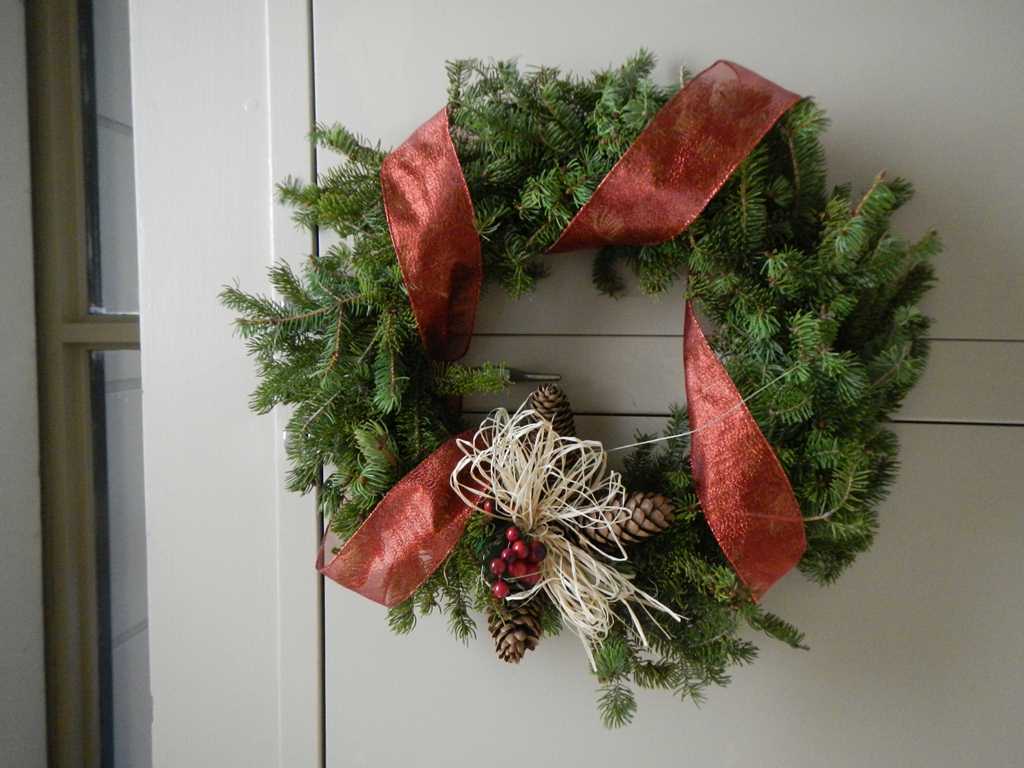
Another completed wreath
This wreath uses spruce cones, pine tips, and twigs without a bow. It’s base is spruce greens - a good wreath to place outside where it is cool.
|
 |
Other options
You can add other embellishments or use different base material but the technique is the same.
|
|
Safety precautions
• Pruners are sharp. Please follow the safety precautions outlined on the package.
• Keep your hands away from the sharp blades of your pruners and loppers when trimming twigs and branches.
• Wire cutters and the sharp ends of wire can also cause injury.
• Wear gloves for pruning your branches and natural materials.
|