|
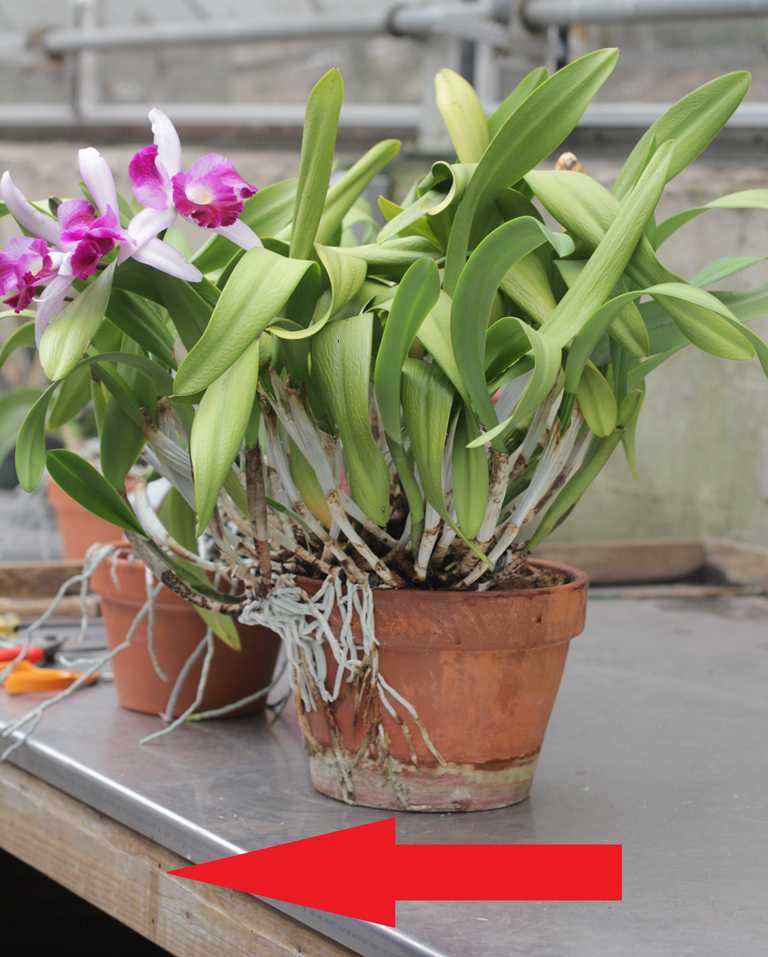
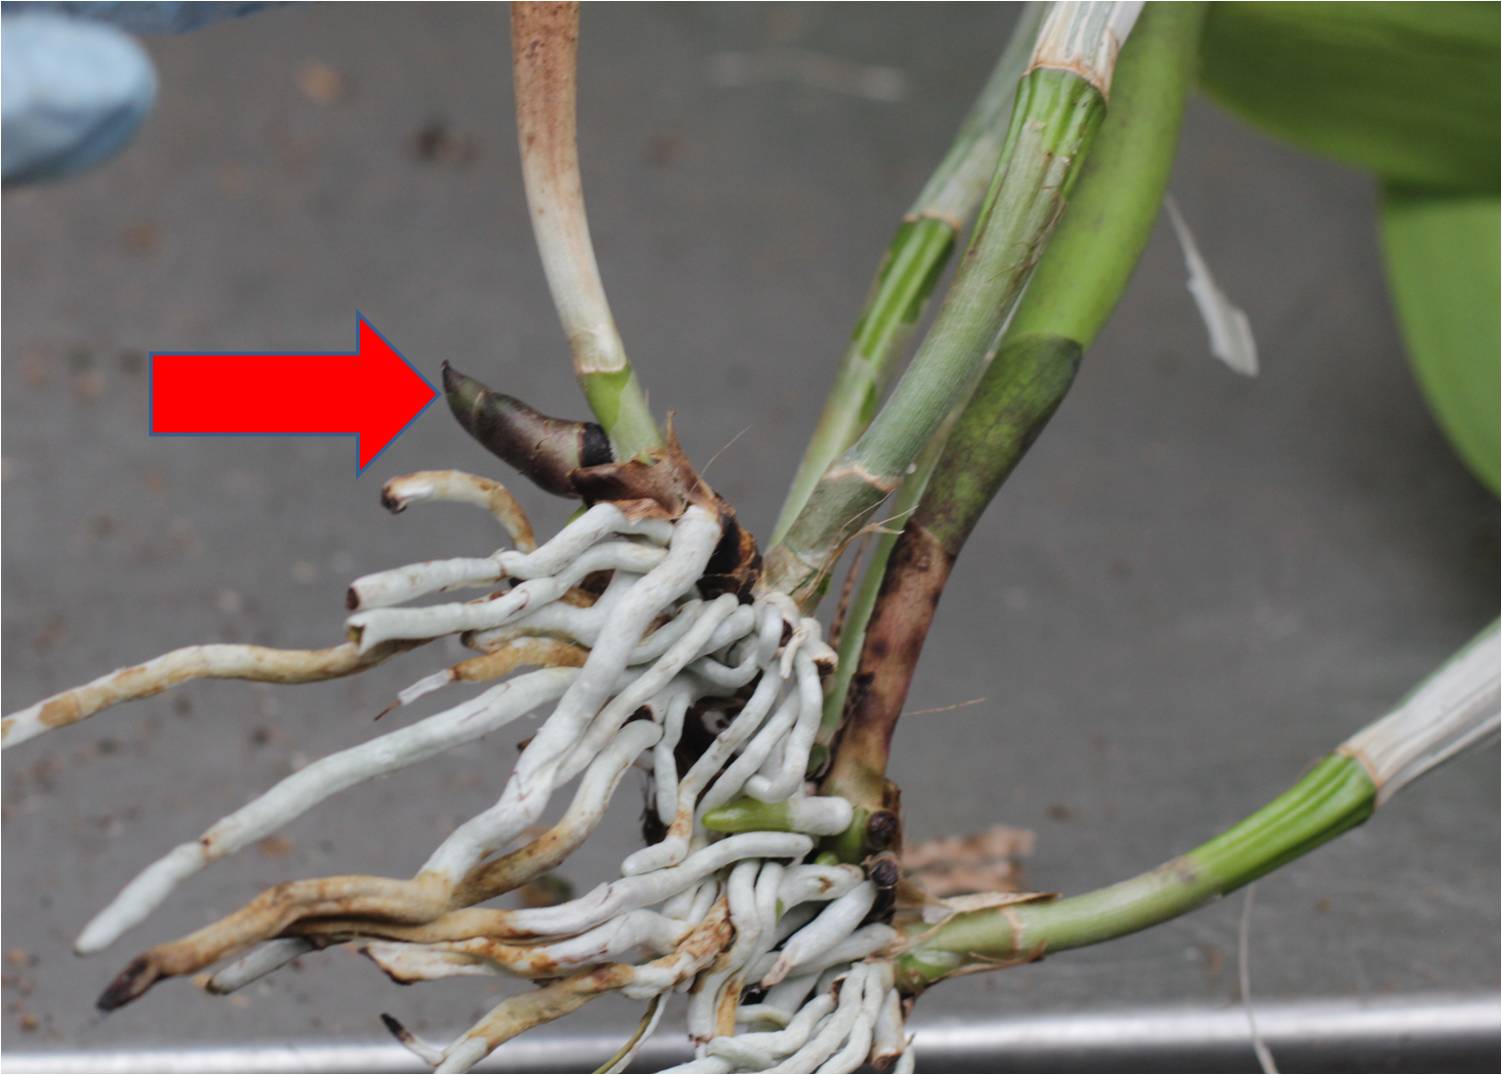
Red arrow = direction of growth
|
What is sympodial growth? "Marching across the pot"
Sympodial orchids march across their pots, growing horizontally, but only in one direction. They produce a stem (rhizome) which grows parallel to the ground. Shoots, called pseudobulbs (because they swell and hold water and nutrients), grow upward from this rhizome, while roots develop from the underside where the rhizome contacts the potting medium. A flower spike is produced in a sheath that forms in the leaf axil where the pseudobulb joins the base of the leaf. Each pseudobulb flowers only once. Older pseudobulbs will never bloom again, despite the green leaves, so it is important to recognize the direction of growth and older parts of the plant when repotting. Older sections of the plant may be discarded while the growing points (buds) on the remaining rhizomes should be positioned so that they have room to “march across the pot,” i.e., place the older growth against one side of the pot.
|
|
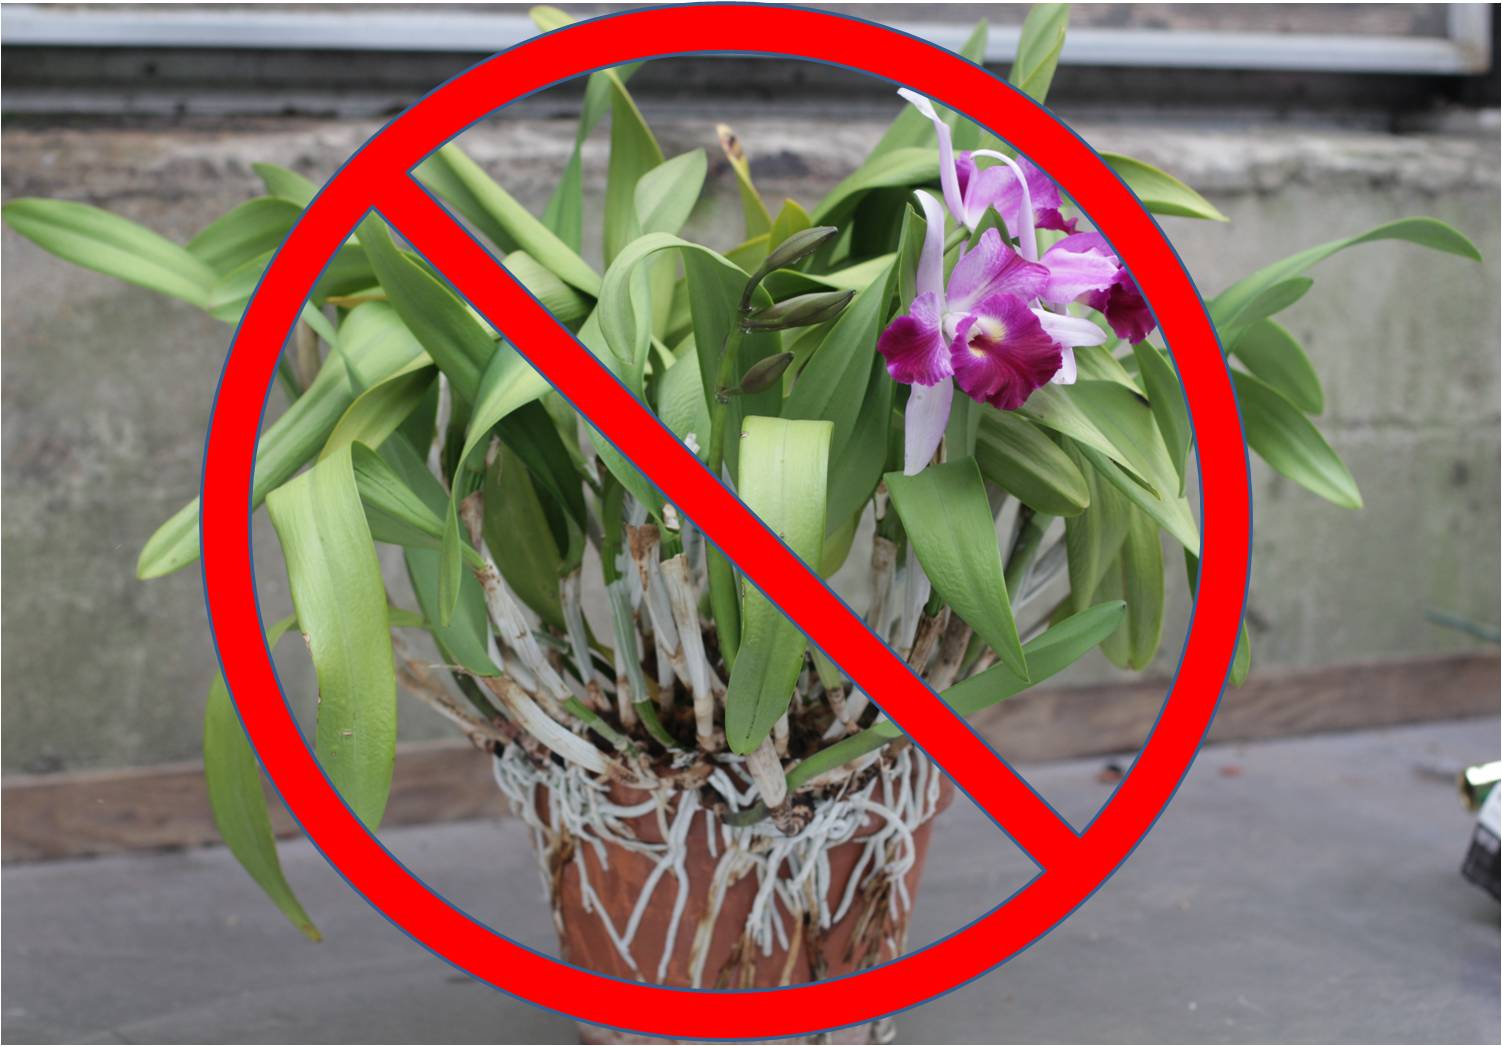
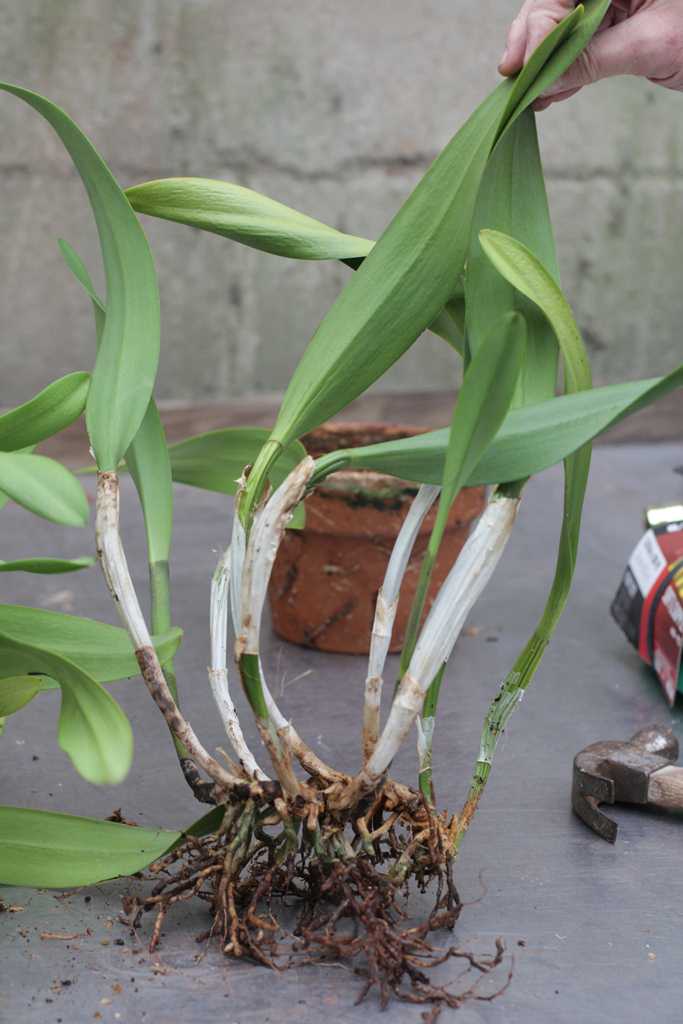
Do NOT repot orchids when in bloom
Sympodial orchid in need of repotting
|
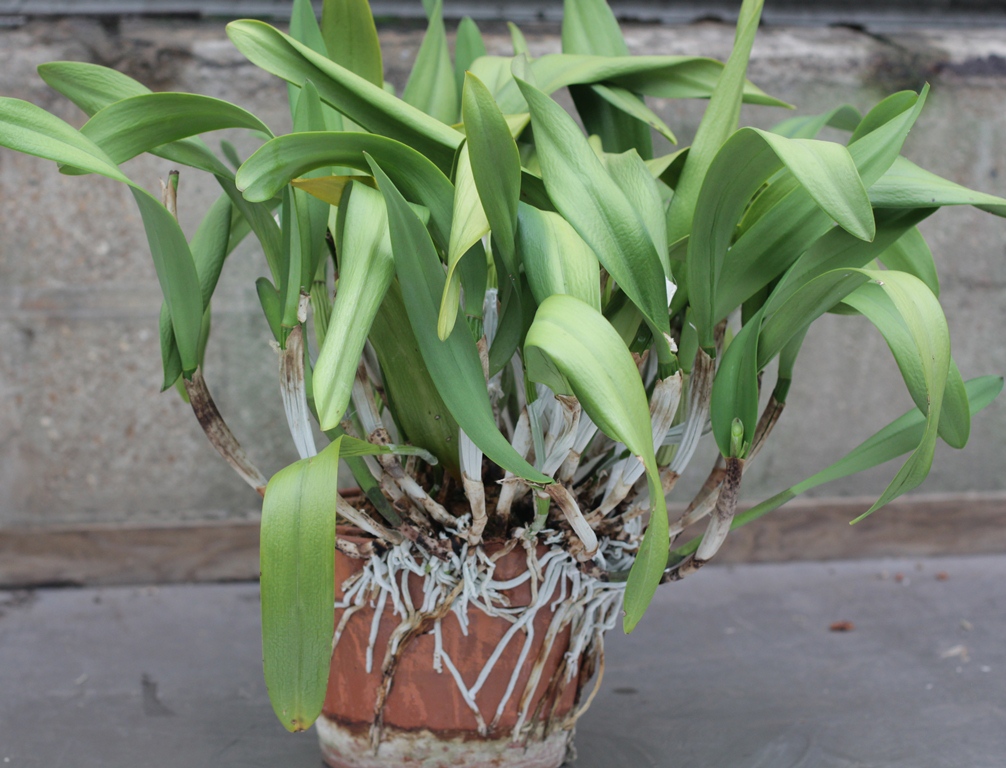
When to repot
The roots of this Brassolaeliocattleya orchid are stuck to the outer edge of the pot on one side. This indicates that the plant has no room to grow further and needs to be repotted, keeping in mind that the plant will only bloom on new growth, which is why there are only blooms on one side of the pot. However, do NOT repot orchids that are in bloom no matter how much they seem to need it. Wait until after they finish blooming and new growth appears.
Cattleya and other sympodial orchids (e.g., Laelia, Dendrobium, Oncidium and crosses like the Brassolaeliocattleya in the picture) should be repotted when the rhizome of the plant protrudes over the edge of the pot or when the potting medium decomposes too much and drains poorly (shown later).
As a general rule, repot sympodial orchids every two years after flowering and when new growth appears spring through fall. Do not be tempted to put the plant in a larger pot to circumvent this. For best flowering and growth, orchids prefer to be fairly tight in their pots, allowing for only a couple of years' growth.
|
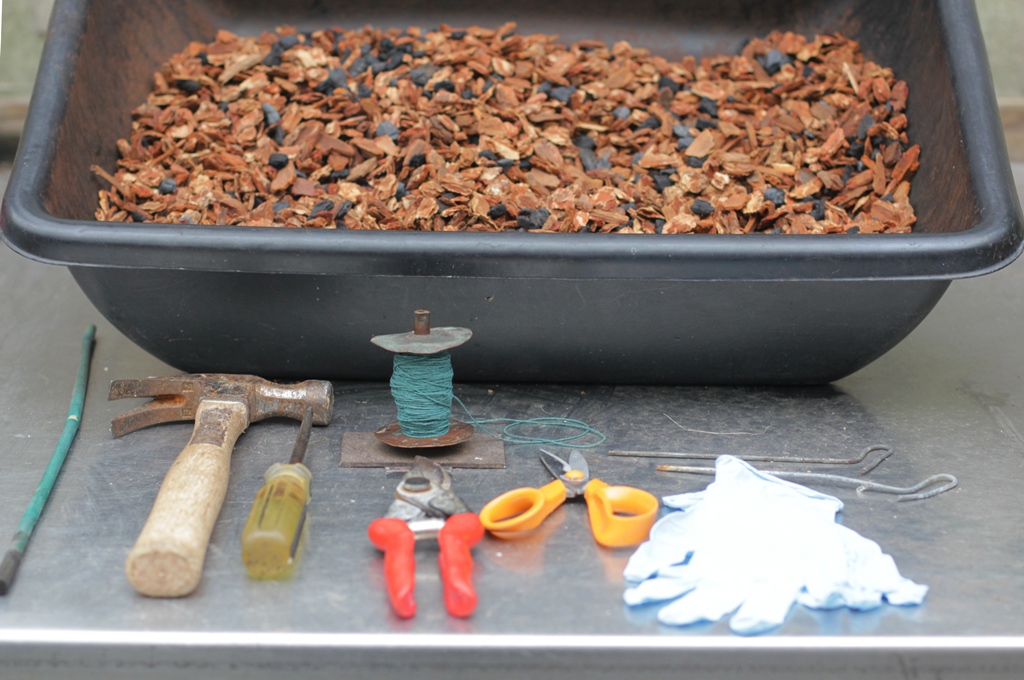 |
Gathering required materials
-
Purchase commercial potting medium designed for Cattleya orchids or make your own (our recipe follows)
-
Another pair of hands (optional but helpful)
-
Plastic, latex or rubber gloves
-
Pruners (sharp and sterilized between plants)
-
Powdered cinnamon (optional, discussion follows)
-
Appropriate sized pot (discussion follows)
-
Hammer & screwdriver
-
Rhizome clips (usually 2)
-
String or thin twine (preferably green) & scissors
-
Label
|
 |
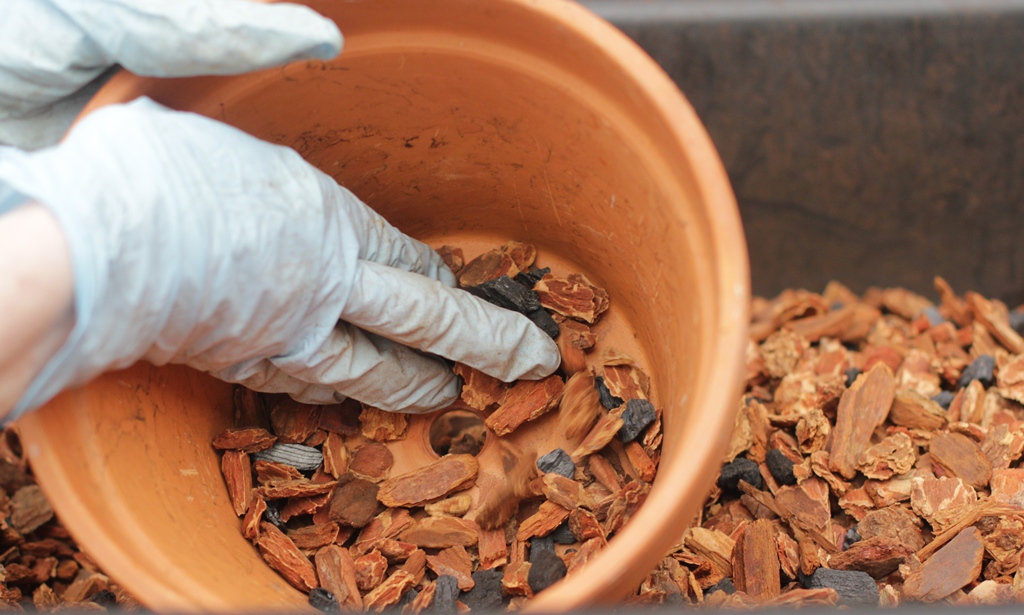
Potting medium recipe
Many orchid growers make their own potting medium. Not all use the same ingredients or the same combination of ingredients. Here is the mixture used at the Missouri Botanical Garden for growing Cattleya orchids:
-
5 parts fir bark, medium grade (¼ to ½ inch chunks) (NOT landscape mulch)
-
1 part horticultural charcoal (not the same as charcoal for barbecues). Note: This ingredient is extremely important as it neutralizes fertilizer salts.
|
|
Used pots should be cleaned, sterilized & dried
|
Selecting a suitable pot
Container size is important because most orchids are more likely to flower well if kept moderately pot-bound. For sympodial types, choose a container which just accommodates the plant. If the pot is too large, the roots will rot because the excess medium retains too much water. Special pots with slits along the sides are unnecessary but may be used.
The choice of which container, plastic or clay, depends upon the grower. Plastic pots retain moisture longer, are lightweight and inexpensive. Clay pots will tend to dry out the potting medium quicker. However, clay pots are preferable for 2 reasons: 1) bulky orchids with lots of top growth, need the weight of clay to anchor the plant down and prevent toppling and 2) because clay is porous and dries out faster, it helps prevent root rot by allowing more air into the root zone.
In any case, if reusing a pot, soak it 1 to 2 hours in hot soapy water containing chlorine bleach (1 part bleach to 9 parts water). Scrub clean, then rinse well and let dry. If re-using a clay pot, the drying period must extend at least 2 days in order to completely outgas the chlorine, which will be harmful to the roots.
|
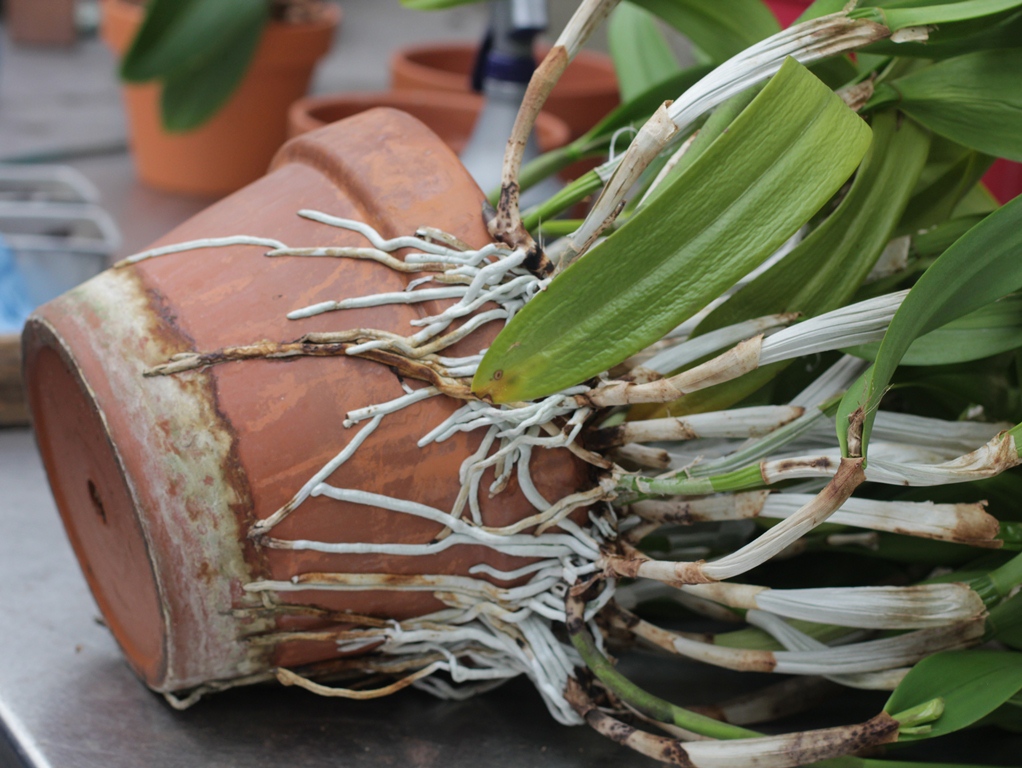 |
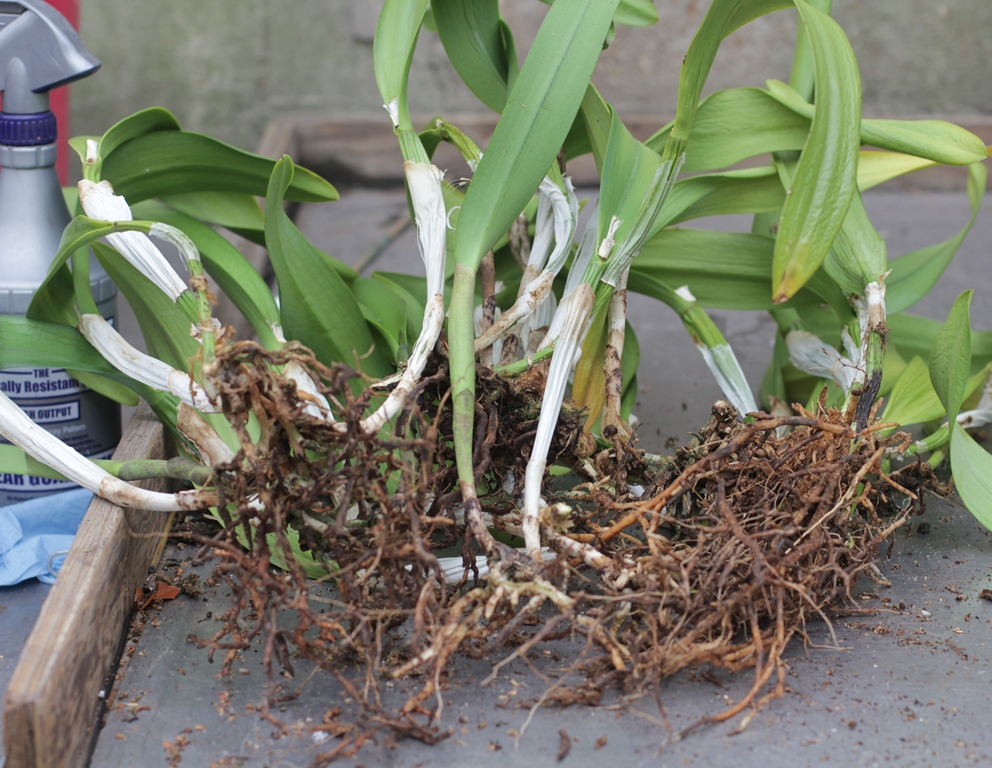
Remove the plant from the pot
This picture is a perfect example of why orchids should be repotted regularly--usually this means repotting every 2 years. The roots of this plant have grown out of the pot and are in fact stuck to the side. Because these roots are growing from the only portion of the plant that will continue to grow and flower, they must be removed intact from the pot. To do this, the pot may need to be broken.
|


 |
Break the pot if necessary
If using a clay pot, break it with a hammer, positioning the head of the hammer along side, but not on, the living roots. If using a plastic pot, cut the pot away from the roots if necessary Then, gently slide the pieces of pot from under the roots. Repeat this process until all the roots are free from the pot. Take care not to damage the root tips as these are the growing points of the roots.
|
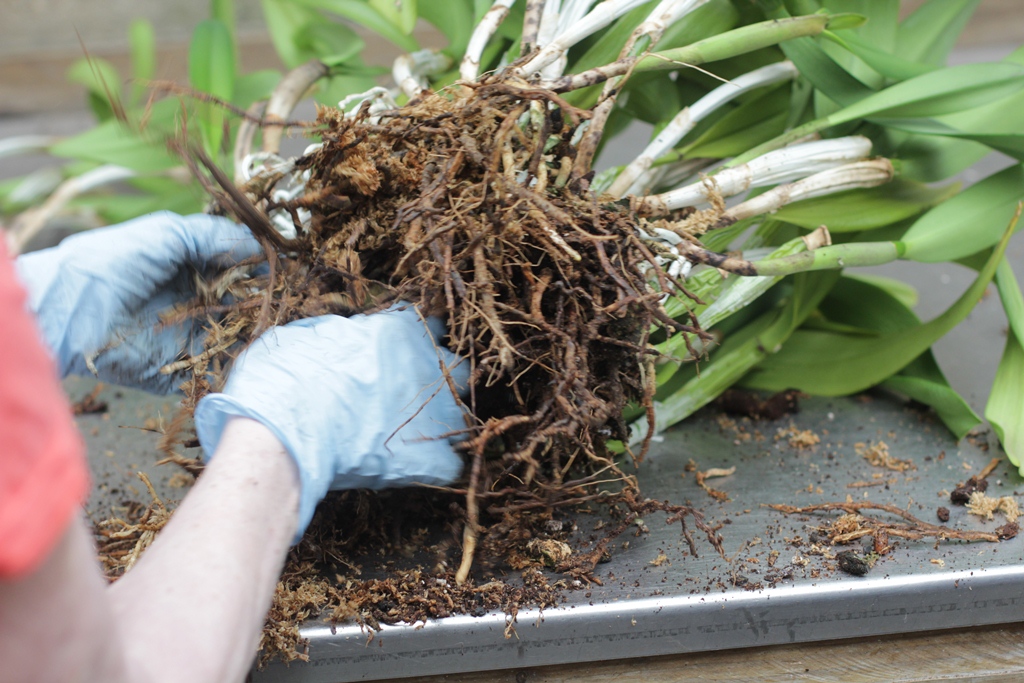 |
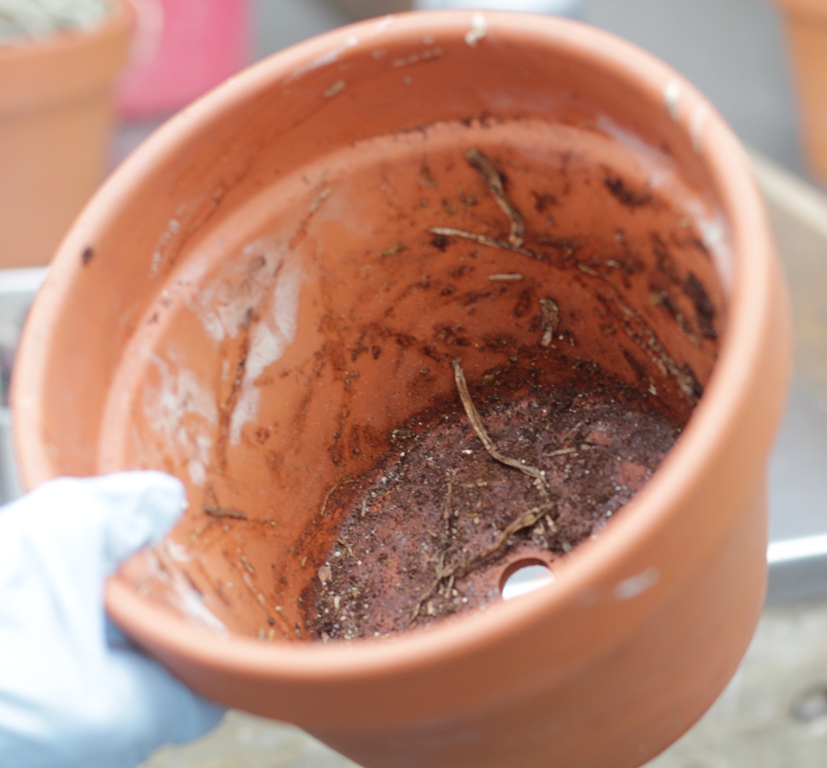
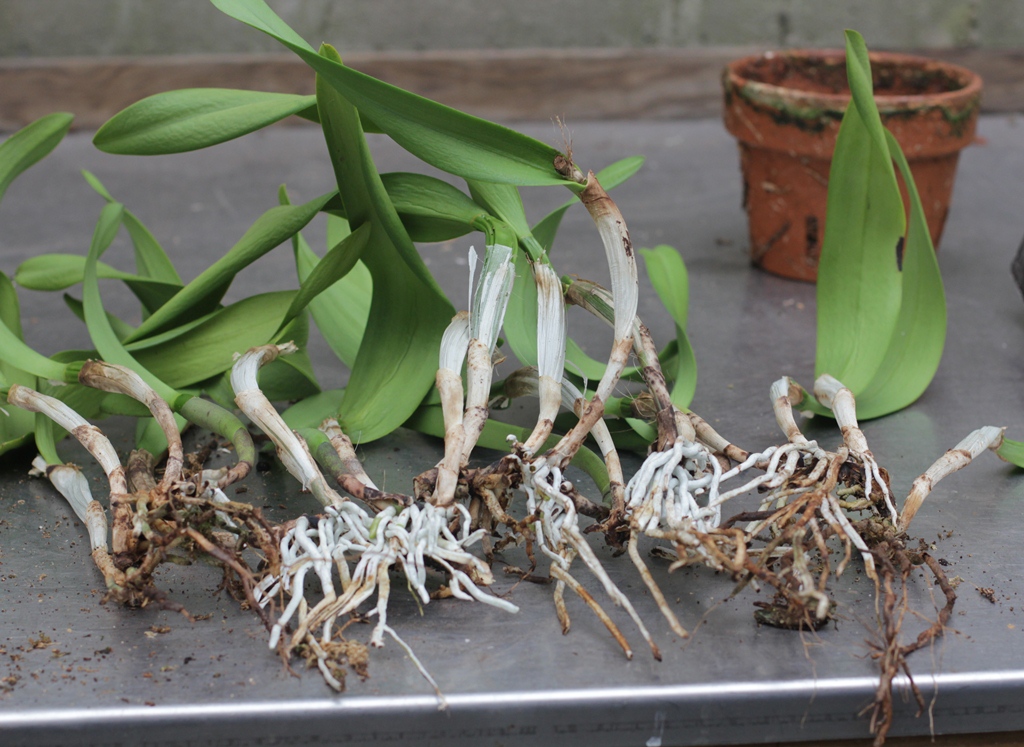
Remove and discard all the old potting medium
The picture on the top left shows that the bark making up the old potting medium has decomposed to the point that it looks like soil rather than bark. This plant was long overdue for repotting.
The objective is to remove as much of the old potting medium as possible by shaking and picking out the pieces of bark, taking care not to damage any living plant tissue. Pieces of old potting medium could also be washed out with tepid water.
Do NOT reuse potting medium.
|
|

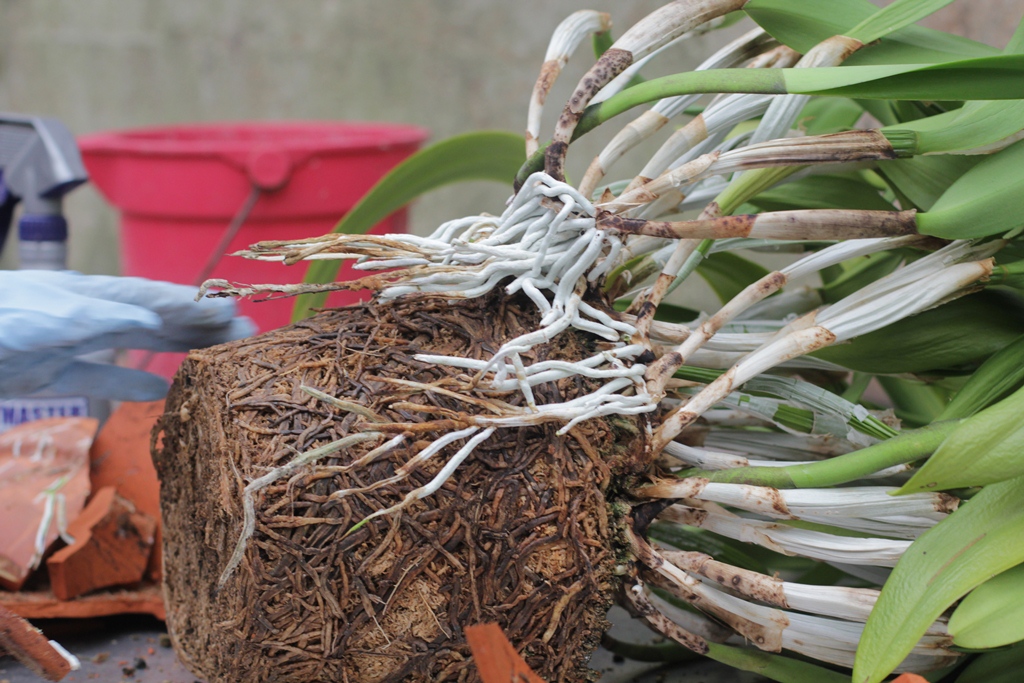
Green pseudobulb
New shoot & white healthy roots below it
|
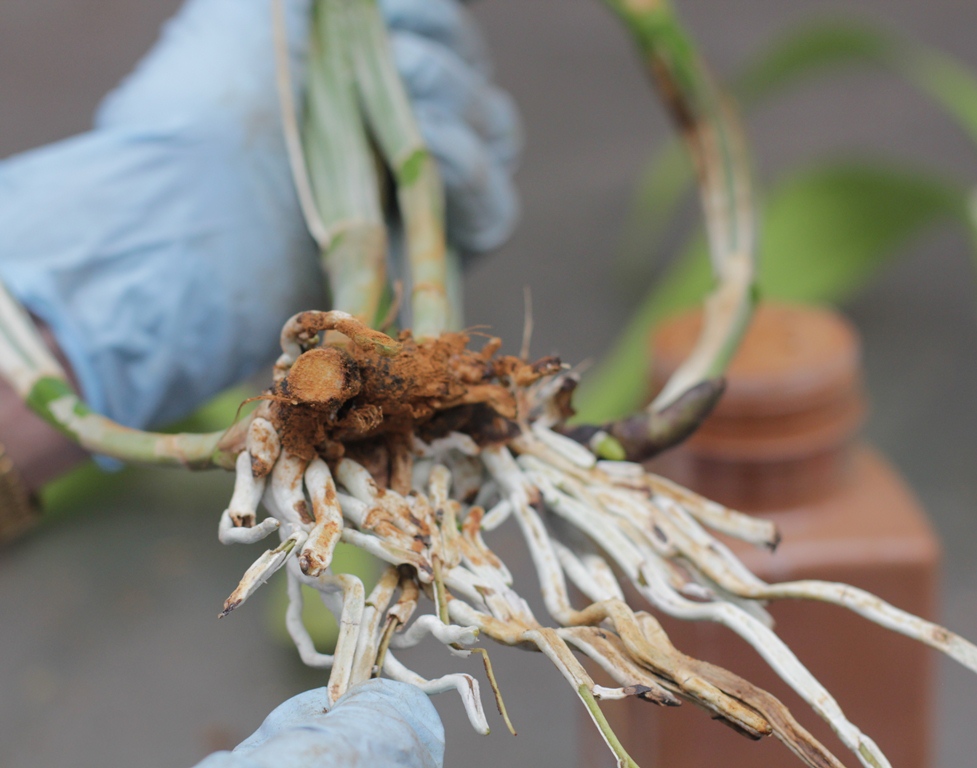
Identify the youngest pseudobulbs
Indicators of young parts of the plant that will grow and bloom are swelling buds or new shoots emerging from the base of existing pseudobulbs, plump green pseudobulbs and healthy, white roots.
|
|
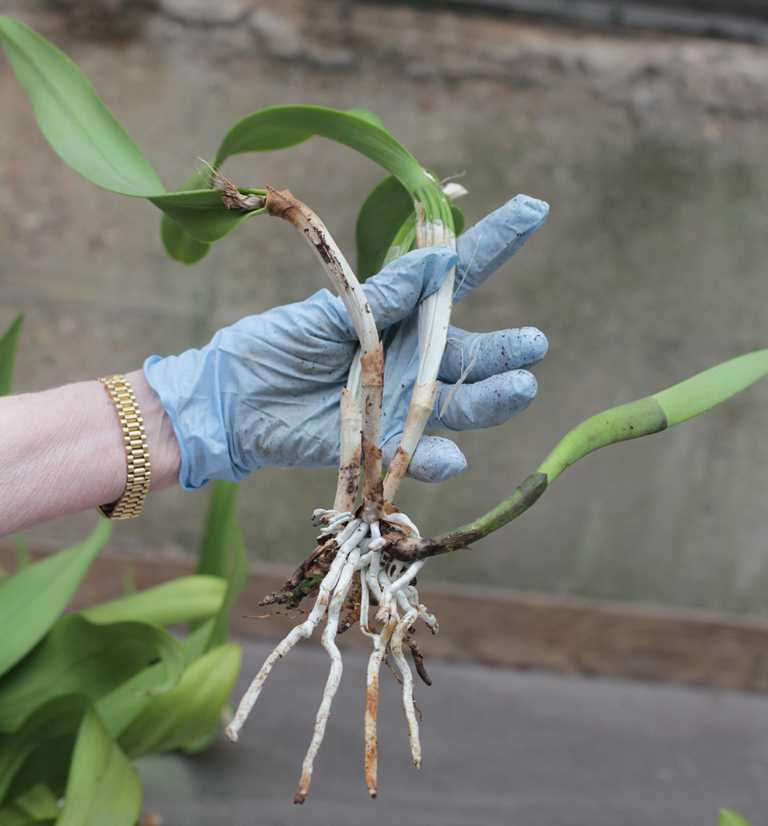
Section with three healthy pseudobulbs
|
Separate sections with living pseudobulbs
Using your hands pull apart the rhizomes keeping at least 3 young pseudobulbs (3 sets of stems with leaves) in each section. Any section with fewer than 3 pseudobulbs is unlikely to survive.
|
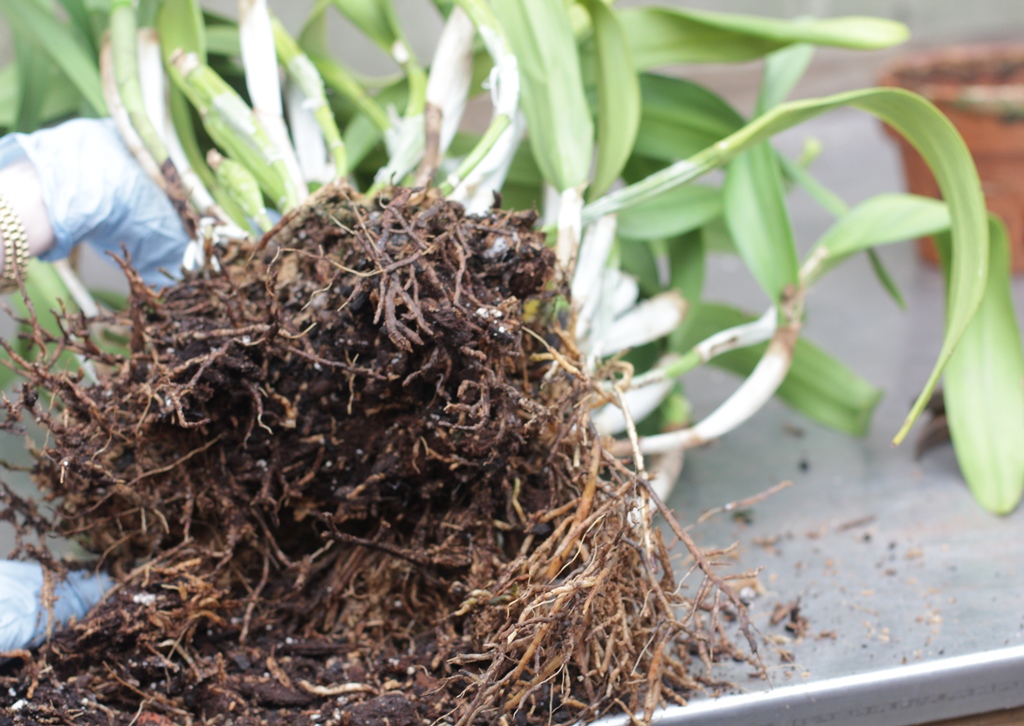
Green leaves do NOT mean healthy roots
Discards |
Discard old sections
Discard all sections of the plant that lack healthy roots and do not have plump buds ready to grow or new, developing shoots. Also, discard healthy sections that have fewer than 3 healthy pseudobulbs.
|
 |
Keep only the young healthy sections
Keep sections with 3 or more healthy pseudobulbs.
|
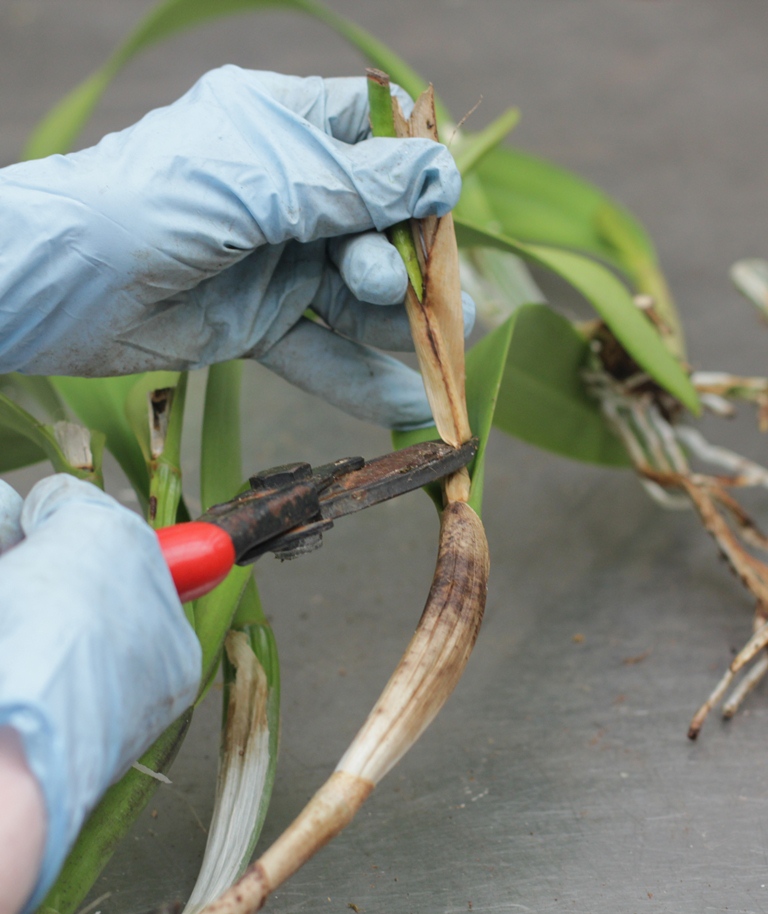 |
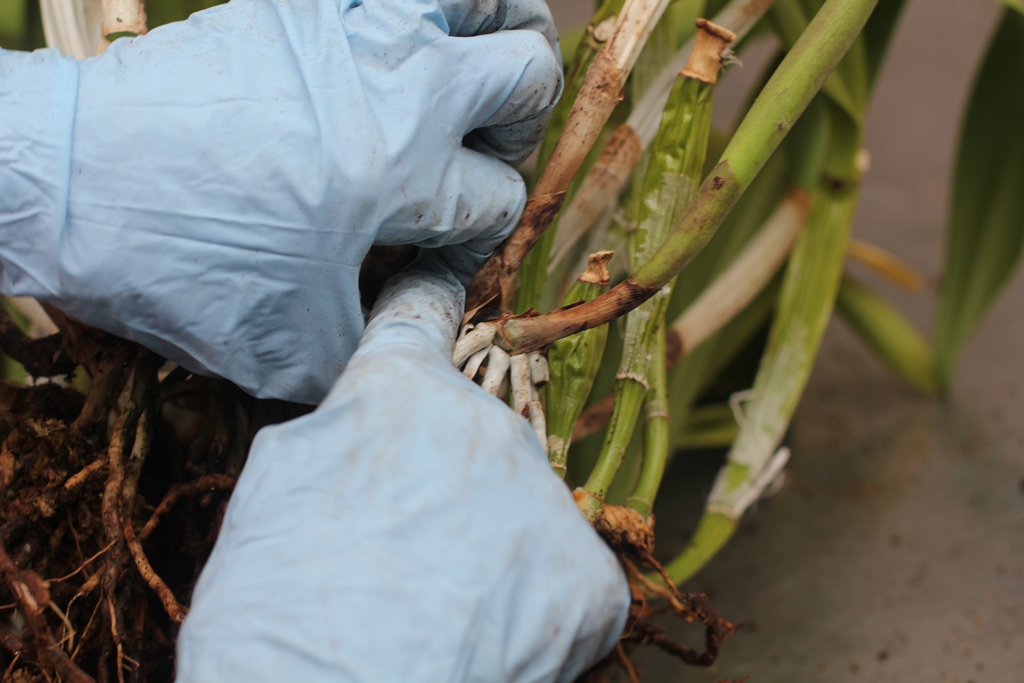
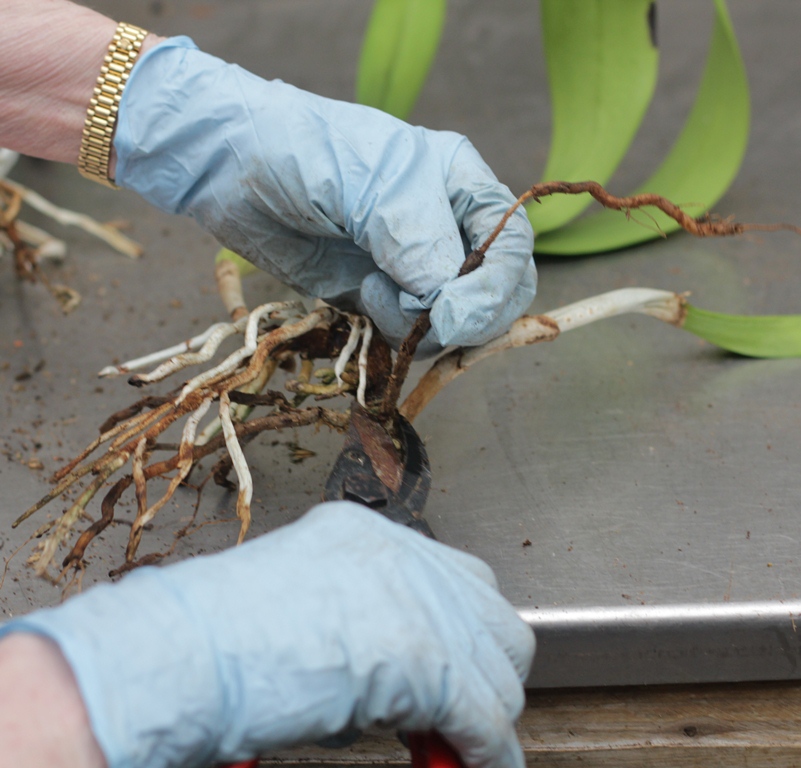
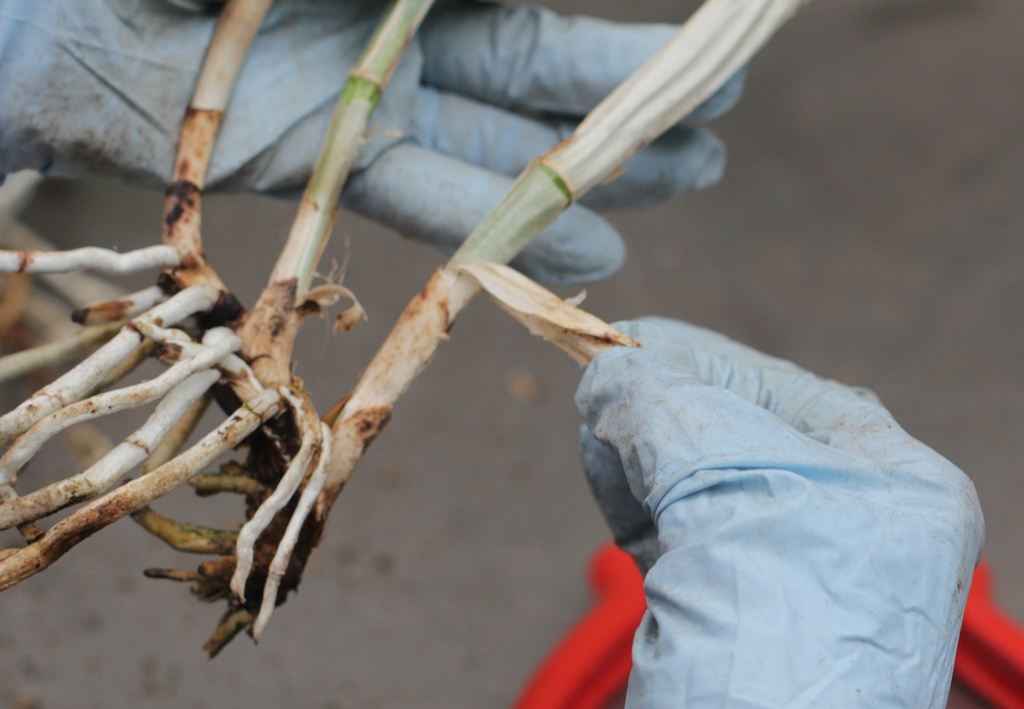
Remove dead roots and shoots
Using a new razor blade or sharp pruning shears, cut off all dead tissue from roots. If in doubt of what is dead or alive, gently squeeze the roots. Dead roots are hollow when squeezed or look wiry. Live tissue is solid. If the entire root is dead, remove the entire root.
|

Cleaned pseudobulbs |
Remove dried leaf sheaths
Using your hands, peel off the papery, tan or brown sheaths covering the pseudobulbs. Avoid injuring the pseudobulbs. Stripping off the dead tissue improves the appearance of a plant and removes hiding places for insects. This can be done at any time, not just when repotting.
|
 |
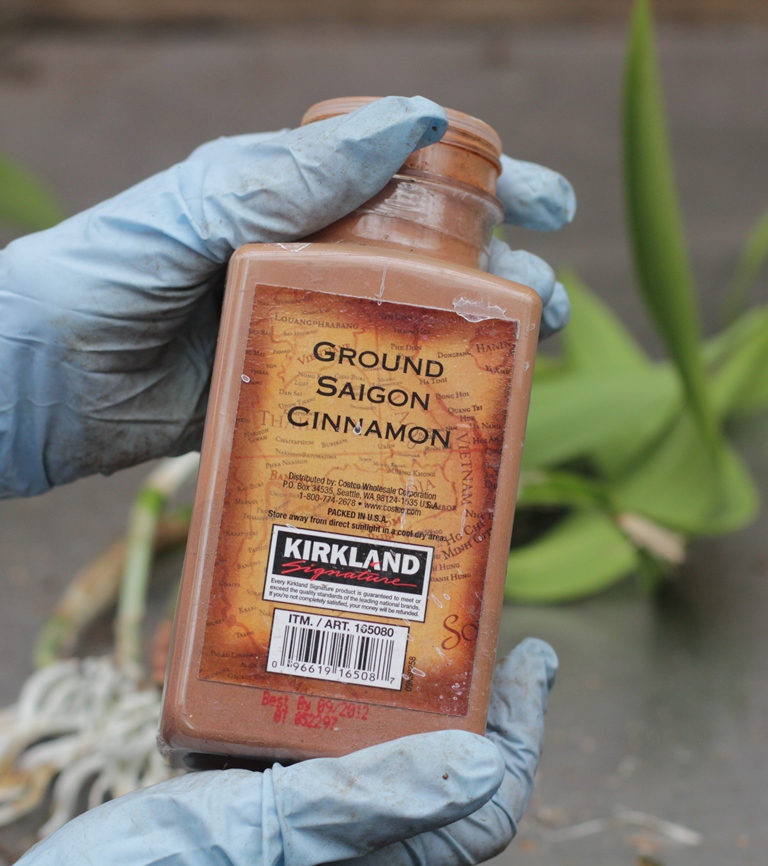
Apply cinnamon to all cuts and abrasions (optional)
Many orchid growers have found that cinnamon has anti-bacterial and anti-fungal properties which reduces the chance of rots developing at the cuts.
|
 |
Prepare the pot
Cover the bottom of the pot with a thin layer of the premixed potting medium.
|

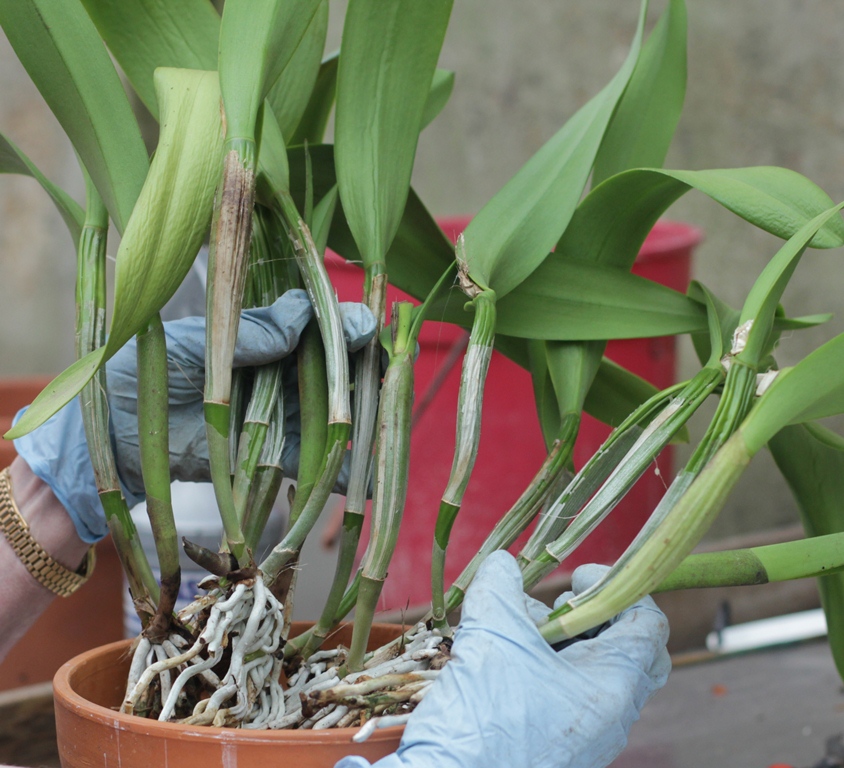 |
Position the rhizomes in the pot
Position the oldest part of each clump against the side of the pot, so that the new growth can expand inward and “march across the pot.” New buds should be positioned just above the level of the potting medium.
Each clump of stems can be placed in separate smaller, appropriate-sized pots or all the clumps can be potted together to increase the number of new pseudobulbs being produced, which results in a showier display at bloom time.
|
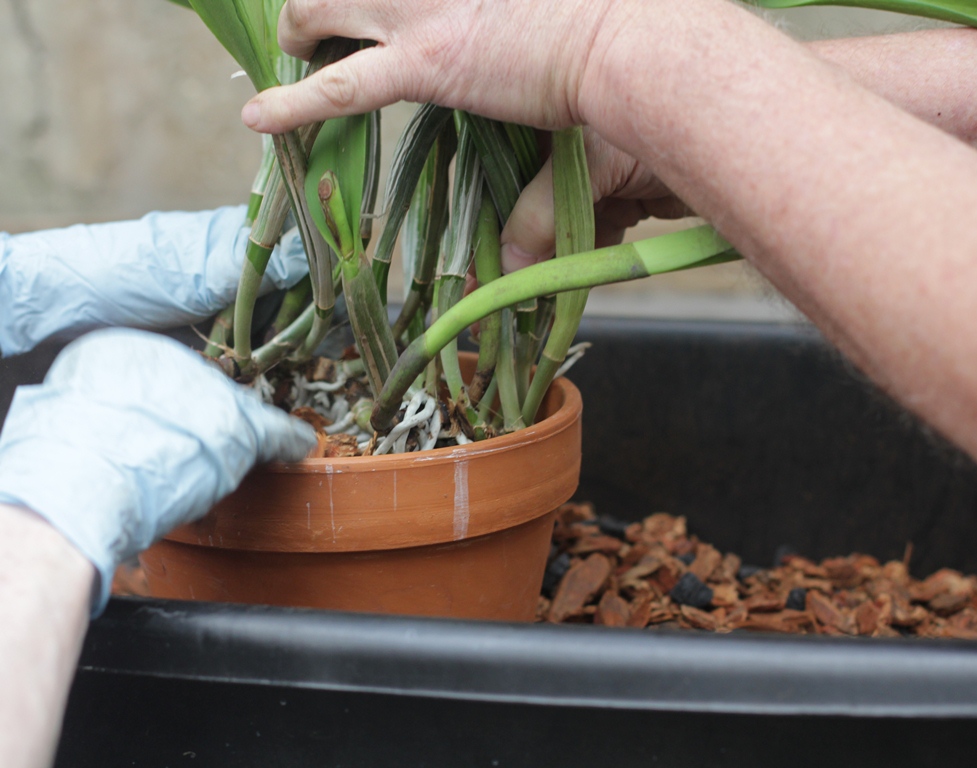 |
Fill with potting medium
This is where that other pair of hands really comes in handy. It is very difficult to hold the plant in place and fill the pot with potting medium, especially when multiple sections of rhizomes are being placed in the same pot. While a helper holds the pseudobulbs in place, gently place or push potting mix into air spaces around roots, leaving no air pockets. Continue until the level of the potting medium is just below the rhizomes leaving the new buds exposed.
|
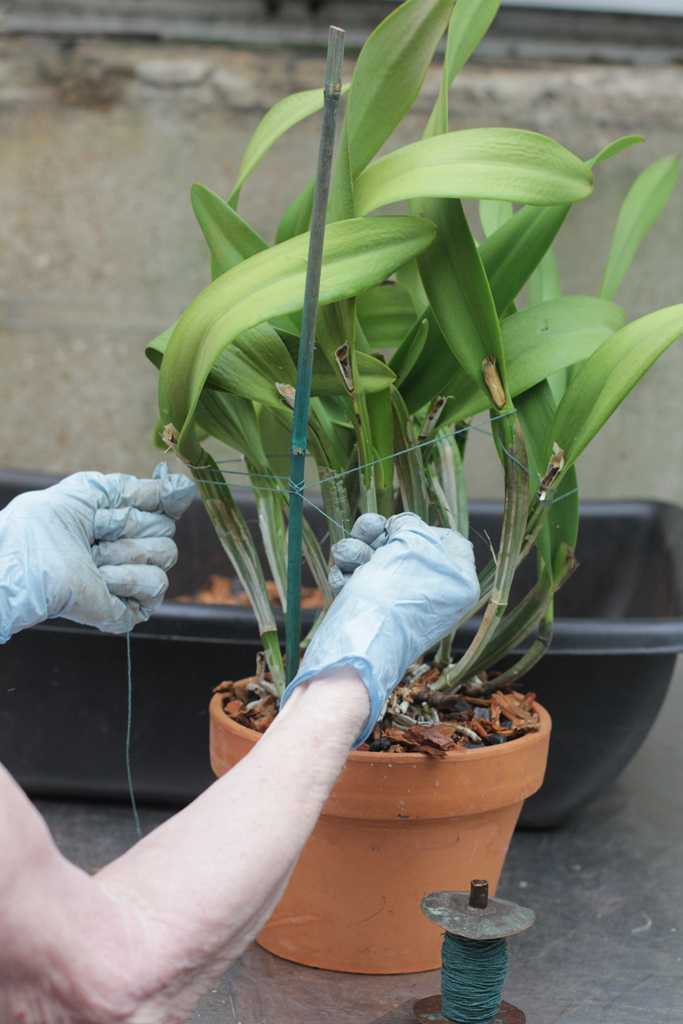 |
The big hug
This step requires a stake, string or thin twine and scissors. Green string or twine is preferable because it blends in better with the green foliage.
To stabilize the plant, place a stake in the side of the pot opposite the new growth. Tie the string or twine to the stake. Then wrap the twine in and around the tops of the pseudobulbs, where the leaves emerge. Tie off securely at the stake and cut off excess twine. Do not tie the plant too tightly.
|
 |
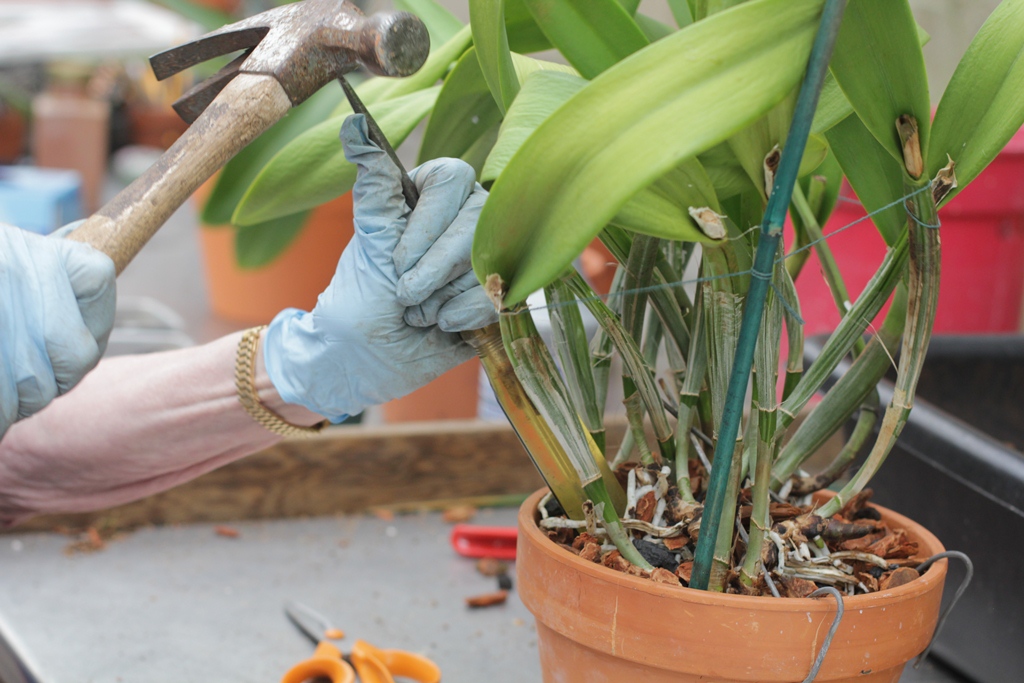
Install rhizome clips
Metal rhizome clips are used to further stabilize the plant while new roots are forming. Lay a clip lengthwise across the top of the potting medium in the clear spaces between pseudobulbs. Position the clip end atop the rim of the pot. Then, hammer it down, securing it to the rim of the pot. Repeat in another part of the pot if necessary. Two clips may be needed depending on the size of the pot. For a smaller plant, one clip will be sufficient.
|
 |
Firm the potting mix
After the rhizome clips are secure, place the handle end of the screwdriver against a plant free section of the potting medium and tap the driver end of the screwdriver with the hammer. The purpose is to eliminate air pockets in the potting medium and further stabilize the plant. Fill any valleys in the top of the potting medium with more potting medium and tap down with the screwdriver and hammer.
|
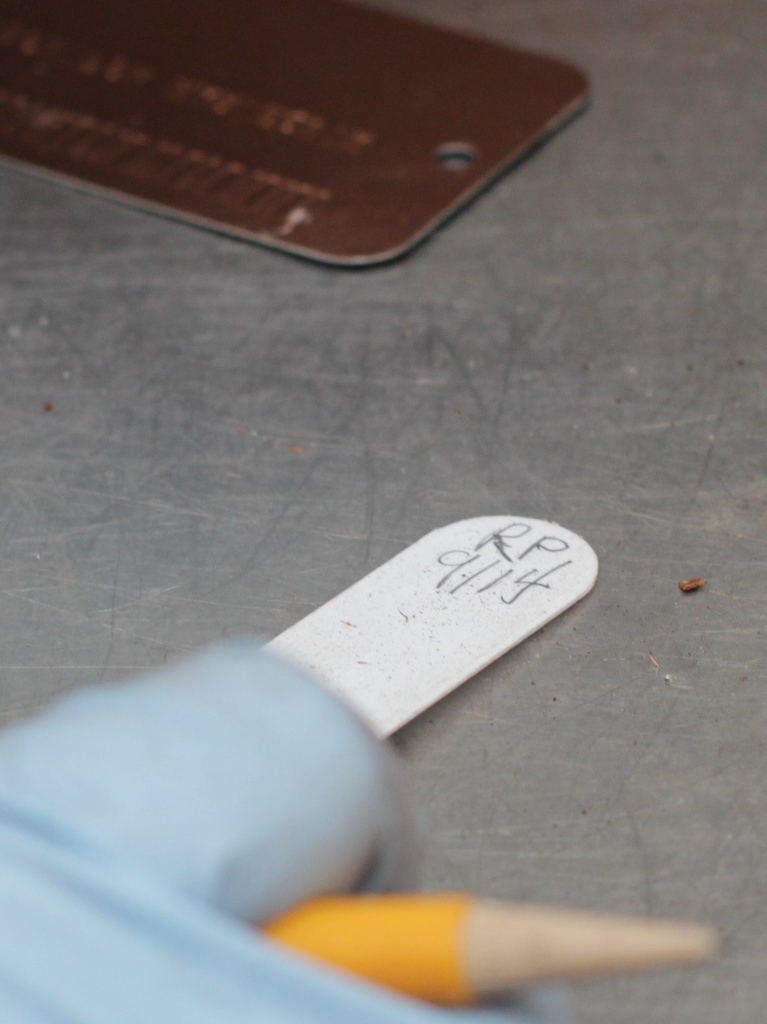
RP 9/14 = Repottted September, 2014 |
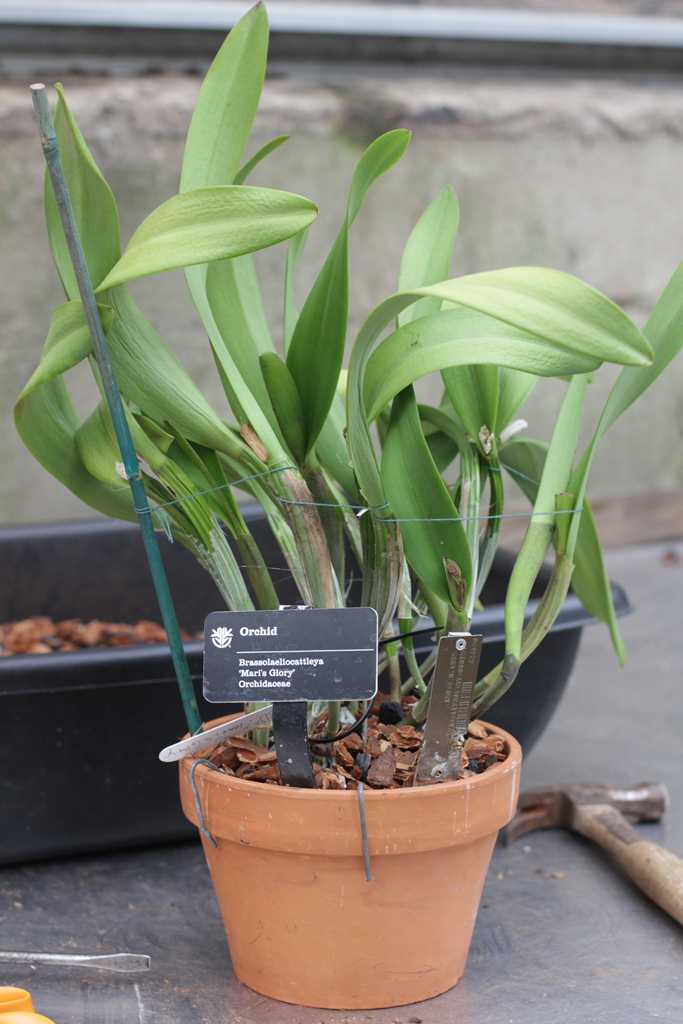
Label the plant
All plants should be labeled with the complete Latin name. Although still lovely, a plant without a label is valueless in the trade. Knowing the Latin name of a plant can also help if problems or questions arise.
A great help in maintaining orchids is writing on the label the month and year of repotting. It can also help to include the date that the plant bloomed. If it has not bloomed in three years, it may be time to pitch it or give it to a friend who may have more suitable growing conditions.
Loosely attach the label to the plant or insert it along the inside rim of the pot. This prevents the label from getting lost or separated from the plant. Never discard the original label.
Serious orchid growers also maintain a log book to record flowering and repotting dates, as well as when and where the plant was acquired.
|
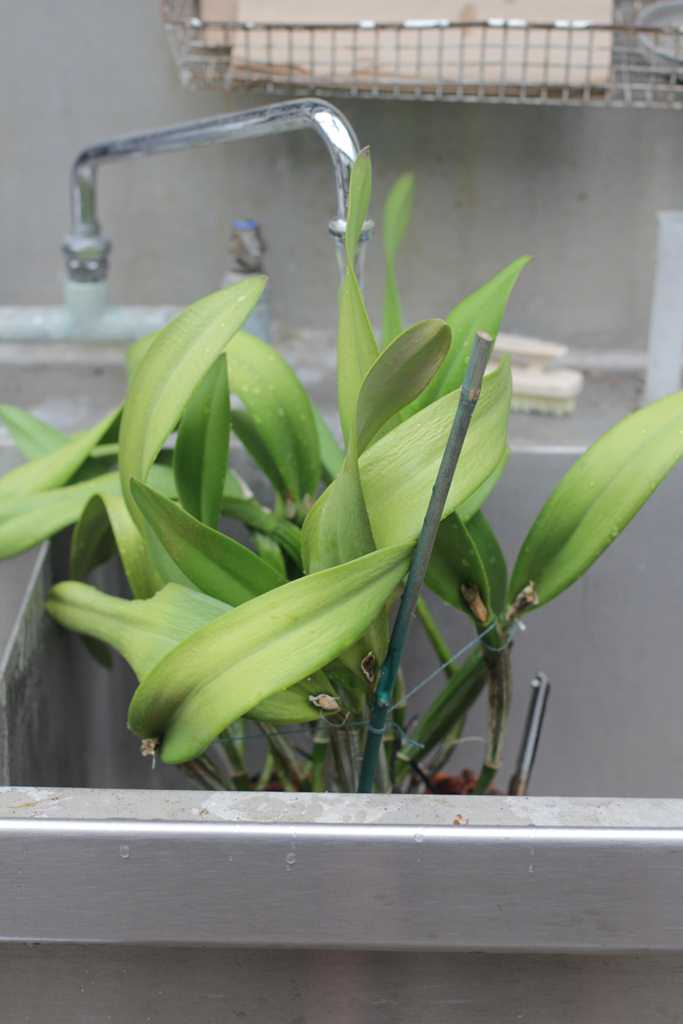 |
Water
Be sure to water the plant thoroughly after repotting. Tepid water is best; cold water will harm the roots. Tap water can be used if not too cold. One method is to soak the plant, pot and all, in a bucket of tepid water for an hour or so.
NEVER use ice cubes to water orchids or any other plant. All plants prefer tepid (room temperature) water, especially tropical plants. Ice can injure roots and stems, leading to root rot and eventual death of the plant, just as an early frost in Spring can kill tender plants outdoors. Furthermore, when watering, water thoroughly, getting all the potting medium moist; allow it to drain completely; then discard any water left in the drip pan.
|
 |
On-going maintenance
For information on the day-to-day care of orchids, see the Kemper Center Factsheet “Orchids: Culture.”
For pests and problems with orchids, see the Kemper Center Factsheet “Orchids: Problems.”
|