What do you do when an indoor plant has grown too tall for your home? One way to deal with this is to do what is called air-layering. In effect, you are causing an above-ground section of a plant to form roots while it is still attached to the mother plant so that it can be removed and repotted. There are two general methods used: one for monocot plants and another for dicot plants. Monocots are plants such as dracaenas (Dracaena) and dumbcanes (Dieffenbachia). They can often be recognized by narrow leaves with parallel veins. Dicot plants, such as, figs and India rubber trees (Ficus), have netted veins. Click here for more information on monocot and dicot plants. This guide covers how to air-layer a monocot. See also, how to air-layer a dicot plant.
|
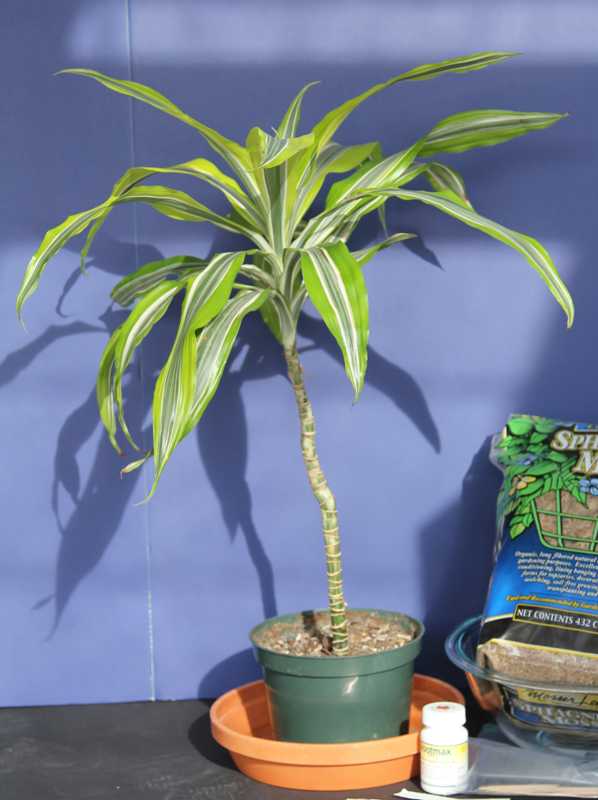
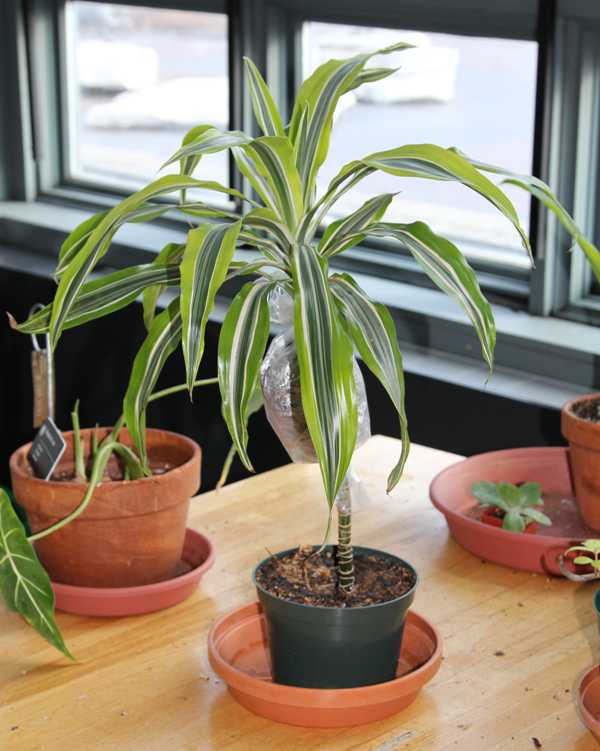
Select a plant Select a plant that is too tall or that you want to propagate. |

|
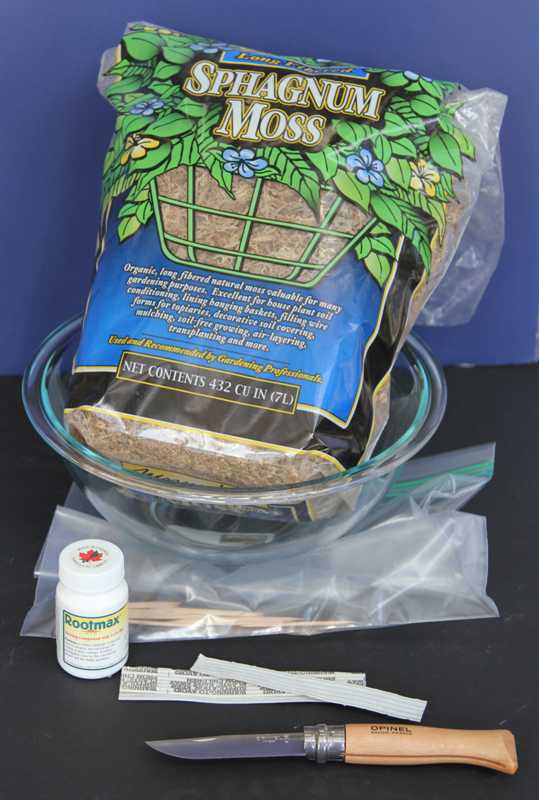
Assemble the materials
For air-layering you will need the following materials:
1. Unmilled (long-strand) sphagnum moss
2. Tepid water
3. A container to hold water and sphagnum moss
4. A sharp, sterile knife
5. Toothpicks
6. Rooting hormone
7. Clear plastic
8. Twist ties |
|
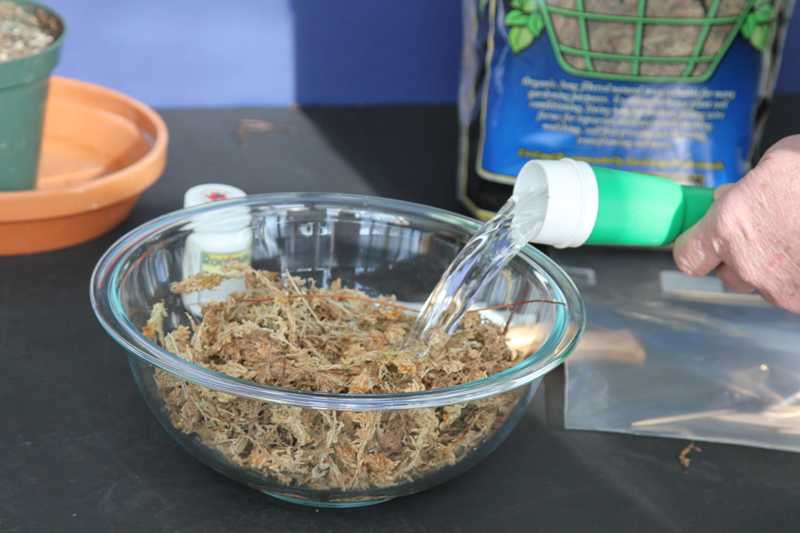
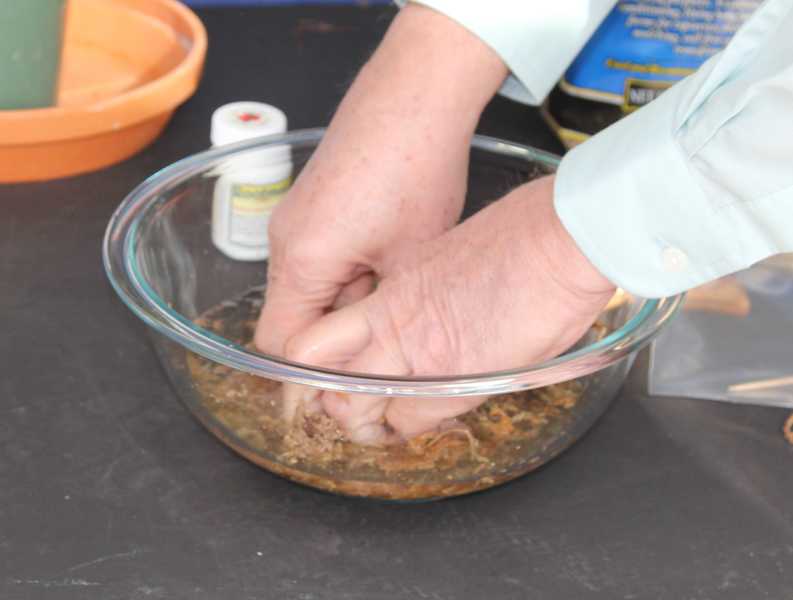
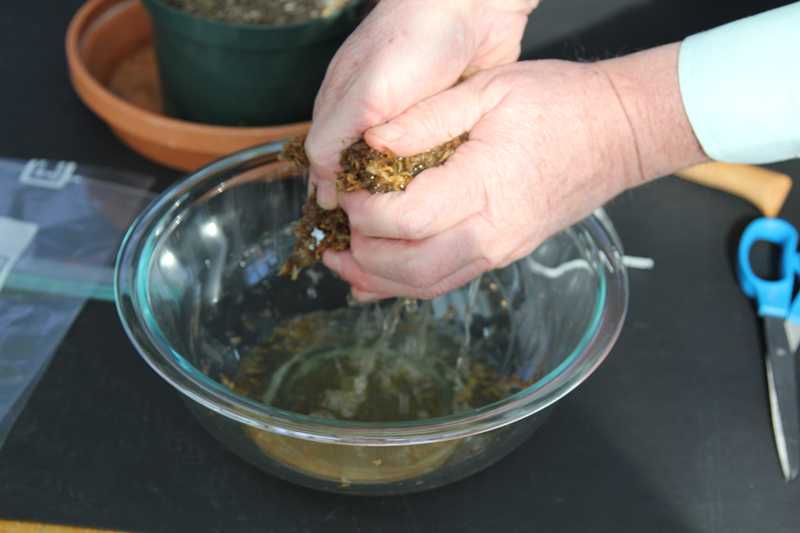
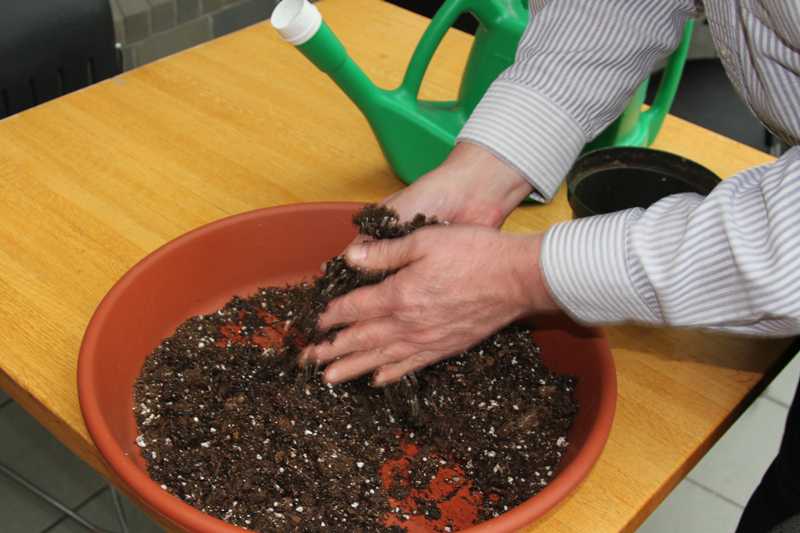
Soak the sphagnum moss
Place the sphagnum moss in a bowl and cover with water. Squeeze the moss a few times to help it absorb the water. Let it soak while you prepare the plant. |
|
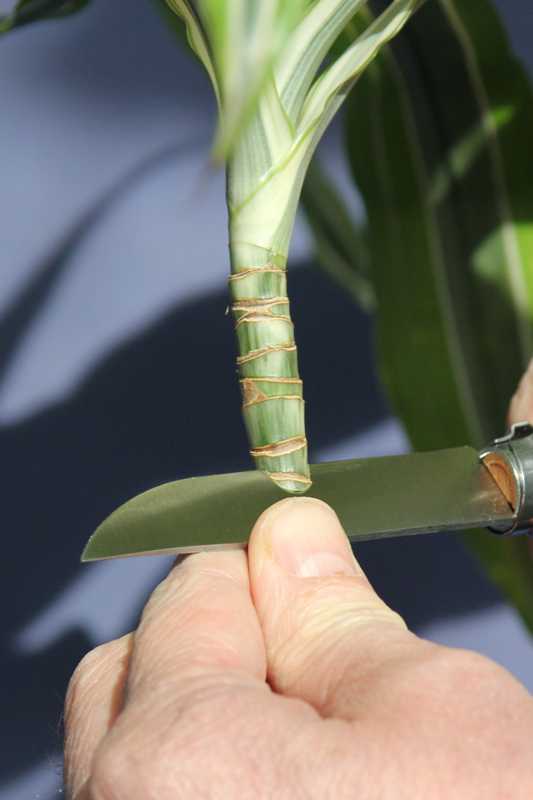
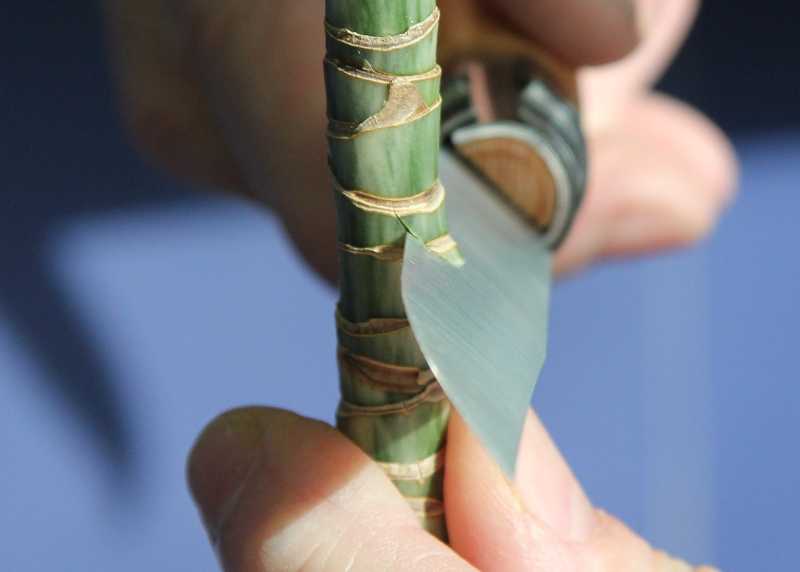
Cut the stem
At the location where you want roots to form (usually 6-12 inches below the tip of the plant) carefully make a slanting cut about ½ the way through the stem. Be careful that the knife doesn’t slip and cut all the way through the stem. Part of the stem must remain attached to provide water and nutrients from the mother plant to the section above the cut. |

|
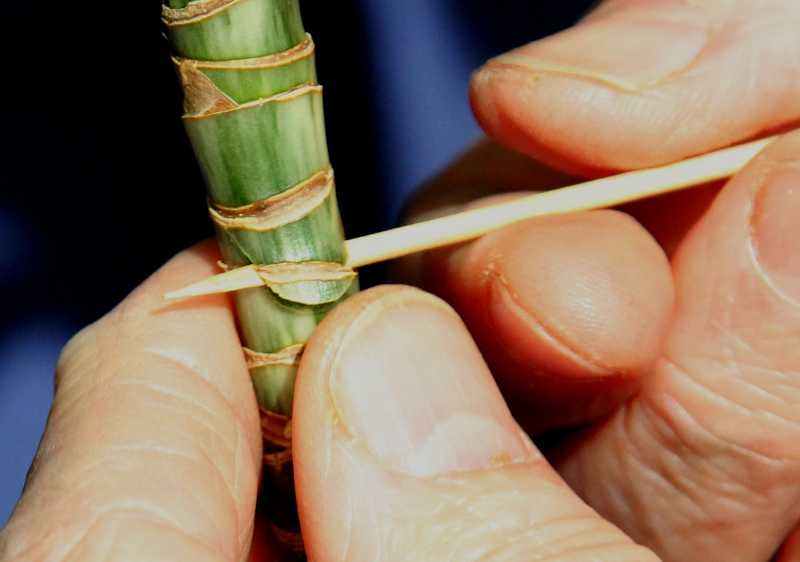
Force the cut to stay open
Insert a toothpick into the cut to keep it open and prevent the two cut sides from growing back together. If this happens, rooting may not take place. You need to interrupt the flow of nutrients and hormones down the stem at the top of the cut. This will cause roots to form at this point.
Remove the excess length of the toothpick.
|
|
|
Apply the rooting hormone
To encourage roots to form, place rooting hormone in the slit and work it all the way back into the cut. Roots will form on the stem just above the slit.
|
|
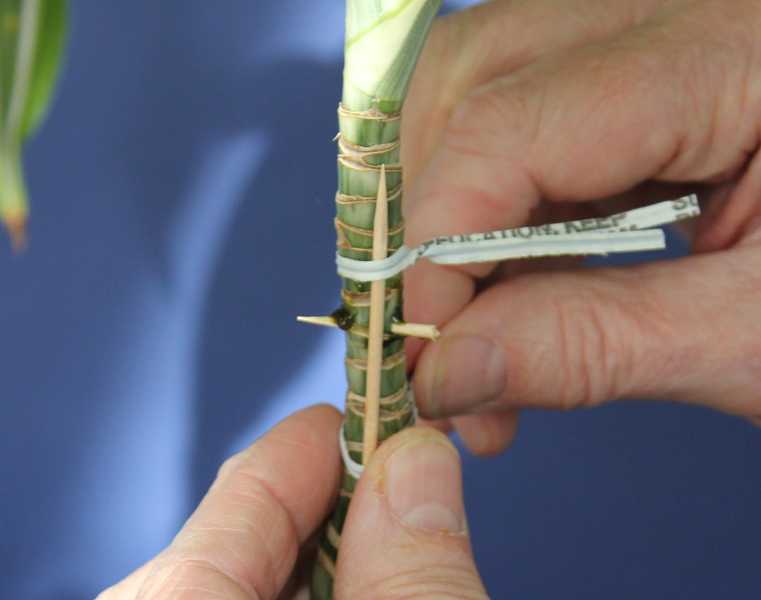
Support the cut stem
If the stem has been weakened by the cut, there is a chance that it could break. Support it with a splint, such as, a toothpick for small stems or a popsicle stick for larger stems. In this example, the dracaena stem is small so a toothpick is sufficient. Use twist ties to hold the splint in place.
|
|
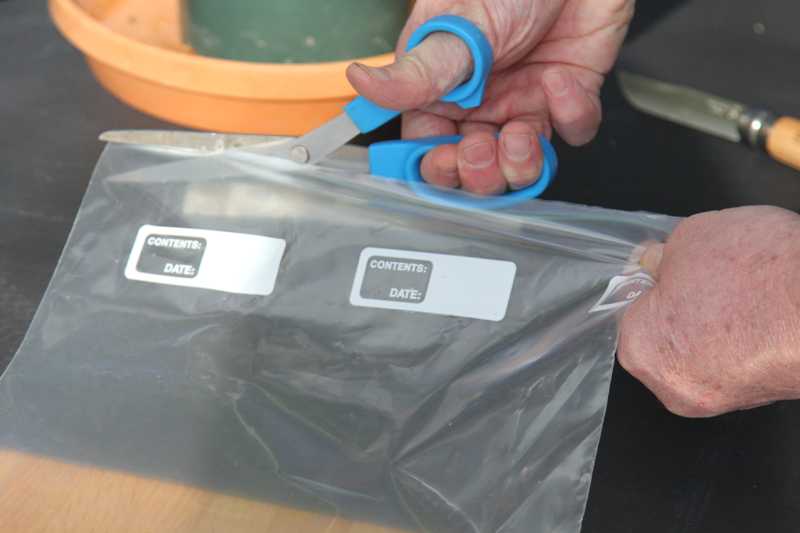
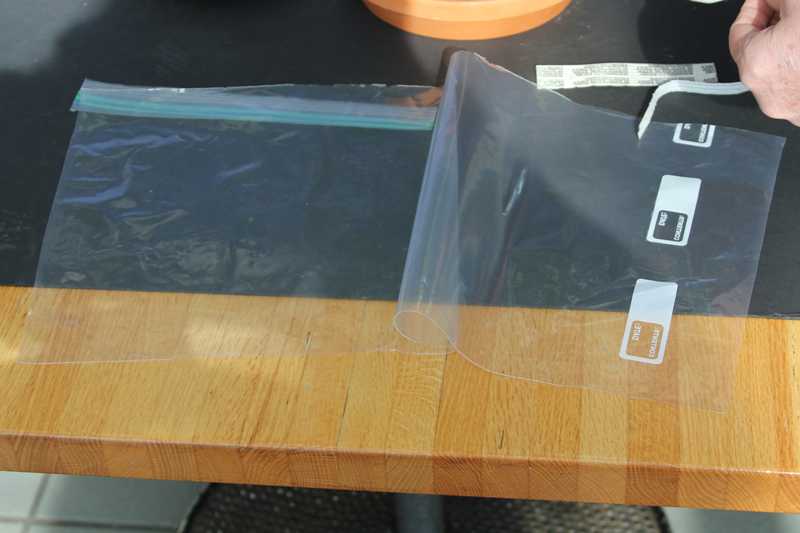
Prepare the plastic cover
Cut a piece of plastic to form a flat sheet about 12 inches by 18 inches. Here, a plastic bag is being used. Remove the top and slit down the sides leaving the bottom intact. Fold out to make a flat sheet.
|

|
Surround the cut stem with sphagnum moss
Take a handful of the wet sphagnum moss and squeeze out the excess moisture so that it is still damp but not dripping. Form it into a ball. Open up the ball in your hand and surround the stem with the damp sphagnum moss so that the sliced stem is in the center of the ball. Close the sphagnum moss around the stem.
|


|
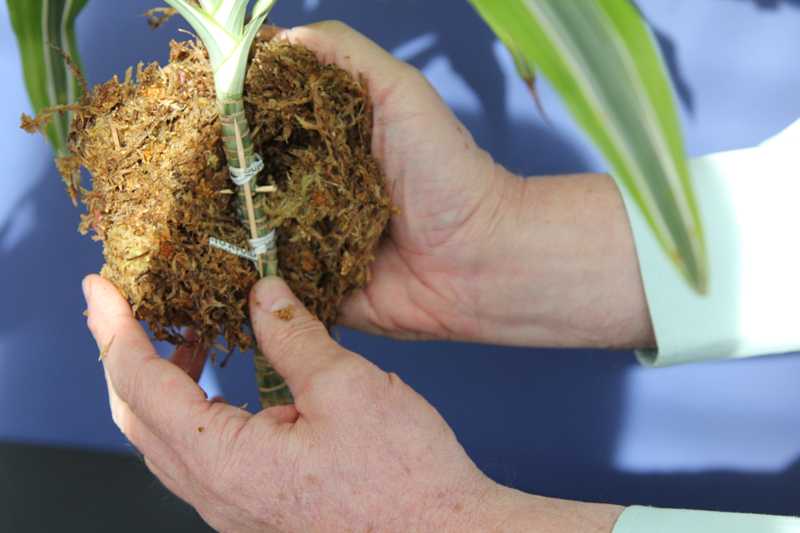
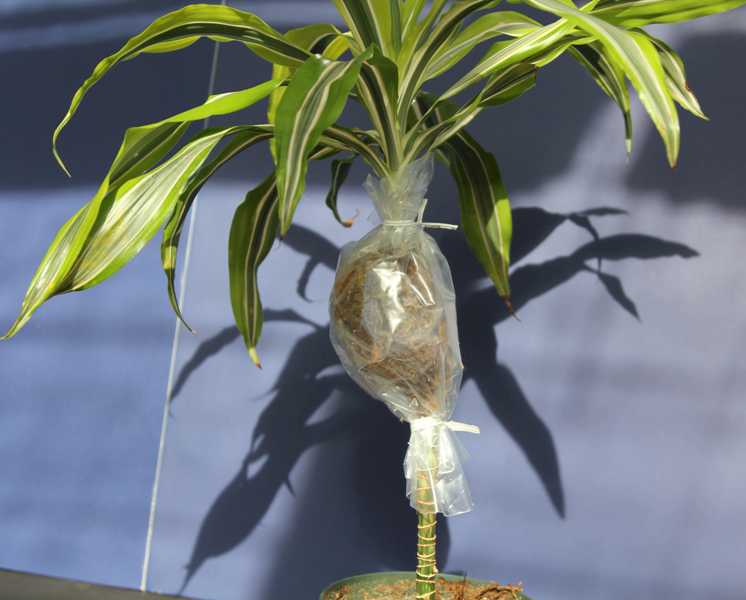
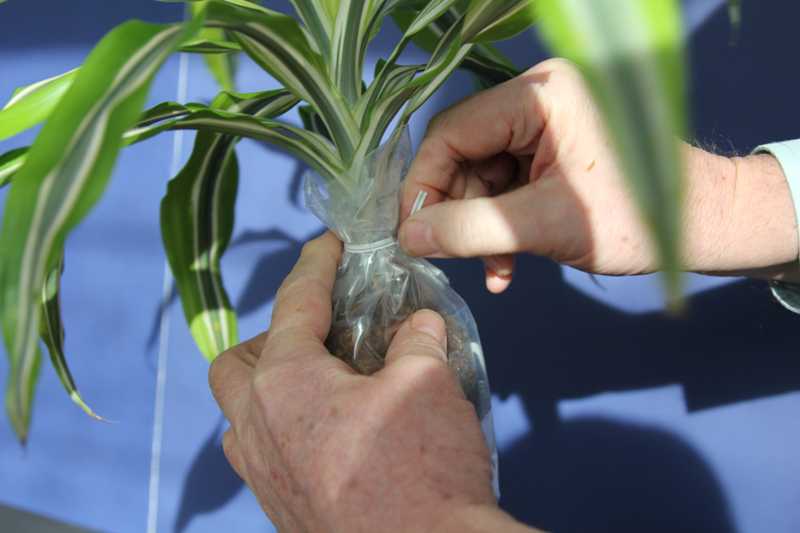
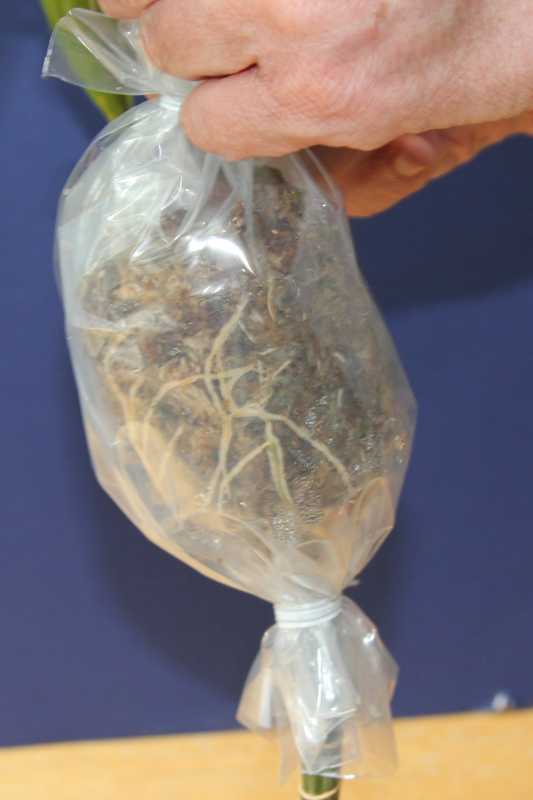
Provide a constantly moist environment
While holding the sphagnum moss in one hand, wrap the plastic around the sphagnum moss so that it is fully enclosed in the plastic. Tuck any loose sphagnum moss that is sticking out the bottom back into the ball inside the plastic and put a twist tie around the bottom of the plastic wrap. Tuck in any loose sphagnum moss sticking out the top and put a twist tie around the top. Make sure that none of the sphagnum moss is poking out. If it is, it will act like a wick and the sphagnum moss will dry out more quickly.
|
|
Return the plant to its usual growing location
Return the plant to its usual growing location and monitor weekly.
|
|
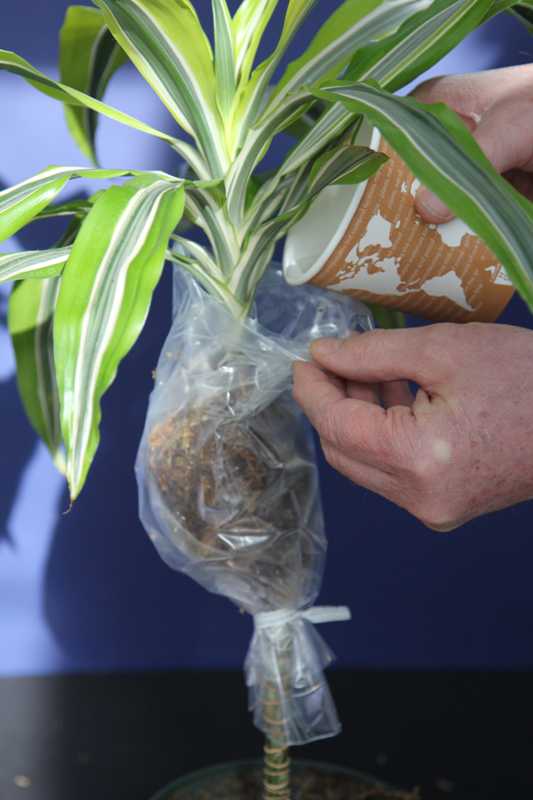
Monitor the moisture level in the sphagnum moss
If the sphagnum moss starts to dry out (the color will change from brown to a light tan), open the top twist tie and add some water, then re-seal.
|
 |
 |
| Not enough roots |
Sufficient roots |
|
When roots have formed
It will take 1-3 months for rooting to take place; some plants may take longer. Do not remove the air-layered plant when the first root appears (left photo) but do add water regularly as the roots will absorb moisture from the sphagnum moss.
Wait until abundant roots are seen growing through the moss and encircling the plastic (right photo) before removing the air-layered plant.
|
|
Materials needed to complete the project
1. Pruning shears
2. A pot slightly larger than the root ball
3. Potting soil
4. Water
|
|
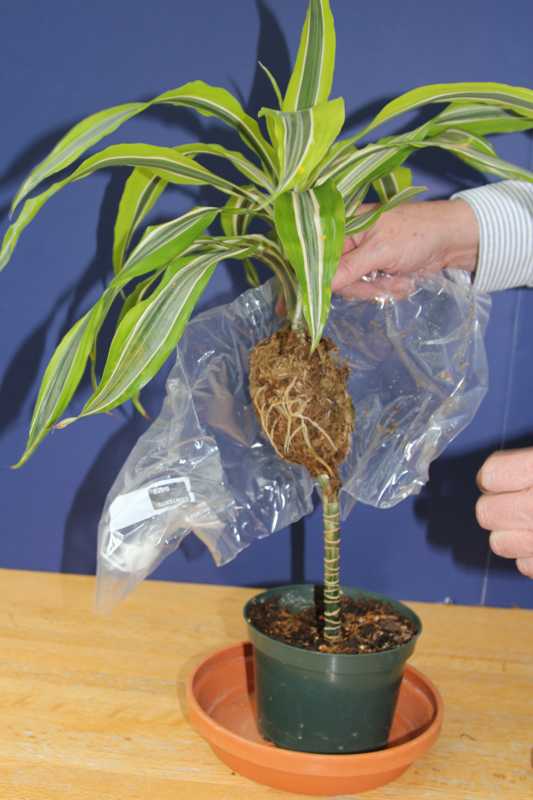
Remove the plastic
Take off the twist ties securing the plastic to the stem and remove the plastic from the root ball.
|
|
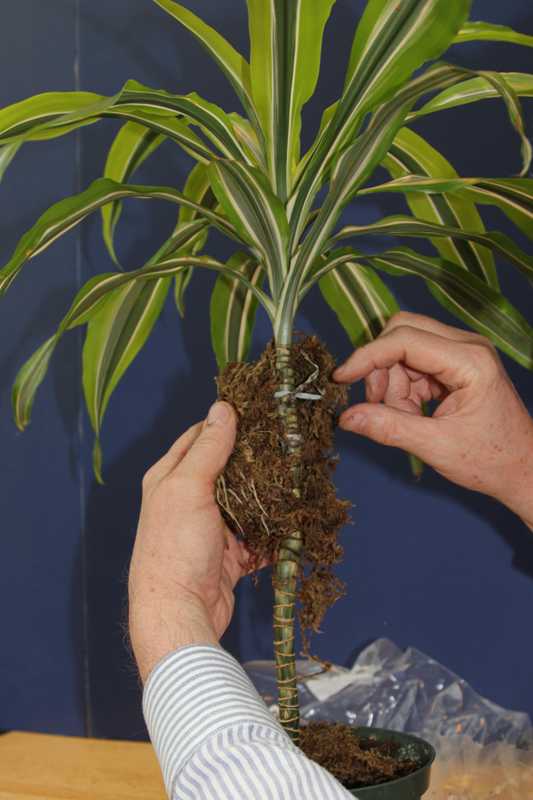
Remove the toothpick and twist-ties
Gently open the ball of sphagnum moss to reveal the toothpicks (or other support). Remove the twist ties securing the toothpick to the stem. Then, remove both the supporting toothpick and the toothpick forcing open the wound.
|
|
|
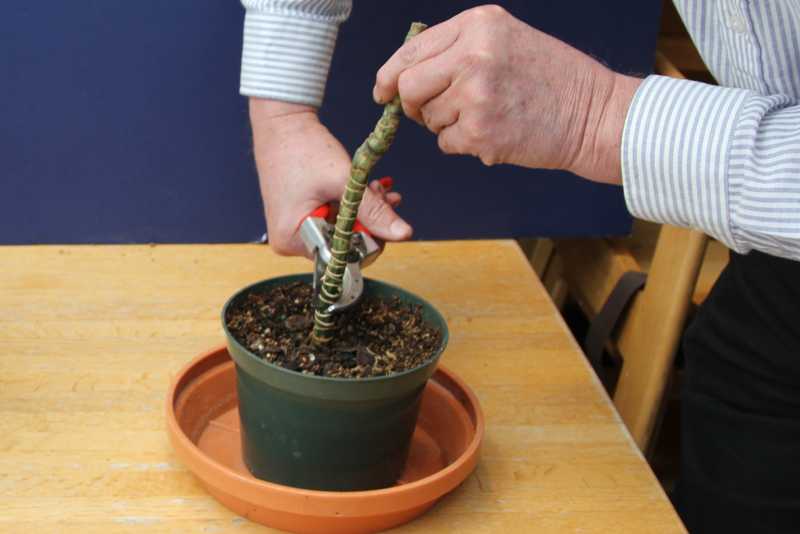
Separate the air-layered plant
Sever the stem just below the point where the roots have emerged.
|
|
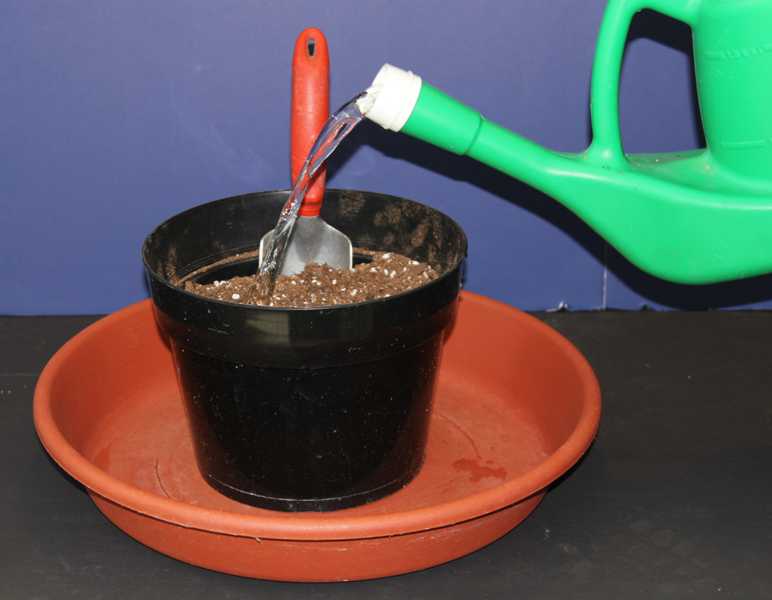
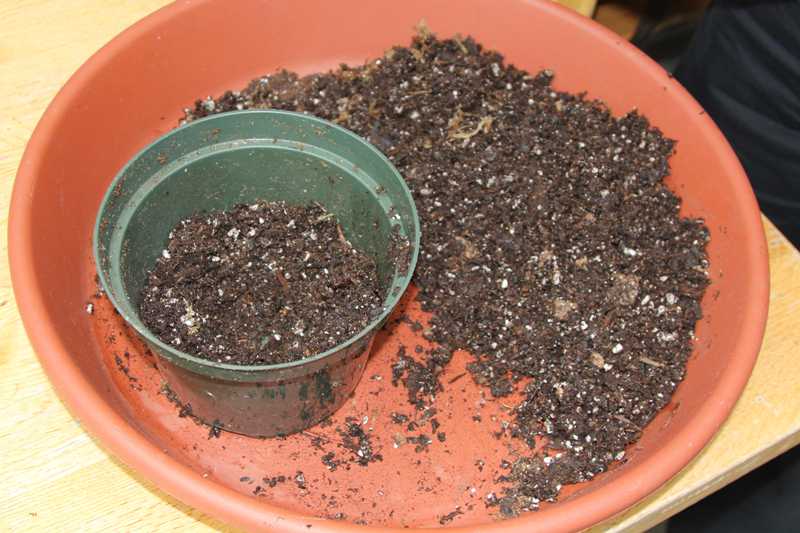
Moisten the potting soil
Moisten the potting soil so it is uniformly moist but not soaking.
|

|
Pot up the air-layered plant
Place enough moist soil in the bottom of the pot to raise the plant to about an inch below the rim of the pot. Place the air-layered plant on top of the soil and gently spread the roots away from the sphagnum ball and over the soil. Fill in around the plant with more moistened potting soil, firming the soil as you go.
|

|
The new plant
The new plant is potted leaving about an inch of space at the top of the pot for water. Water the plant well to settle the soil around the roots.
|

|
What to do with the mother plant
Along the side of the stem of the mother plant are many dormant buds that are capable of growing and forming a new shoot. Usually the new shoot develops close to the top of the remaining stem. If you want the shoot to develop low on the plant cut the stem about one inch above the soil. Water sparingly. In time a new shoot will develop from the remaining stem. The removed stem can be cut into "log" cuttings and placed in a pot of potting soil to root and grow.
|
|
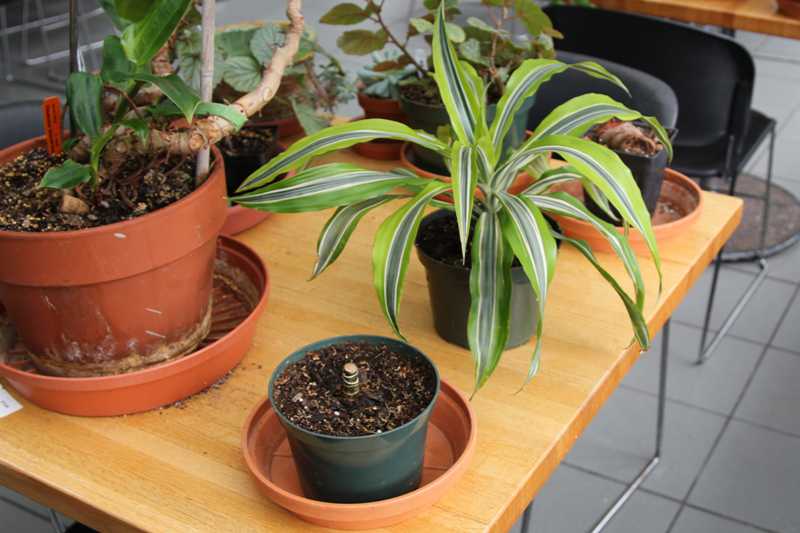
Mother and daughter ready to grow
Return the mother and daughter plants to their growng locations. Providing good, strong light for the mother plant that has been cut back will encourage a new shoot to develop.
|
|
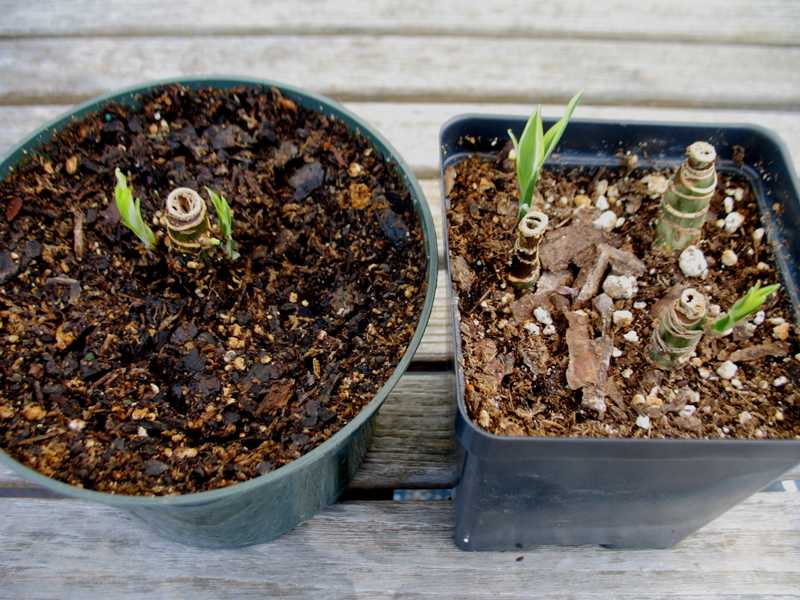
Mother plant and "log" cuttings starting to grow
After about two months the mother plant and log cuttings have started to send out new shoots. When the new shoots on the logs are well rooted each can be potted in its own pot.
|