|
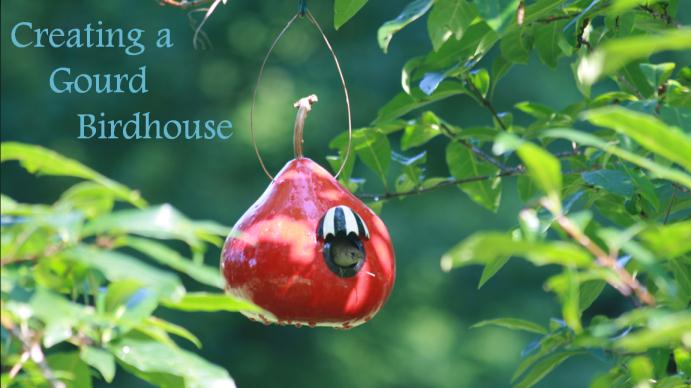
Creating a gourd birdhouse is a fun and simple project that is well worth the time and effort. Gourds make excellent homes for birds and they are naturally attracted to them. You can grow your own or simply purchase a dry, hard-shelled gourd. Birdhouse gourds are available almost everywhere that ornamental gourds are sold and some of the cleaning may even have been done for you.
|
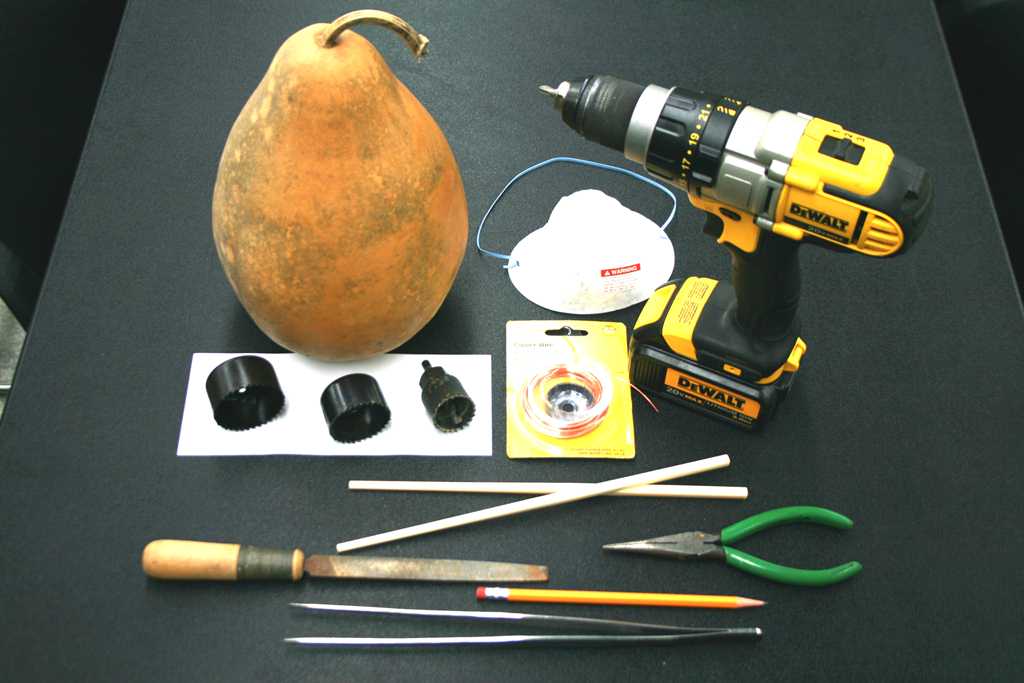 |
Supplies
Gather the following tools and supplies:
• Clean, dry, hard-shelled gourd
• Drill
• 1/4” bit and drill-mounted hole saw
• Chopstick
• Long-handled tweezers or needle-nosed pliers
• Small wood file
• Wire
• Pencil
• Dust mask
If you plan on decorating your birdhouse, you will need sandpaper, paints, brushes or other materials of choice and varnish.
For several methods on how to clean the exterior of a hard-shelled gourd see the following: How to clean a gourd - American Gourd Society
|
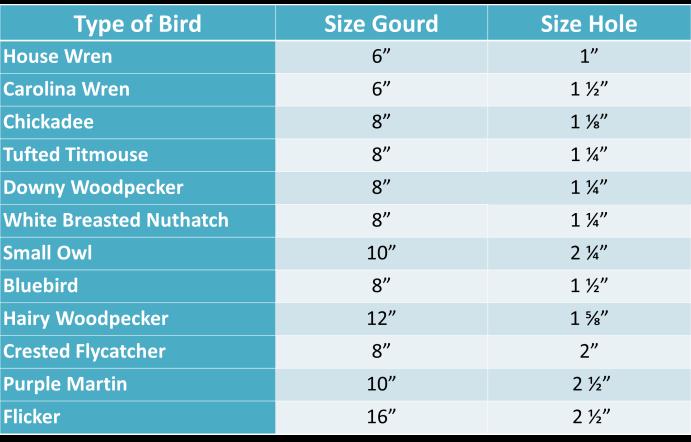 |
Birdhouse Size Chart
The size of the gourd and entrance hole will vary depending on the type of bird that you wish to attract. Refer to this chart from the American Gourd Society.
|
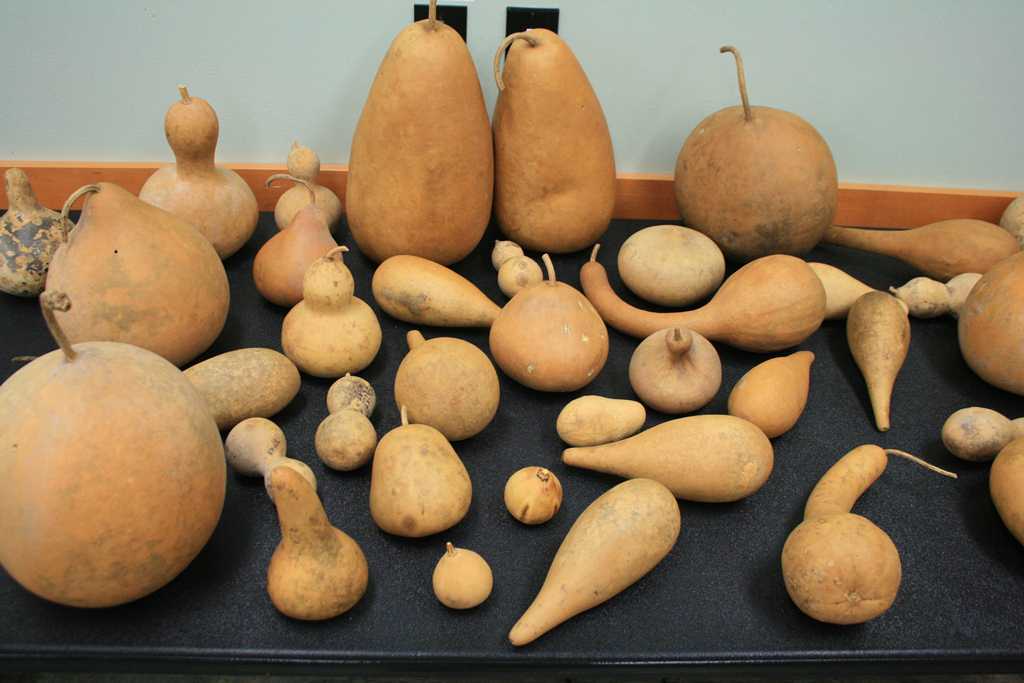 |
Selecting a Gourd
Choose dry gourds that have hard, firm shells. The gourd size will govern the kind of bird that will be attracted. The ball of the gourd should be large enough for a bird to turn around easily. Many birds delight in the long, deep cavity offered by some gourd shapes.
|
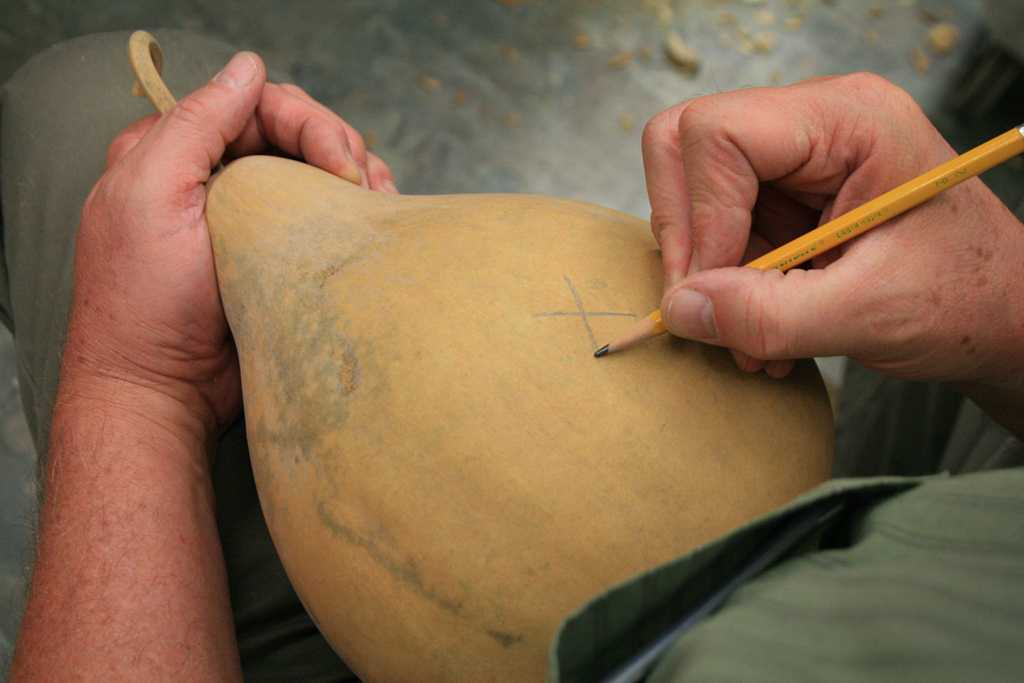 |
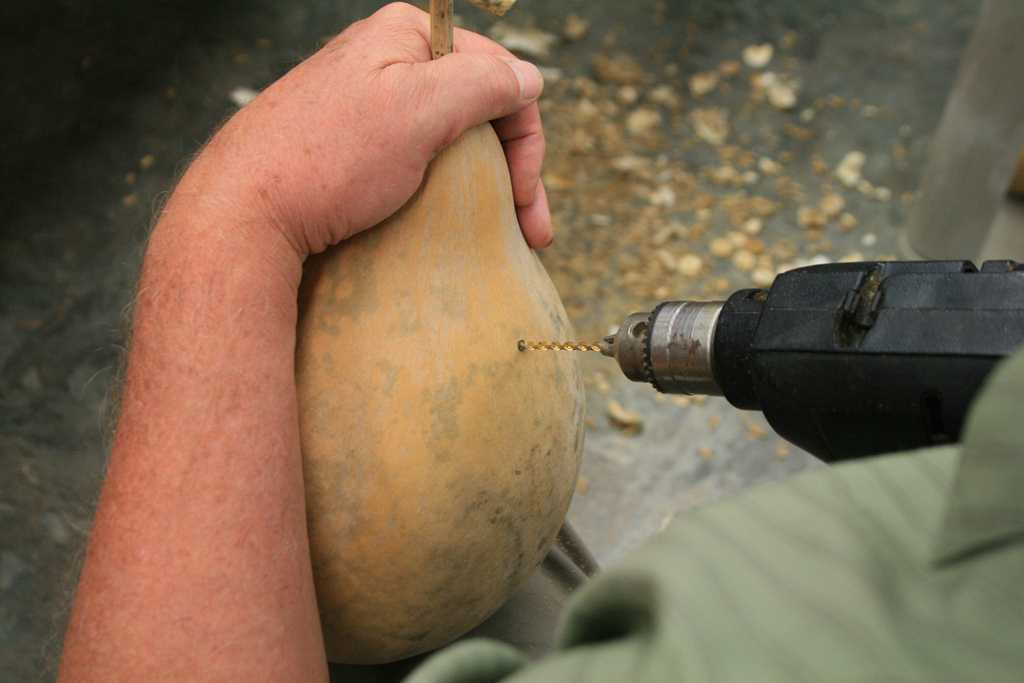
Mark the Entry Hole
To locate the best spot for the entrance hole, hold the gourd by its stem between your index finger and thumb and let it hang. Use a pencil to mark a center point along the outermost part of the curve so the hole faces straight out. Not toward the sky or the ground.
|
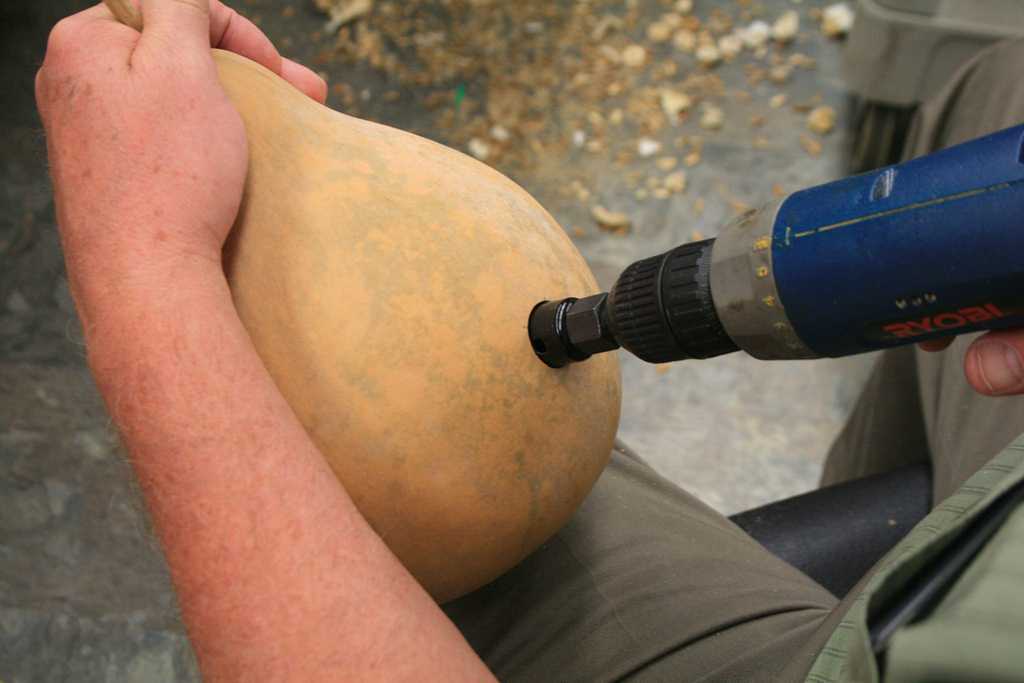 |
Drill the Entry Hole
Use a hole saw to drill the entry hole in the gourd. When drilling, it helps to brace the gourd against something so it doesn’t roll. Hold the gourd and the drill firmly, but you don’t need to use heavy pressure. If the hole does not come out clean, you can lightly smooth the ragged edges with a wood file. The texture and thickness of birdhouse gourds will vary. The harder the shell, the cleaner the cut.
Note: It’s important when making gourd birdhouses that you wear a facemask during the drilling and cleaning process, as the dust is a caustic substance.
|
|
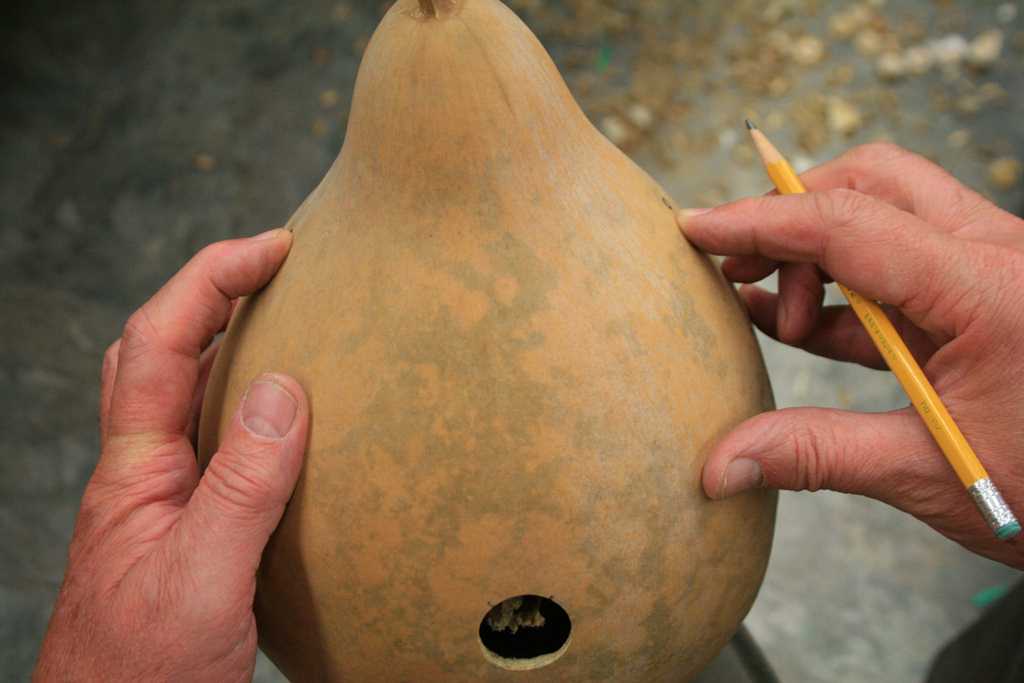
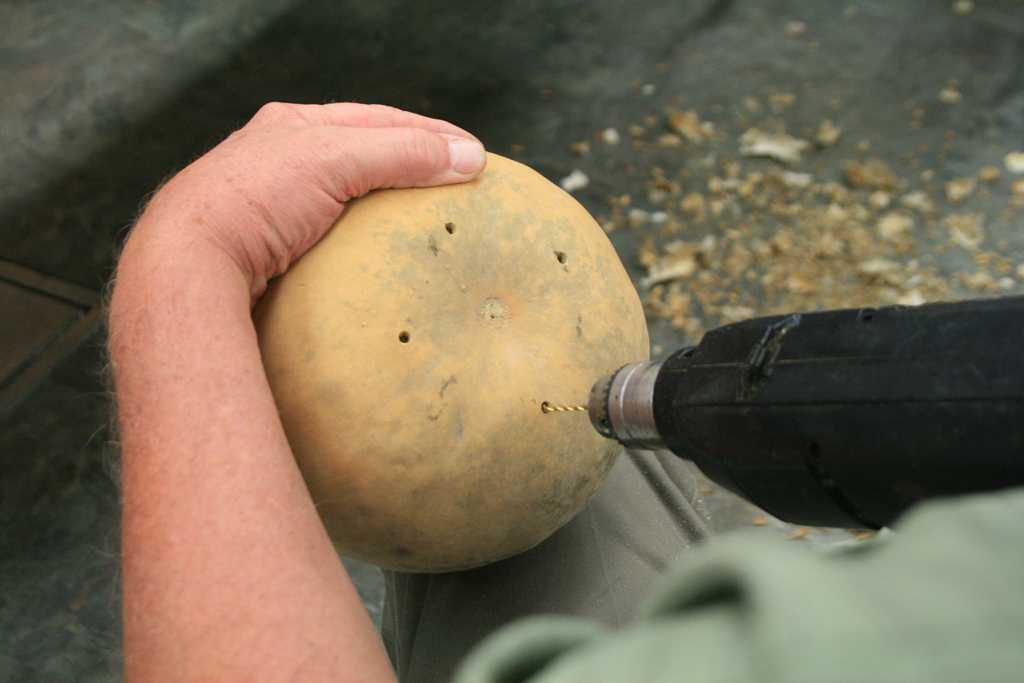
Mark Holes for Hanger and Drainage
Hold the gourd level and mark two holes directly across from each other and near the top for the hanging wire. Mark 3 or 4 spots on the bottom of the gourd for drainage holes as well.
|
|
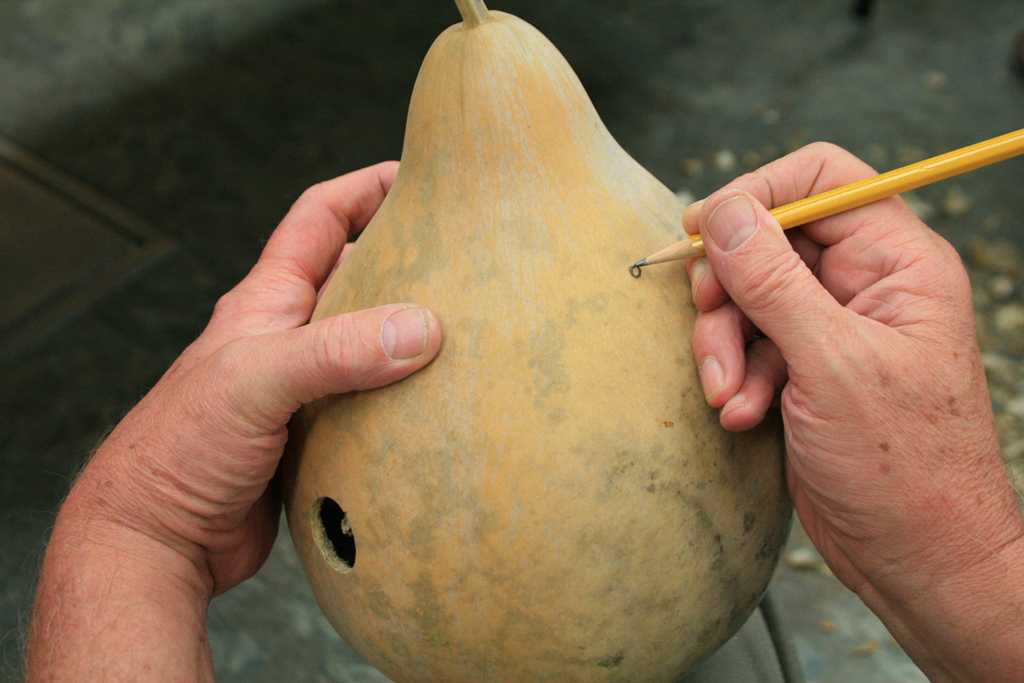
Drill Hanger and Drainage Holes
Using the 1/4” bit, drill both hanger and drainage holes. Again hold the gourd and the drill firmly and use moderate pressure to keep the bit from skipping off the spot.
|

|
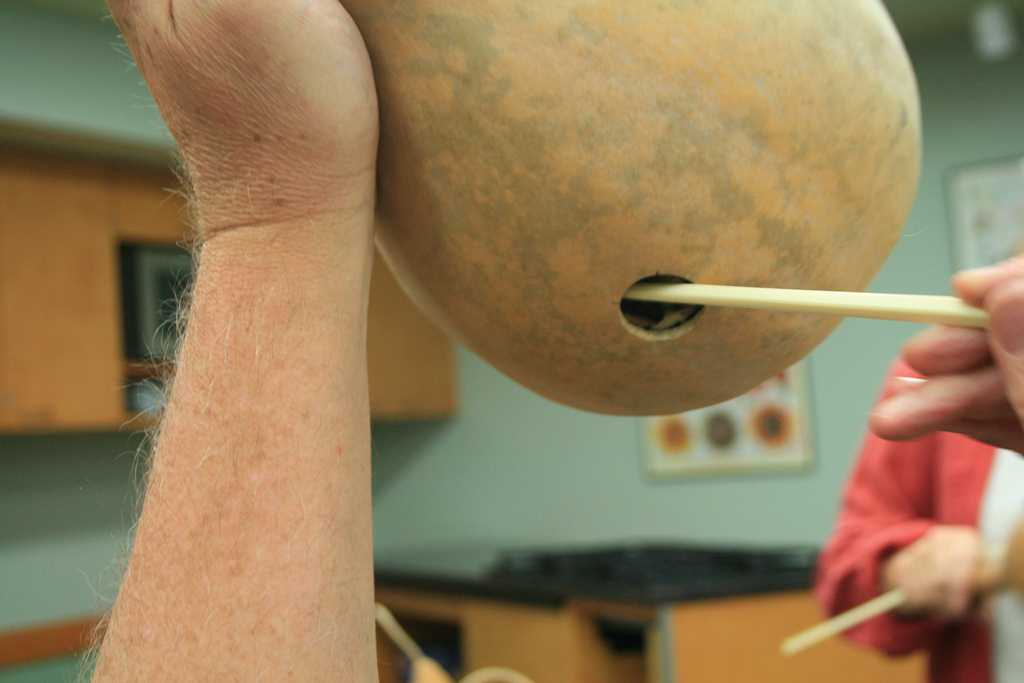
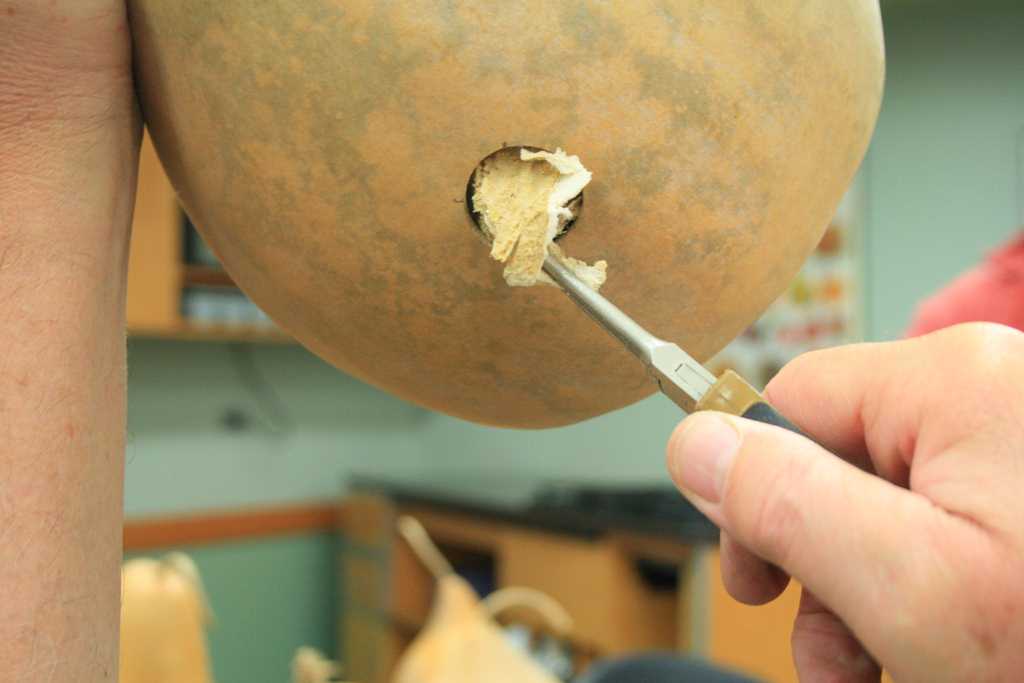
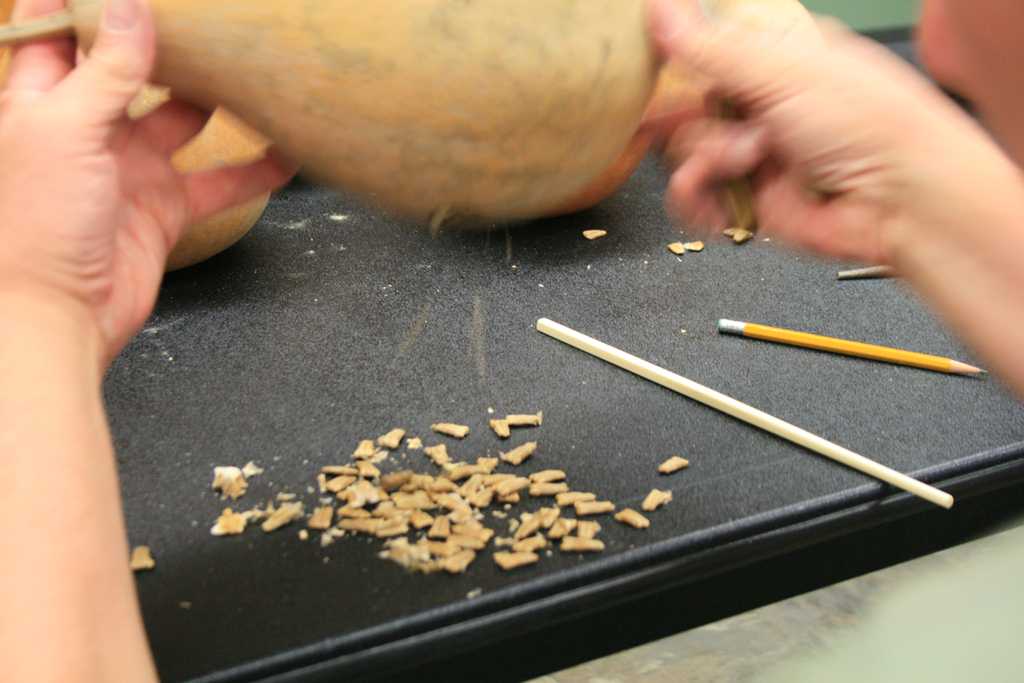
Cleaning the Inside of the Gourd
The contents of some birdhouse gourds will dry differently than others. You may be lucky and have a gourd whose seeds are all loosened and can simply be shaken out. Or, you may find yourself with a gourd that has hard clumps of seeds and thick, peeling inner walls. Either way, use the chopstick to scrape and break up as much of the material in the gourd as you can, shaking out seeds and bits as you go. Other options for cleaning tools are a long metal spoon, screwdriver or a wire coat hanger. A long-handled tweezers or needle-nosed pliers can be very handy to pull out large pieces of peelings and clumps of seeds. Remember, what's left inside will be taken care of by the first residents of your birdhouse.
|
|
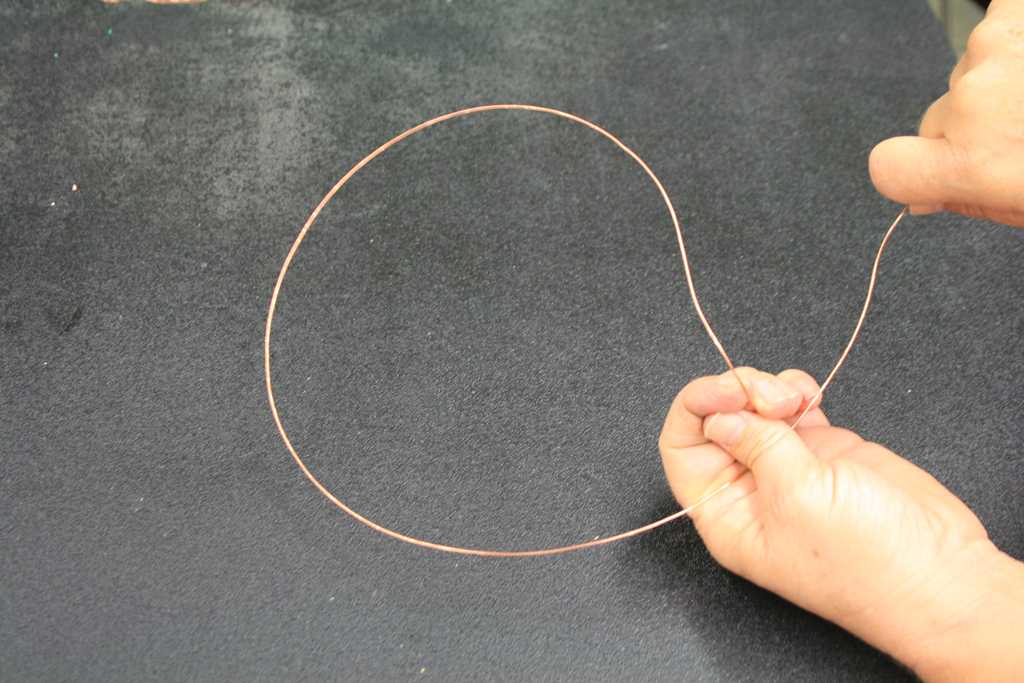
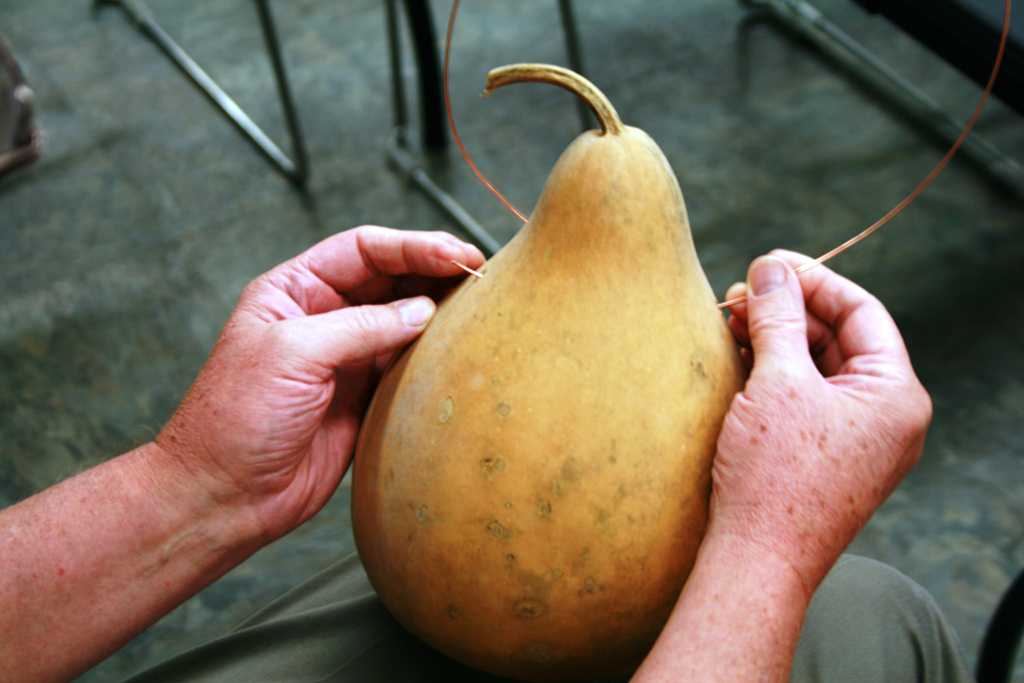
Attach the Hanging Wire
Use copper, brass or plastic-coated wire as a hanger for your house. Cut a length long enough to thread the wire through the two top holes and allow the gourd to hang freely when the ends are connected. Sometimes threading the wire can be a bit tricky. If you are having trouble just drill these two holes a little bit larger and try again. Use the needle-nosed pliers to twist the ends of the wire so no sharp edges remain.
|
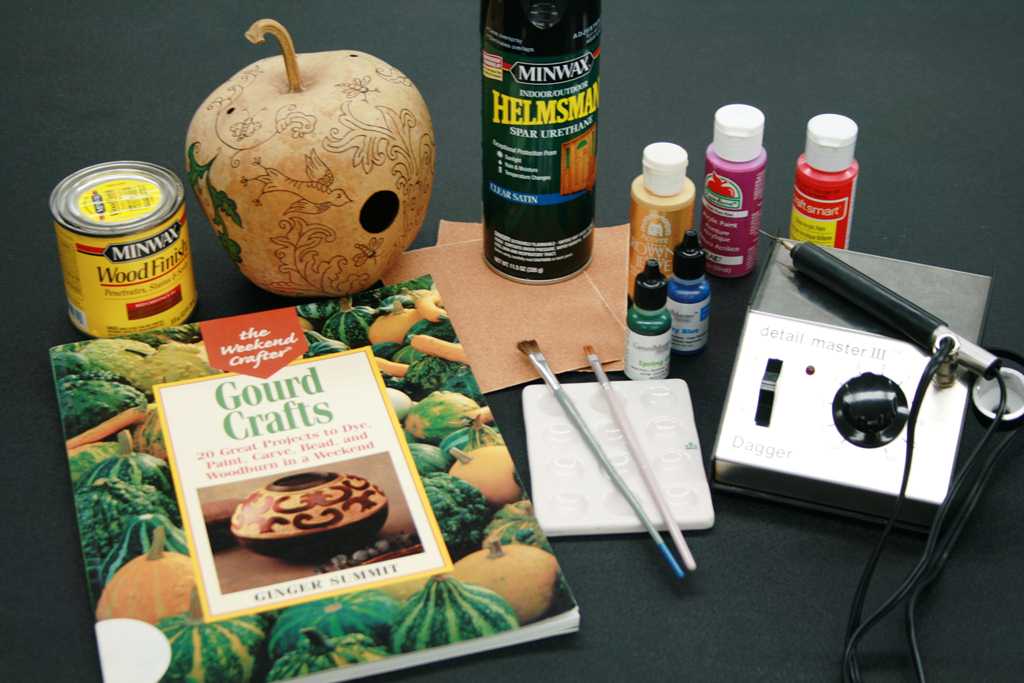 |
Decorating and Finishing Touches
After the gourd is cleaned out, you can simply apply several coats of varnish or shellac to seal the outer surface and cut edges of all the holes drilled in the gourd. Or, you can decorate your creation. Some popular ways are to use paint or stain, wood burning or decorating with natural materials. Just remember for the birdhouse to withstand being outdoors, it will need at least 2 coats of sealer. Spray varnish is an easy product to use giving even coverage without dripping.
For more decorating ideas use the following link to the Kemper Center for Home Gardening holiday tree - Gourdaments
|
 |
Hanging Your Gourd Birdhouse
Hang your gourd birdhouse outdoors in early spring before the birds arrive. Attach it to a post or tree with plenty of space between houses. Position the house with the opening away from prevailing winds. Familiarize yourself with the habits of the type of bird(s) you are trying to attract as they may have different preferences regarding nesting. At the end of the season, clean out the old nest material and store your birdhouse in a dry spot in the garage or basement to keep it from freezing and fading. If properly preserved and stored in the off season, it may last for years.
|
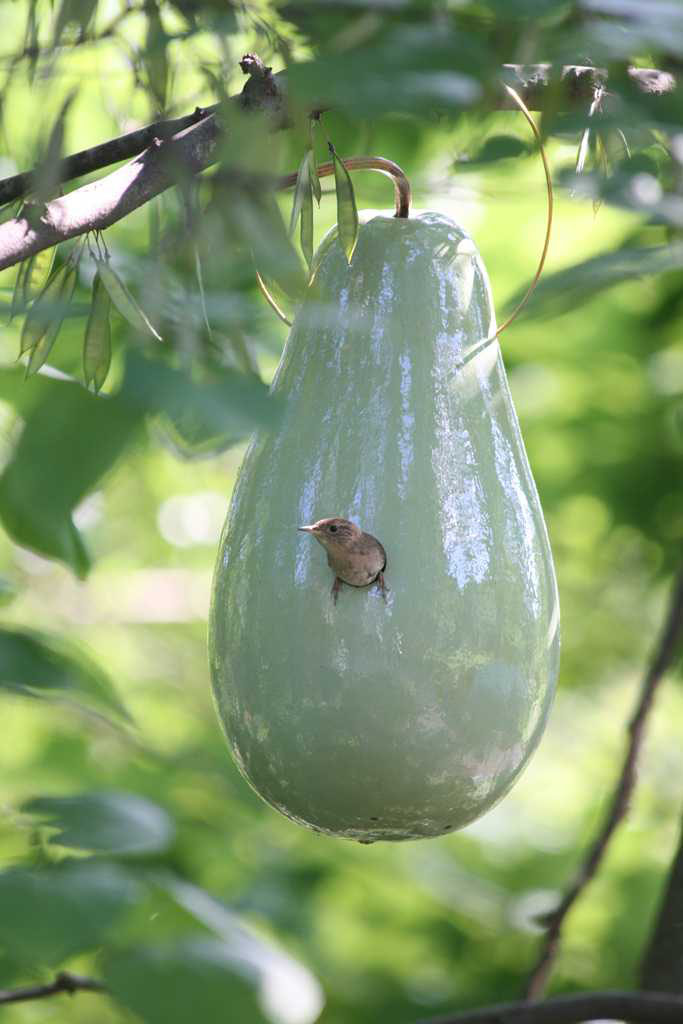 |
Birds Make Gracious Tenants!
With a little effort and a lot of fun you will have the most popular house on your block. Birds really do make gracious tenants!
|